
Fleet company · FLEET_MANAGER
Fleet Manager
For the people who run a company's vehicles day to day: drivers, repairs, garage quotations and costs.
All names, companies, plates and amounts in the screenshots (for example "Frank Fleet-Manager", "QA Kigali Logistics Fleet", "QA Alpha Motors – Kicukiro", "RAD 101 Q") are fictional test data.
A. Introduction
Your company (a transport, logistics or other business with vehicles) uses Pickovo to look after its fleet. As a fleet manager you are the person who keeps the vehicles on the road. You:
- keep the list of vehicles and drivers up to date, and assign drivers to vehicles
- review the problems your drivers report, approve or decline them, and send vehicles to a partner garage
- decide on garage quotations: approve them, ask for changes or decline them, up to your approval limit
- follow every repair from the garage's acceptance to the final invoice
- check invoices, and dispute one when it is wrong
- watch maintenance costs and downtime, and export reports
- answer drivers' requests for a vehicle
- find garages and spare-parts shops and ask to work with them
- add drivers and fleet members to your company's team
Your company admin (role TENANT_ADMIN) sits above you. Only the company admin can add another fleet manager, set approval limits and decide who pays for roadside help. The garage does the repair work, writes quotations and invoices, and records payments.
B. Getting started
Signing in
- Open https://fleet.heptadev.com/en/login in your browser. Use
/fr/loginfor French or/rw/loginfor Kinyarwanda, or tap EN / FR / RW at the top of the page. - Enter your email address or phone number in Email or Phone.
- Enter your Password. The eye icon shows what you typed.
- Select Log in.
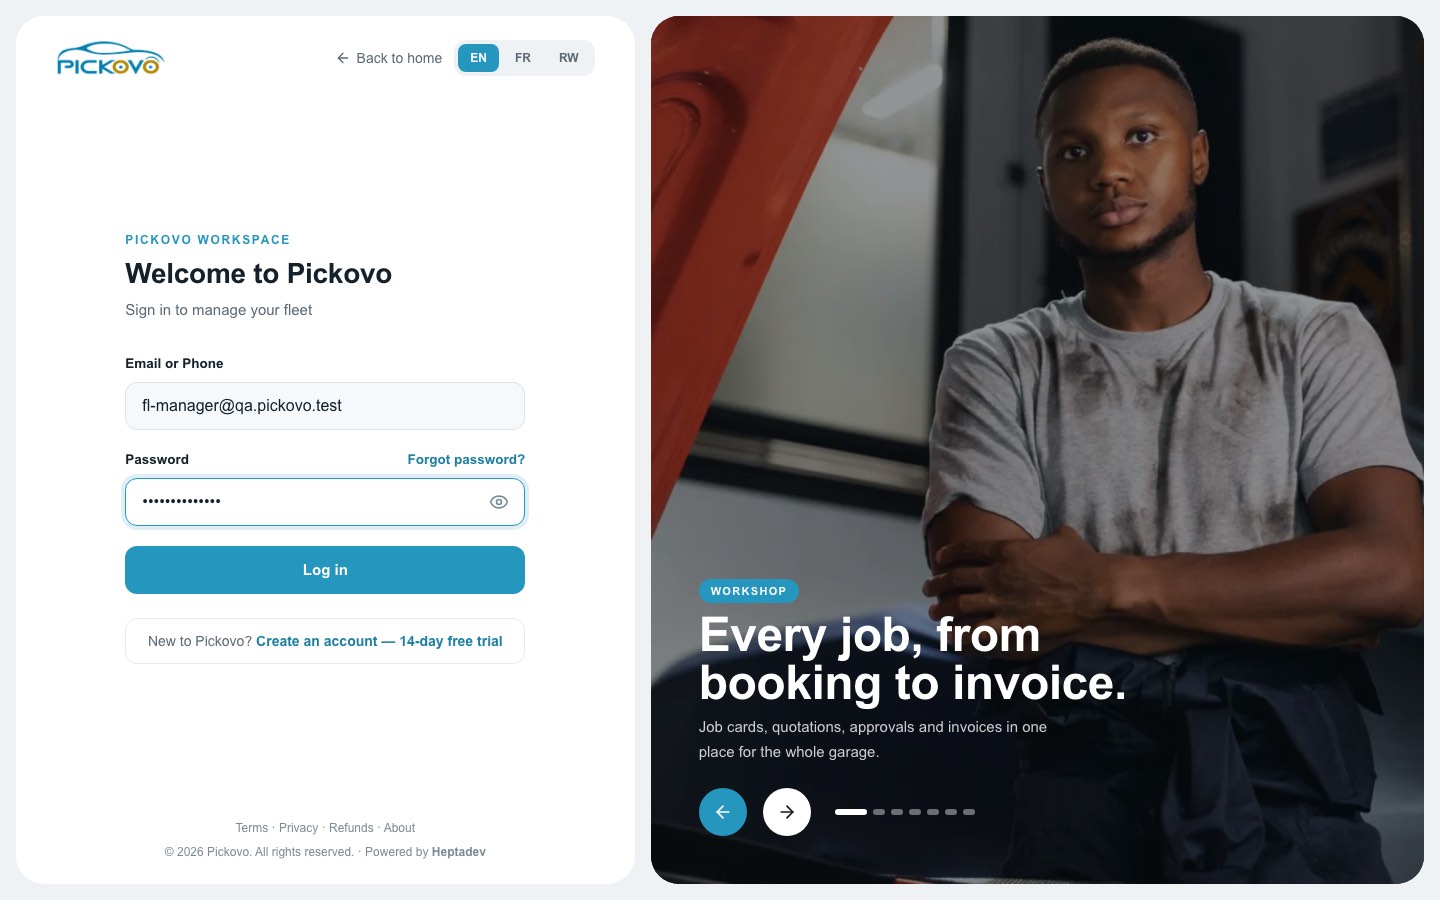
Figure 1: The Pickovo sign-in page.
Good to know:
- Forgot password? (next to the Password label) lets you reset your password.
- If your account has two-factor authentication switched on, Pickovo then asks for the 6-digit Authenticator code from your authenticator app.
- After 10 wrong passwords within 15 minutes, sign-in is paused for that account. Wait 15 minutes and try again, or use Forgot password?.
- Create an account, 14-day free trial is for new companies. You don't need it: your company admin creates your account.
Your dashboard
After you sign in you land on the Fleet Dashboard.
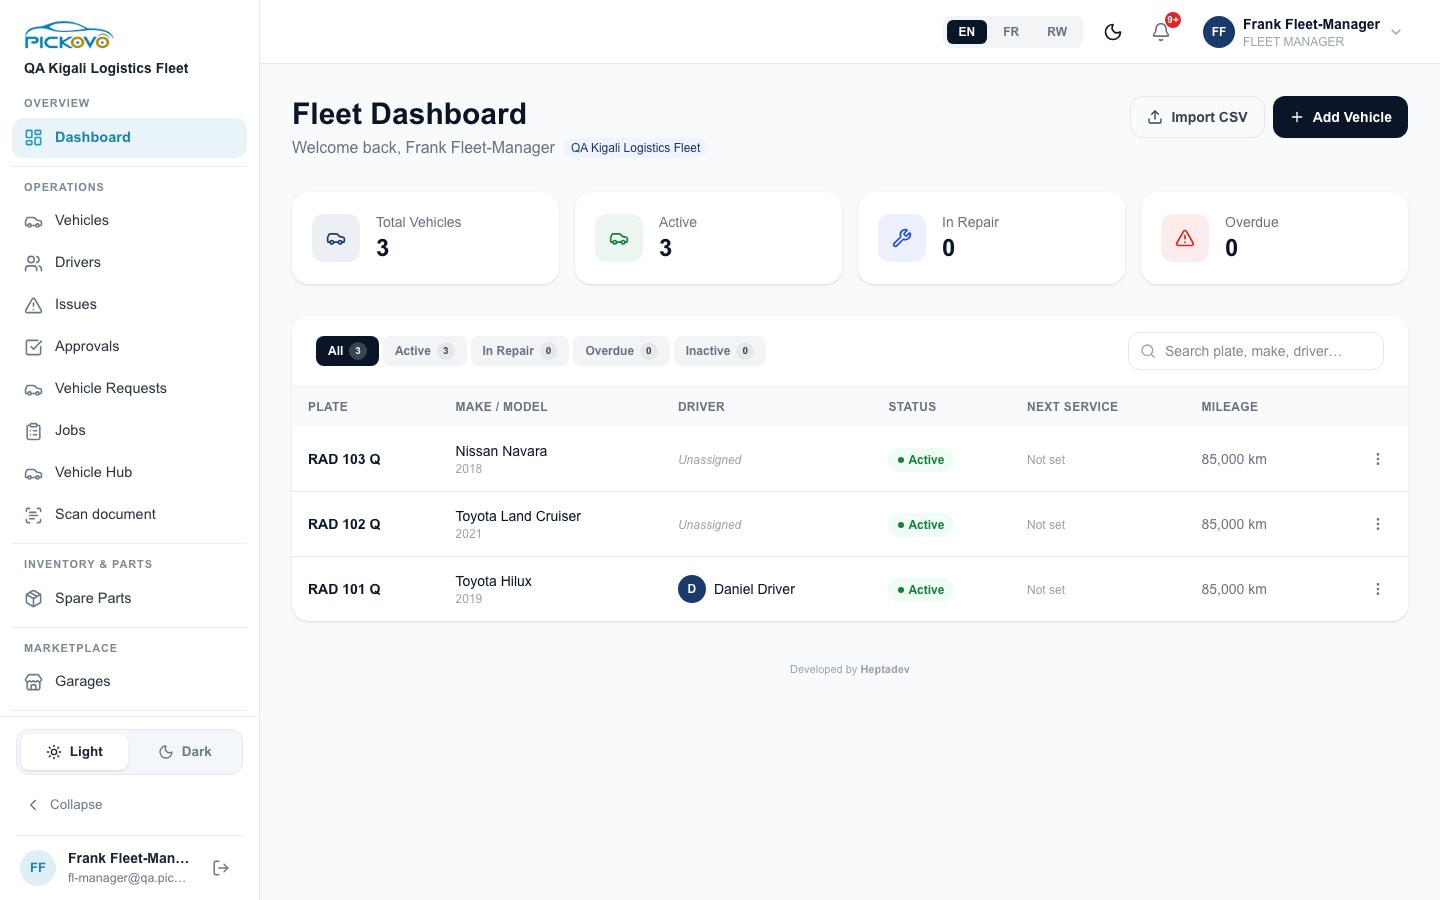
Figure 2: The Fleet Dashboard with the vehicle summary and vehicle table.
- Summary cards: Total Vehicles, Active, In Repair and Overdue (service overdue).
- Tabs: All, Active, In Repair, Overdue and Inactive filter the table. The number on each tab is the count.
- Search plate, make, driver… filters the table as you type.
- The table shows each vehicle's plate, make and model, driver, status, next service and mileage. The ⋮ menu at the end of a row has View details, Edit and Delete.
- Import CSV and Add Vehicle work as on the Vehicles page (see C.1).
The top bar
- EN / FR / RW switches the language.
- The moon icon switches dark mode.
- The bell shows your unread notifications (see C.15).
- Your name opens a menu with your email address and Logout.
The sidebar
Your sidebar is grouped under headings. Scroll it to see every item:
| Heading | Items |
|---|---|
| Overview | Dashboard |
| Operations | Vehicles, Drivers, Issues, Approvals, Vehicle Requests, Jobs, Vehicle Hub, Scan document |
| Inventory & Parts | Spare Parts |
| Marketplace | Garages |
| Billing & Finance | Invoices, Billing |
| Reports & Insights | Reports, Cost Intelligence |
| (bottom) | Refer & Earn, Settings |
At the very bottom: the Light / Dark switch, Collapse (shrinks the sidebar to icons; point at an icon to see its name), and your name and email with the log-out button.
Vehicle Hub shows only when Pickovo has the vehicle showroom switched on. Scan document turns a photo or upload of a paper document into editable text that you can save or download as a PDF. Billing shows your company's Pickovo subscription and plans. This guide does not cover Vehicle Hub, Scan document, Billing or Refer & Earn in detail.
The Team page is not in your sidebar. Open it by going to https://fleet.heptadev.com/en/fleet/users (see C.13).
C. Features
C.1 Vehicles
Purpose: keep your company's list of vehicles, their drivers and their service schedules.
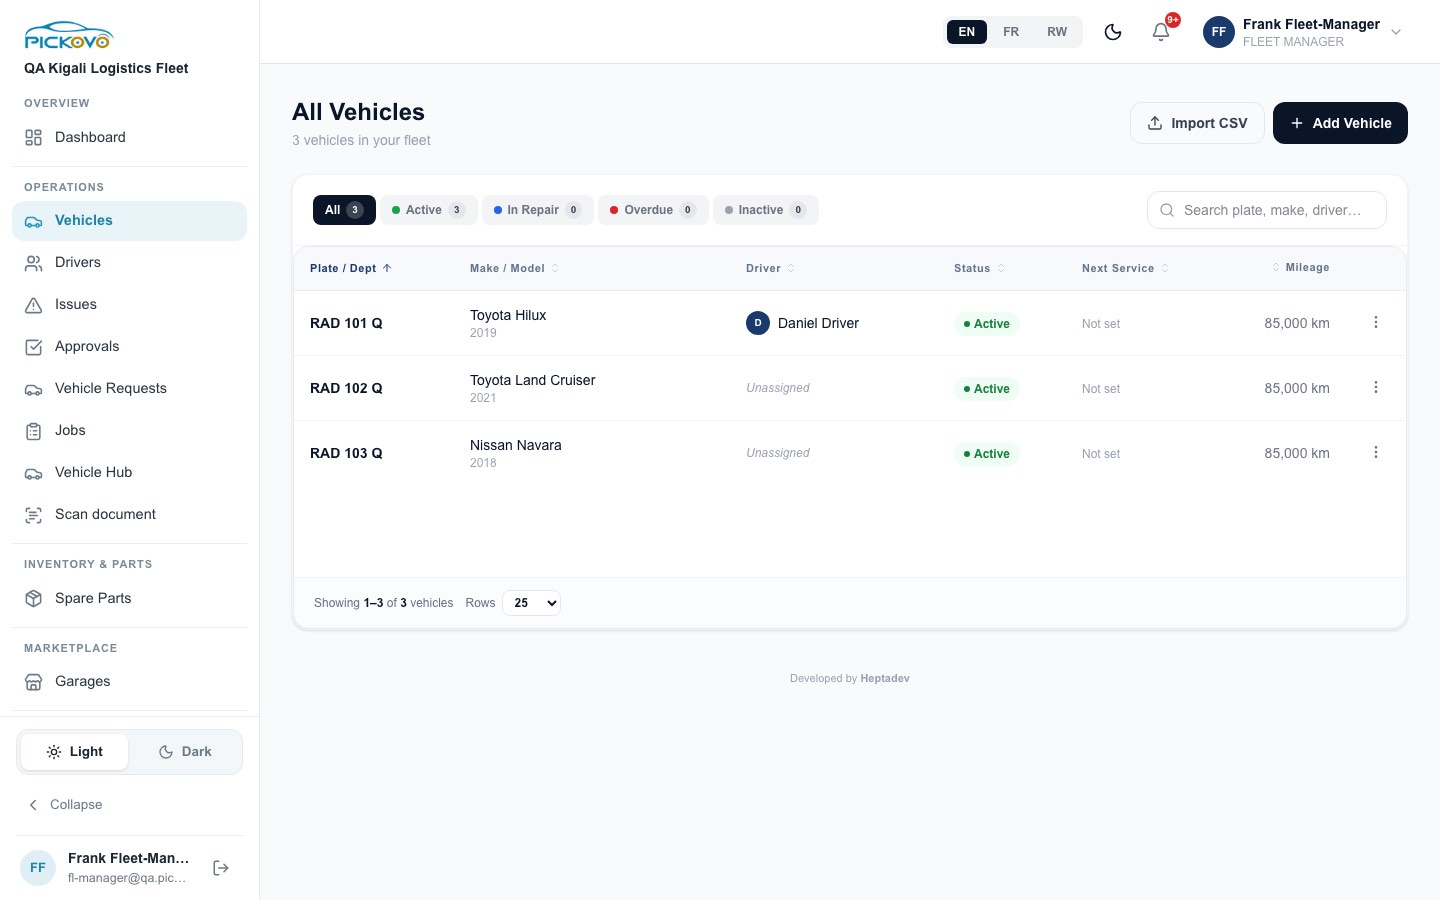
Figure 3: The All Vehicles list, showing three vehicles, one with a driver.
To find a vehicle
- Select Vehicles in the sidebar.
- Use the tabs (All, Active, In Repair, Overdue, Inactive) or type in Search plate, make, driver….
- Select a column heading (Plate / Dept, Make / Model, Driver, Status, Next Service, Mileage) to sort by it.
- Use Rows at the bottom to show more vehicles per page.
To assign or change a driver from the list: point at the driver cell and select Assign driver or Change driver, then pick a driver from the list (or the unassign option). This only appears when your company has at least one driver.
To add a vehicle
- Select Add Vehicle.
- Step 1, Vehicle Info: fill in Plate Number, Make, Model and Year (required), and if you want Department, Mileage (km), Colour, Vehicle Type (or Work it out automatically), Fuel Type (Petrol, Diesel, Electric, Hybrid, LPG) and Insurance Expiry.
- Select Next: Driver & Schedule.
- Step 2: optionally Assign Driver (search by name) and choose a Maintenance Schedule: None, By Time, By Mileage or Both, with Repeat every (days), Repeat every (km) and Last service date.
- Select Save Vehicle.
To import many vehicles at once
- Select Import CSV and pick a
.csvfile. The first row must hold the column names, for exampleplateNumber, make, model, year, mileageKm, fuelType, department(headings such as "Plate Number" or "Mileage (km)" also work). - Check the preview of the first rows, then select the import button. Select Cancel to stop.
- Pickovo checks each row exactly as it checks the form. Rows it refuses (for example a plate already in your fleet) are listed with their line number so you can fix them.
To edit or delete: open the ⋮ menu on a row and select Edit (all vehicle details, Status, Assigned Driver and the maintenance schedule) or Delete (you are asked to confirm).
C.2 Vehicle details and history
Purpose: see everything about one vehicle: its health, issues, repairs in progress, service schedule and full repair history.
Select a plate anywhere in the app (or View details in the ⋮ menu).
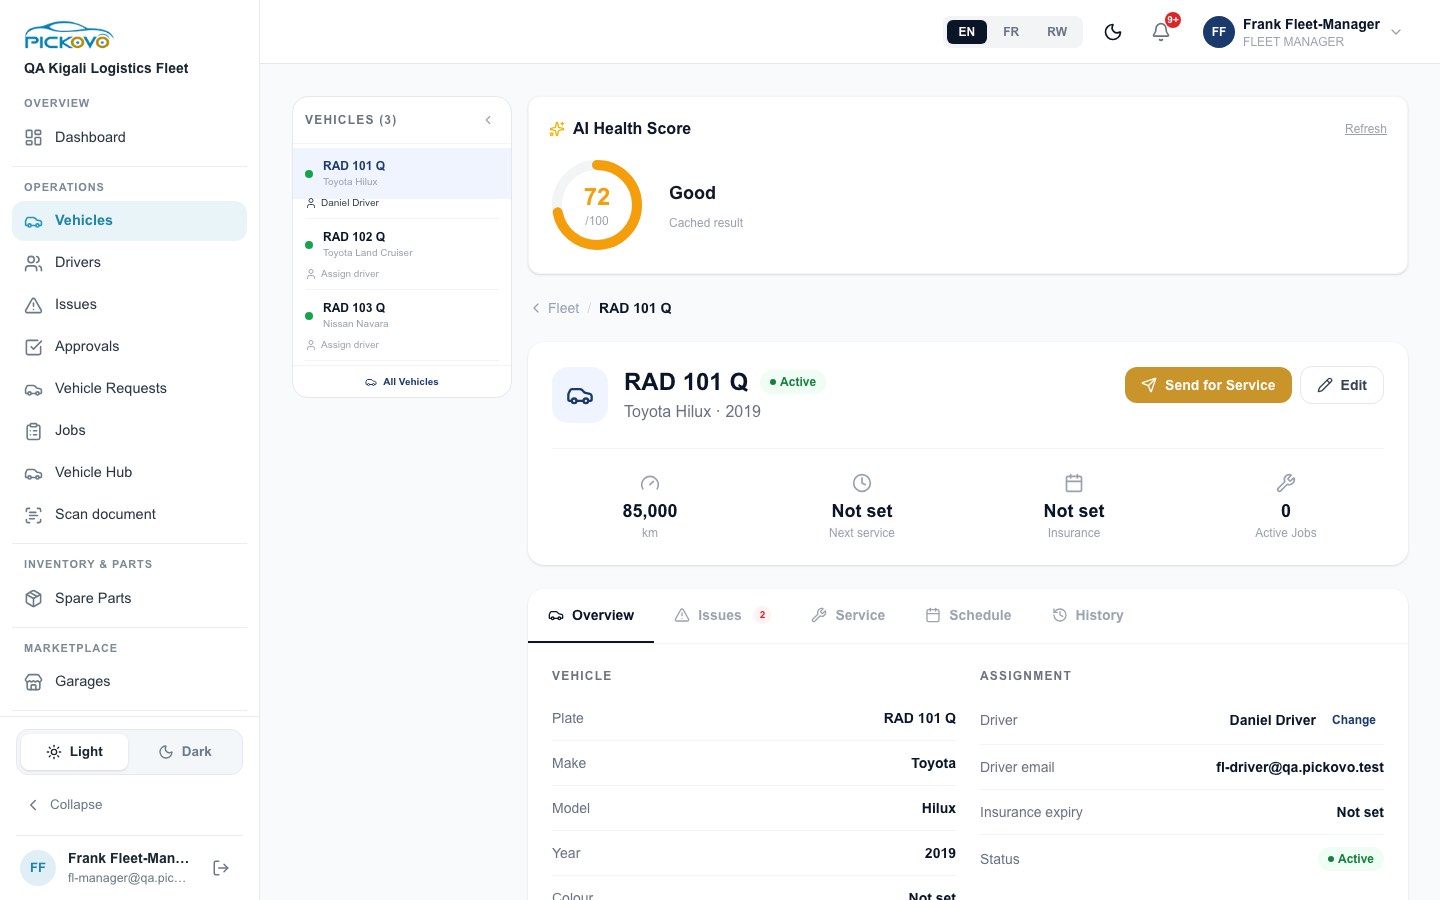
Figure 4: RAD 101 Q's page, with the AI Health Score, the summary and the Overview tab.
- Left panel: your other vehicles. Select one to switch, or All Vehicles to go back.
- AI Health Score: a score out of 100 with a label (for example Good). Refresh recalculates it.
- Summary: mileage, next service, insurance expiry and number of active jobs.
- Send for Service sends the vehicle to one of your partner garages (shown only when you have at least one accepted garage collaboration). Choose the garage, give a title and a description, then send.
- Edit opens the edit form.
The tabs:
| Tab | What you see and do |
|---|---|
| Overview | Vehicle details and the assigned driver. Change lets you pick another driver or unassign. |
| Issues | Issues reported on this vehicle. Report Issue opens a form (description, urgency Low / Medium / High / Critical). On a pending issue you can approve or decline; on an approved issue you can send it to a garage. |
| Service | Jobs in progress for this vehicle. Send for Service is here too. With no partner garage, a link takes you to the garage marketplace. |
| Schedule | The maintenance schedule (by time, by mileage or both) and when the next service is due. If there is none, a link takes you to the edit form to add one. |
| History | Every past repair, with totals: total repairs, completed, total spent (RWF) and parts used. |
C.3 Drivers
Purpose: keep your drivers' details and licences up to date.
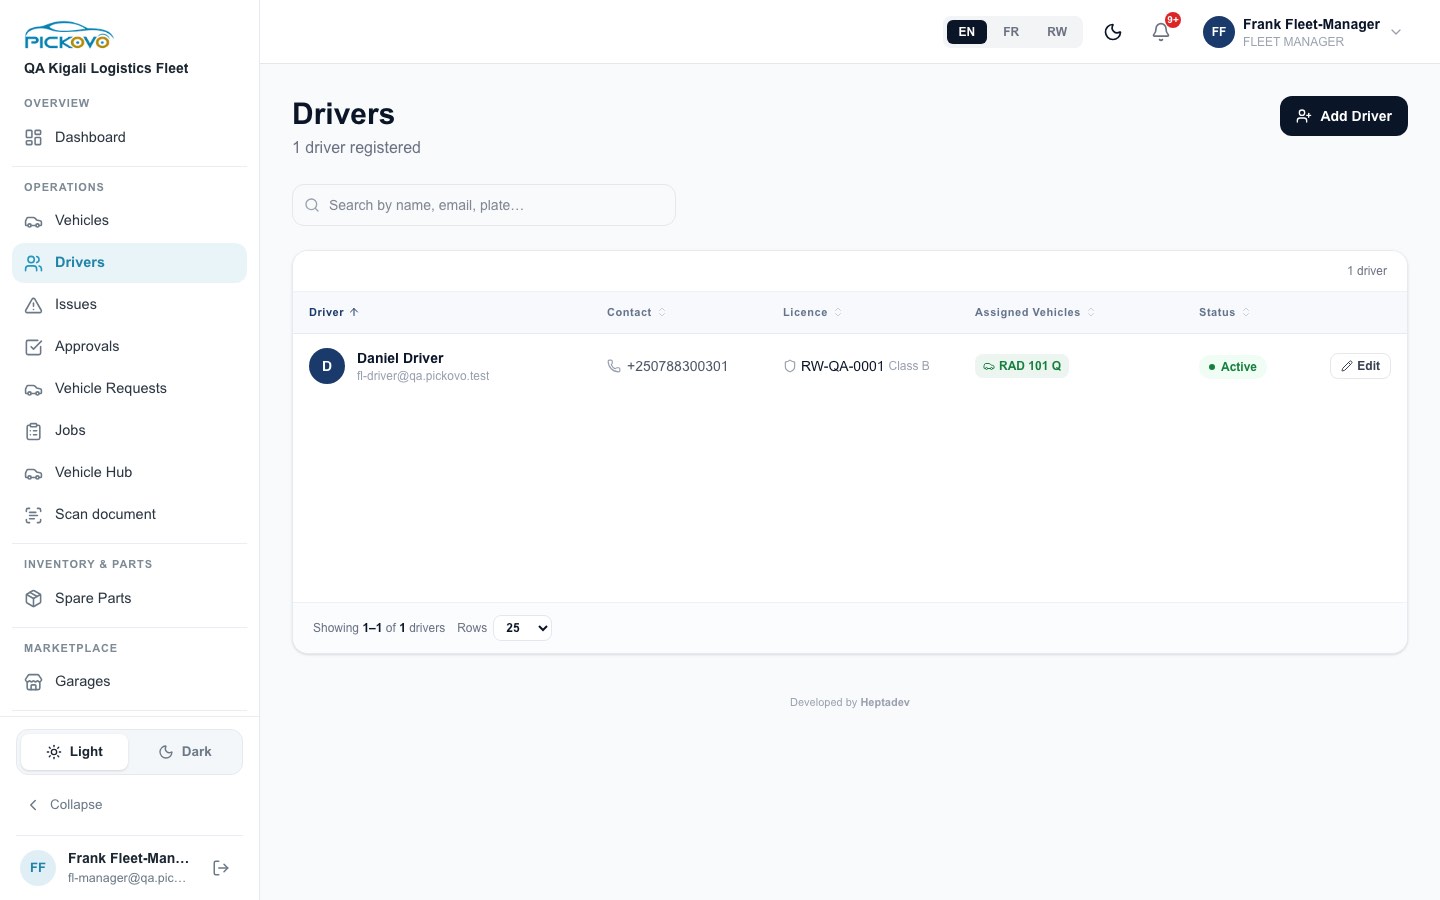
Figure 5: The Drivers list, showing one active driver and the vehicle assigned to him.
The list shows each driver's name and email, phone, licence number and class, assigned vehicles and status. Search by name, email or plate, and sort by any column.
To add a driver
- Select Add Driver.
- Fill in Full Name, WhatsApp / Phone and Temporary Password (required), and optionally Email, Licence Number and Licence Category. A password is suggested for you; the eye icon shows it, Regenerate makes a new one and the copy icon copies it.
- Select Create Driver.
- A green box shows the driver's login and password. Use the copy icon and pass these on to the driver privately.
To edit a driver: select Edit on the row, change Full Name, Email, WhatsApp / Phone, Licence Number or Licence Category, then Save Changes.
Tip: to invite a driver on WhatsApp instead of giving them a password, add them from the Team page (C.13).
C.4 Issues (driver reports)
Purpose: review the problems your drivers report, decide on them and send the vehicle to a garage.
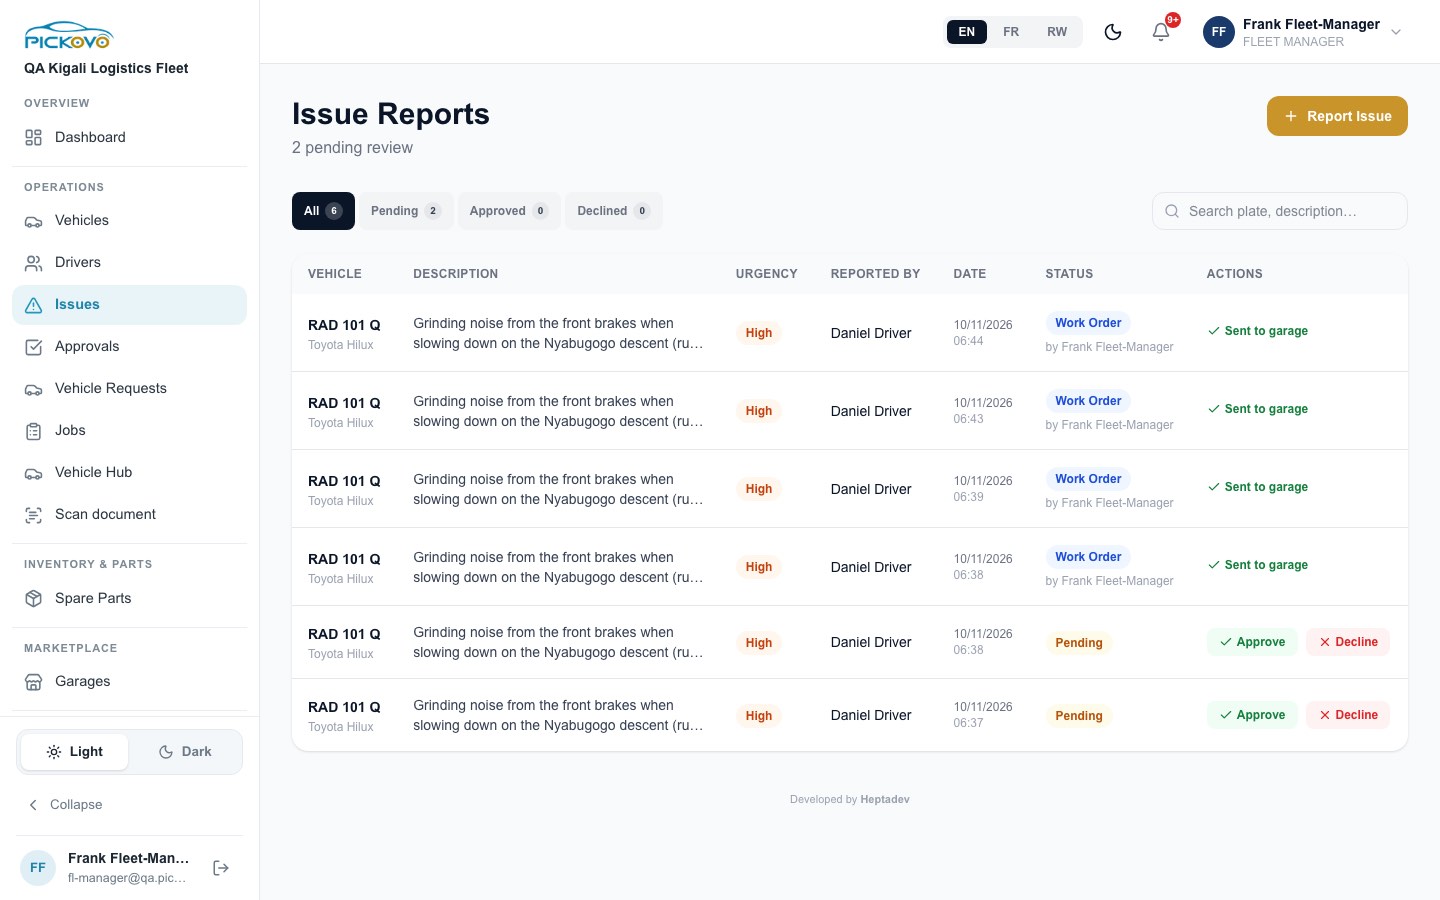
Figure 6: Issue Reports: two reports are pending, four have already been sent to the garage.
The table shows the vehicle, description, urgency, who reported it, the date, the status (with who approved it) and the actions. Filter with All, Pending, Approved, Declined, or search by plate or description.
To review a report
- Read the description and urgency.
- Select Approve, or select Decline. When you decline you can add a reason (optional). The driver sees it.
To send an approved issue to a garage
- On an approved issue, select Send to Garage.
- In Send Vehicle for Service, pick the Partner Garage, check the Job Title (filled in for you) and the Description (the driver's report).
- Select Send to Garage. The status becomes Work Order and the action column shows Sent to garage. The garage now sees the job.
Send to Garage is greyed out until your company has at least one accepted collaboration with a garage (see C.10).
To report an issue yourself: select Report Issue, choose the Vehicle, the Urgency (Low, Medium, High) and write a Description. You can add a Photo (JPEG, PNG or WebP, up to 10 MB); once a photo is chosen, an AI damage analyser can fill in the description and urgency for you. Select Submit Issue Report.
C.5 Approvals: maintenance requests and quotations
Purpose: one place for every decision waiting for you.
Select Approvals. The page has two tabs.
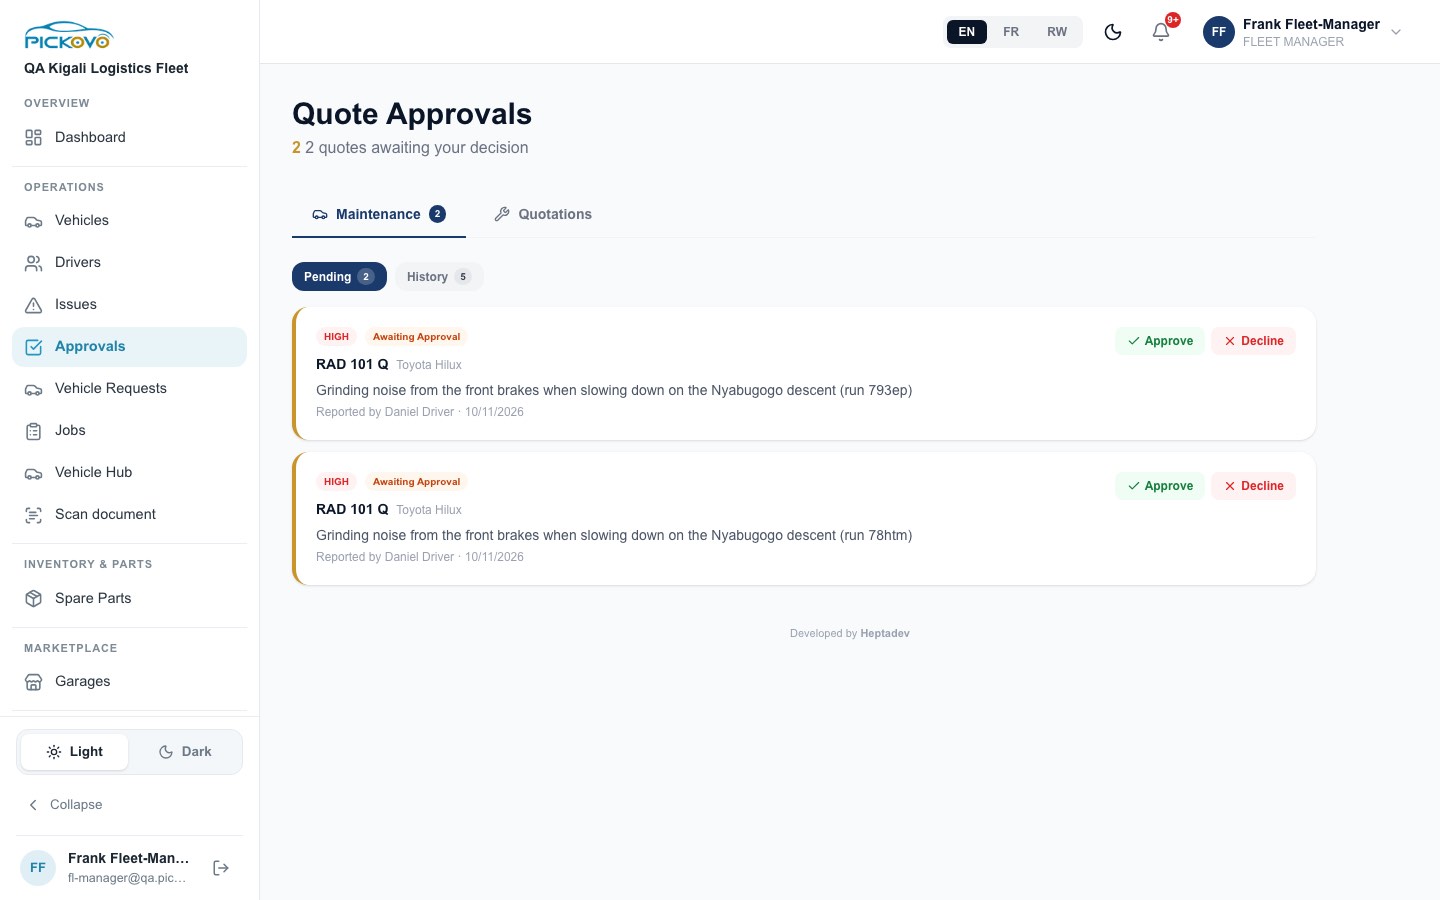
Figure 7: Quote Approvals, Maintenance tab: two driver reports awaiting approval.
Maintenance tab
- Pending lists driver reports awaiting approval (with Approve and Decline), approved reports ready to send (Send to Garage, same form as in C.4), and jobs sent to a garage that the garage has not yet accepted (View).
- History lists your last 50 garage jobs with their current status.
Quotations tab
The garage's quotations, filtered by All, Awaiting Decision, Approved, Revision Requested, Rejected. Each card shows the job, the vehicle, the garage, labour and parts totals, estimated days, the total in RWF and, for a quotation that is due to expire, the time left. Select a card to open it.
To decide on a quotation
- Open the quotation. Read the totals, the Line Items (description, type Labour or Part, quantity, unit price, total), the Garage Notes and, if the garage changed it, the version history.
- Use Discussion to ask the garage a question: type in Write a message… and send.
- Under Your Decision, choose one:
- Approve, then Confirm approval: the work order moves to In Progress.
- Request Changes, write What changes are needed? (required), then Send Revision Request to Garage.
- Decline, write the Reason for declining (required), then Confirm decline: the job will be closed.
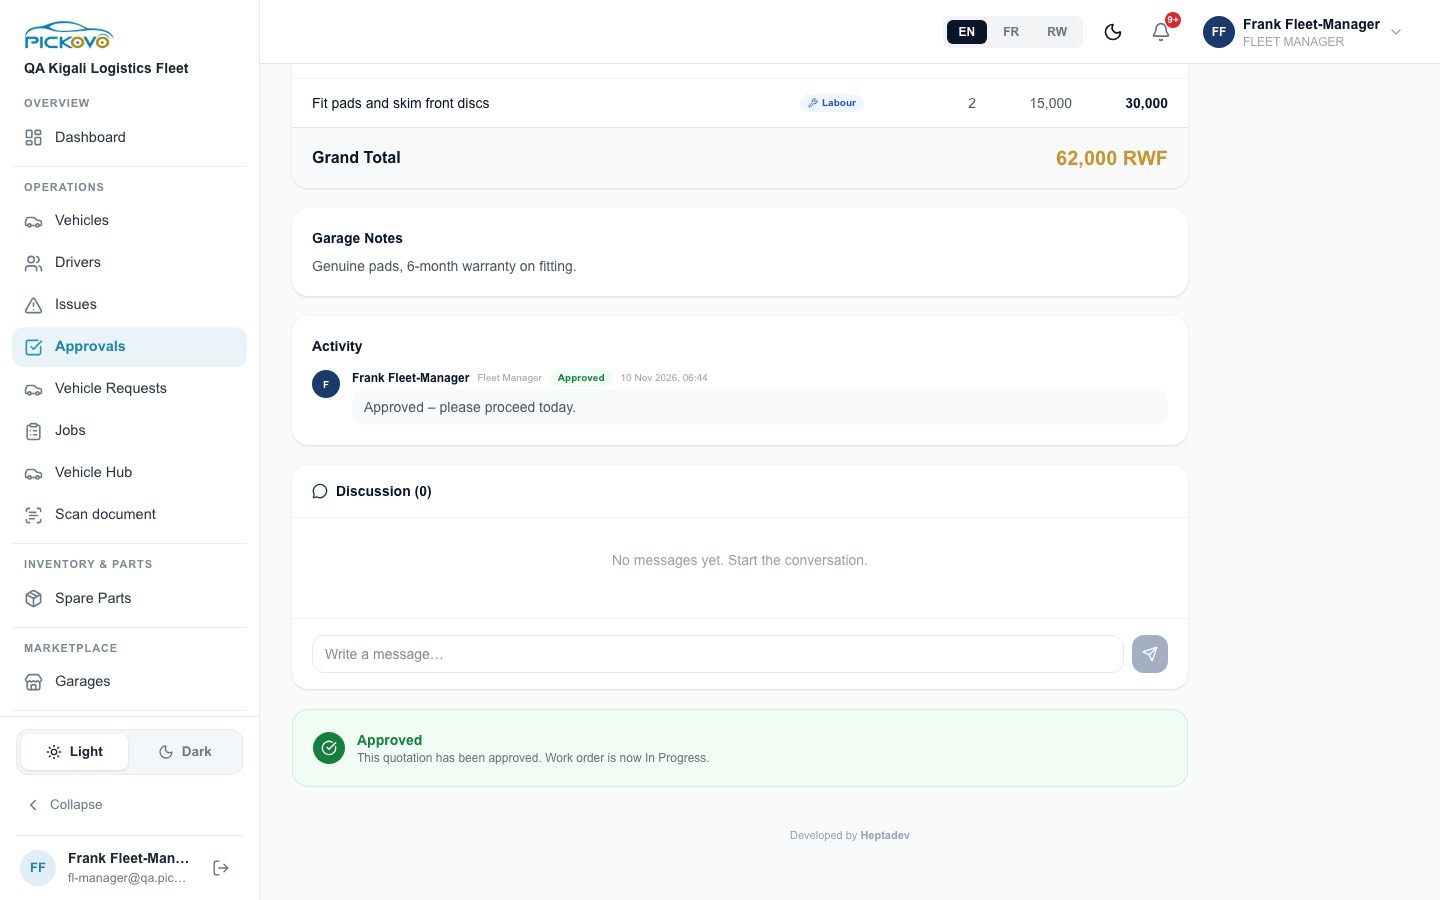
Figure 8: The bottom of an approved quotation: the grand total (62,000 RWF), the activity entry with the approval comment, and the green "Approved" banner.
After you answer, the garage admins are notified. An approved quotation starts the work: the job moves to In Progress.
Your approval limit. Your company can cap how much a fleet manager may approve:
- Your company admin can give you your own limit (on the Team page). If they have not, the company limit applies (set by the admin under Cost Intelligence).
- If neither is set, there is no cap.
- If a quotation's total is above your limit, approving it fails with the message "This quotation (RWF …) is above your approval limit of RWF …. A company admin must approve it." Ask your company admin to approve it. You can still request changes or decline.
- You cannot change your own limit.
Other rules: only a quotation that is awaiting decision can be approved; an expired quotation cannot be approved (ask the garage to re-quote); and if another manager answered first you see "This quotation has already been answered".
C.6 Jobs
Purpose: follow every repair your company has at a garage.
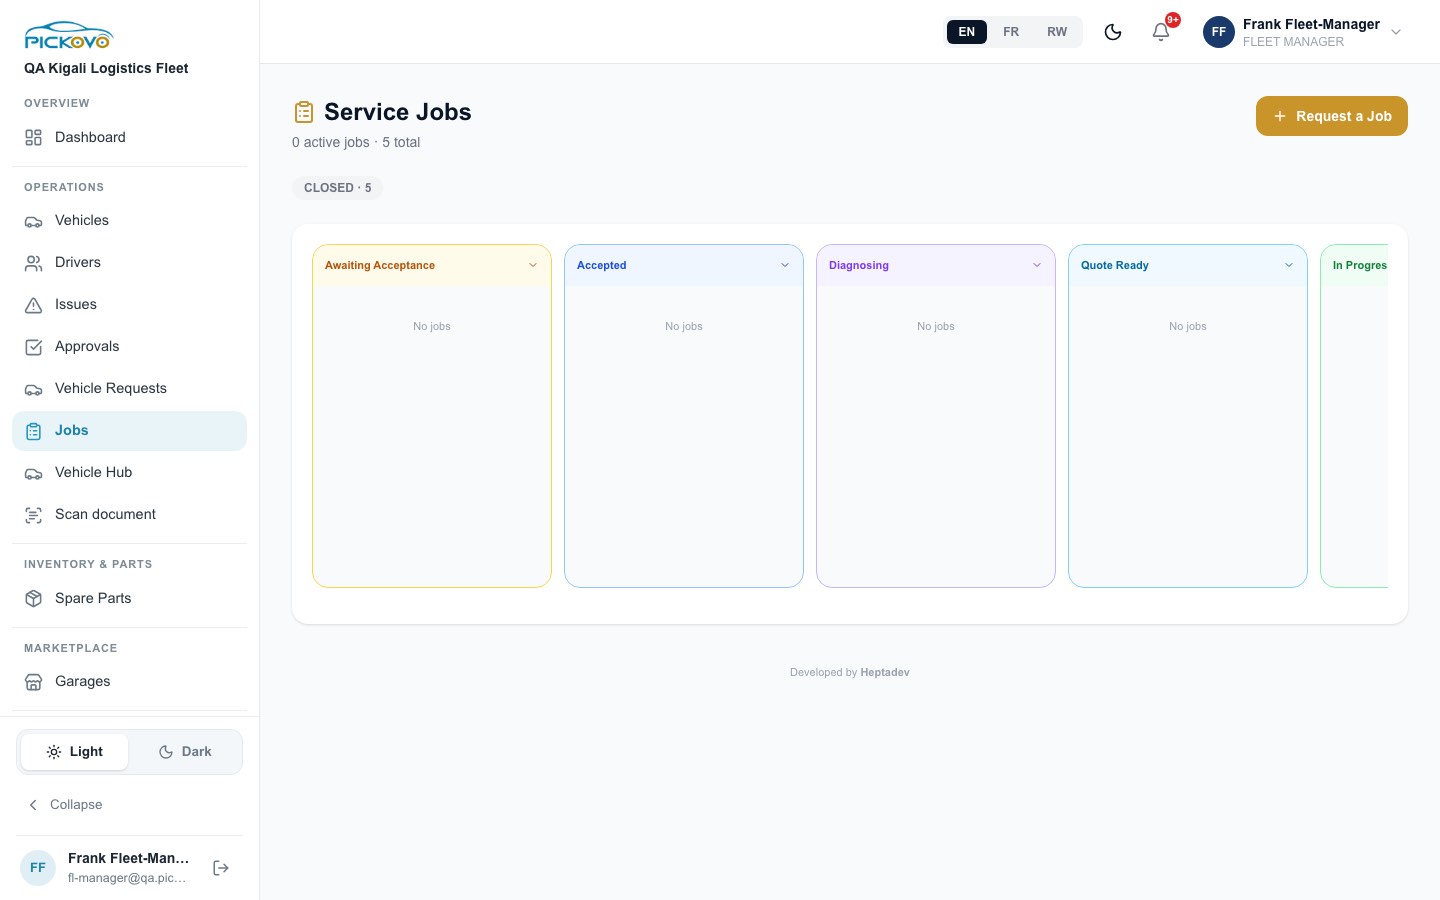
Figure 9: The Service Jobs board: no active jobs, five closed.
- The header shows the number of active jobs and the total. A pill under it counts jobs per status (for example CLOSED · 5).
- The board has a column per stage: Awaiting Acceptance, Accepted, Diagnosing, Quote Ready, In Progress, Completed (scroll sideways to see them all). Select a column's arrow to fold it. Select a job card to open it.
To request a job directly (without a driver report)
- Select Request a Job.
- Choose the Vehicle, type a City and use Find Best Garage to see matching garages with a match score, or pick a Garage from the list (optional).
- Fill in the Job Title and Description, choose the Priority (Normal or Urgent) and, if you want, a Deadline.
- Select Request Job.
You can only send a job to a garage your company has an accepted collaboration with. Otherwise you see "No accepted collaboration with this garage".
A job's page
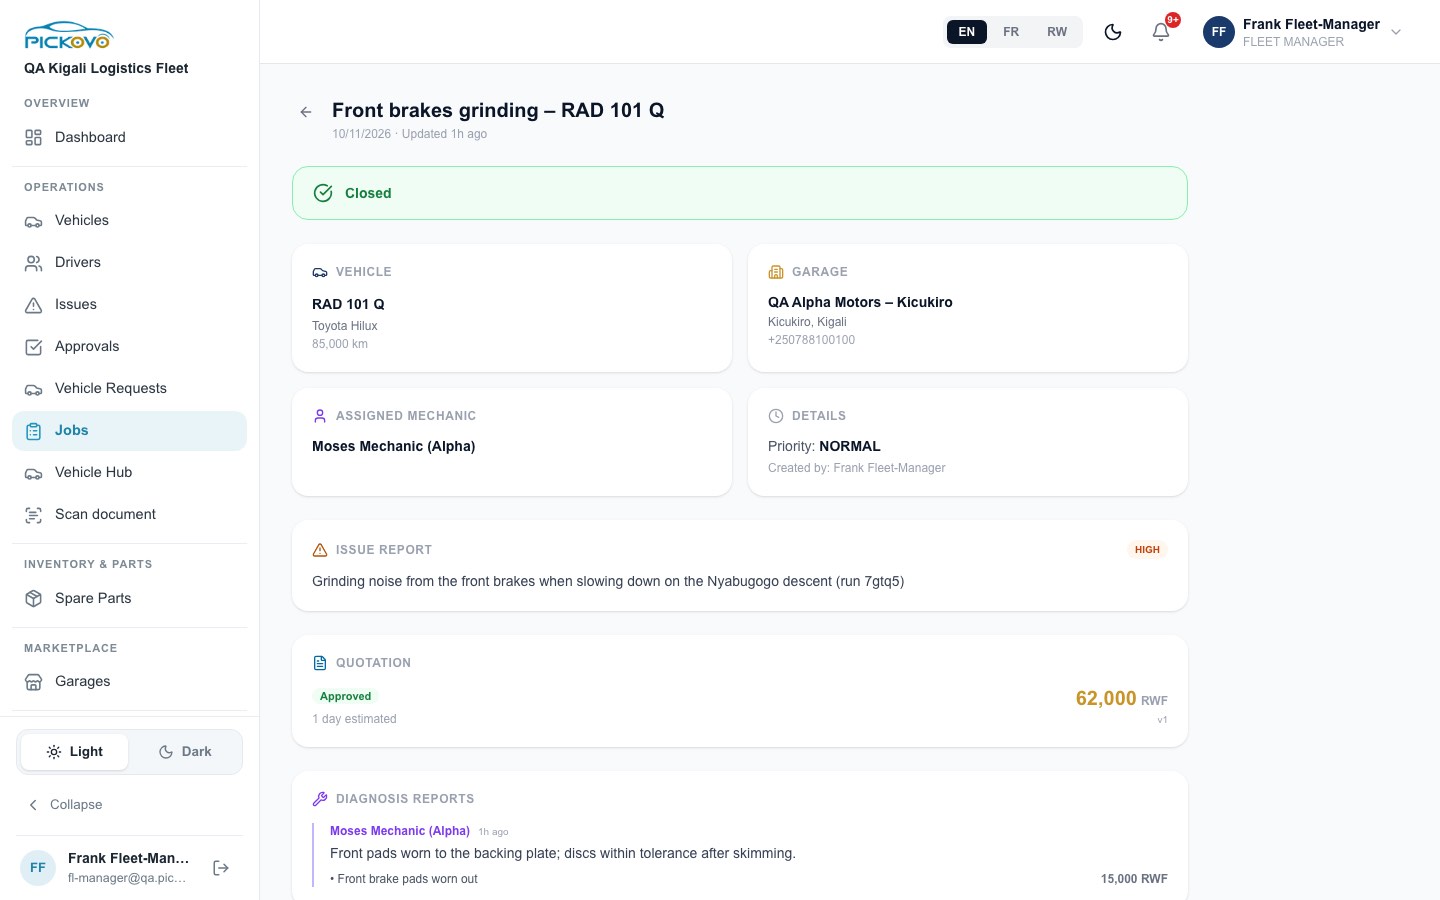
Figure 10: A closed repair job: vehicle, garage, assigned mechanic, details, the driver's issue report, the approved quotation and the mechanic's diagnosis.
For a job that is still open you also see a progress bar of its stages. The page shows the vehicle, garage, assigned mechanic, priority and creator, the original issue report, the latest quotation (with Review Quotation when it awaits your decision), diagnosis reports and parts used.
- Approve Job appears while the job is Awaiting Acceptance; it moves the job to Accepted.
- Cancel Job appears while the job is Awaiting Acceptance, Accepted or has a quotation waiting. Confirm with Yes, Cancel.
You cannot move a job through the workshop stages. Diagnosis, repair, quality check and closing belong to the garage.
C.7 Invoices
Purpose: see what garages have billed you, and dispute a wrong invoice.
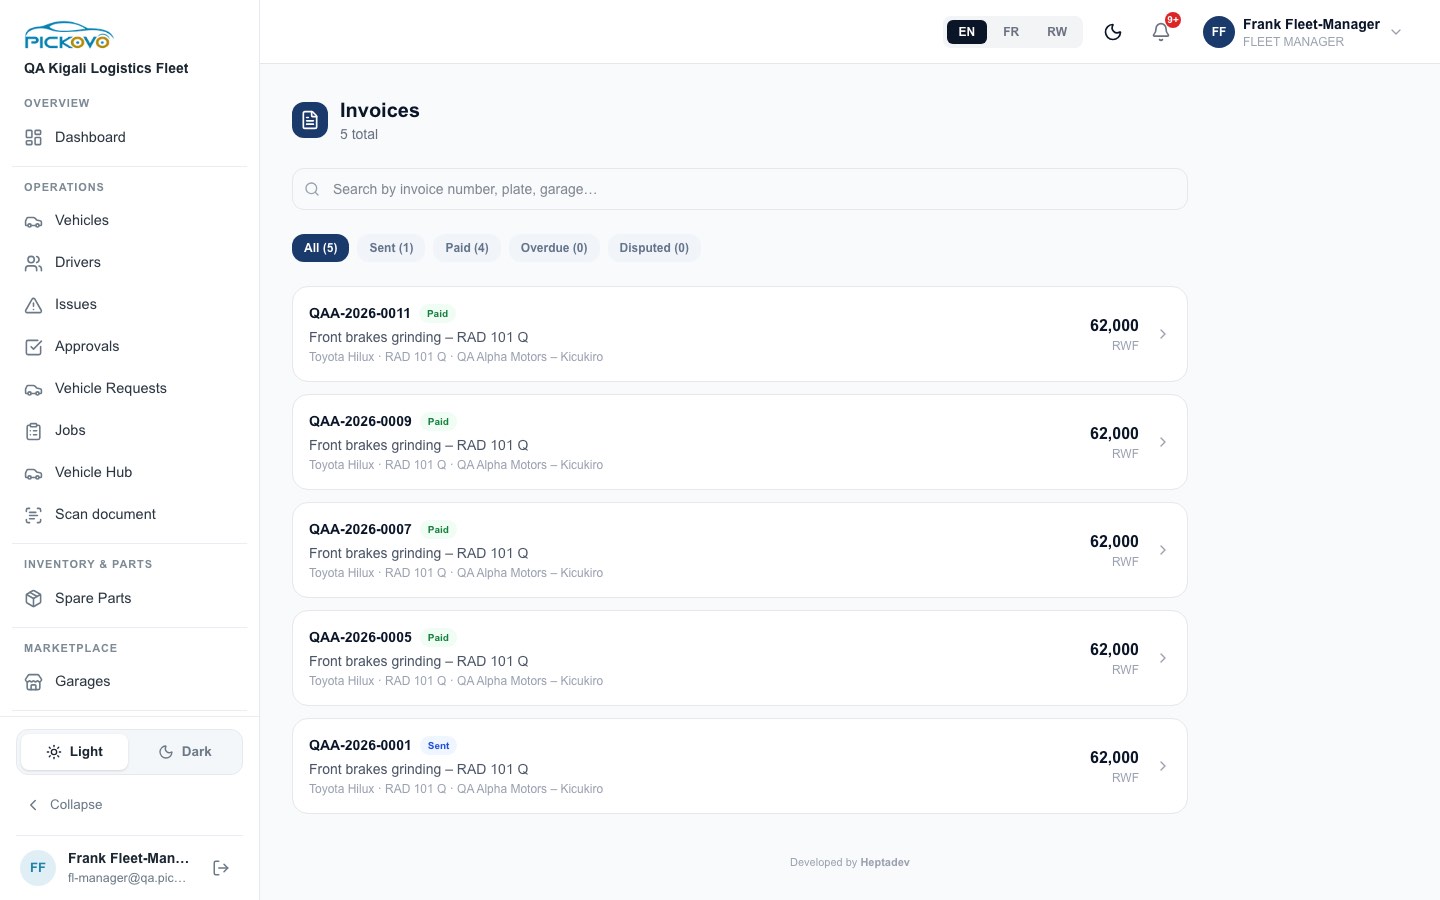
Figure 11: The Invoices list, with five invoices from QA Alpha Motors.
Filter with All, Sent, Paid, Overdue, Disputed or search by invoice number, plate or garage. Each card shows the number, status, job, vehicle, garage and amount in RWF. Select a card to open the invoice.
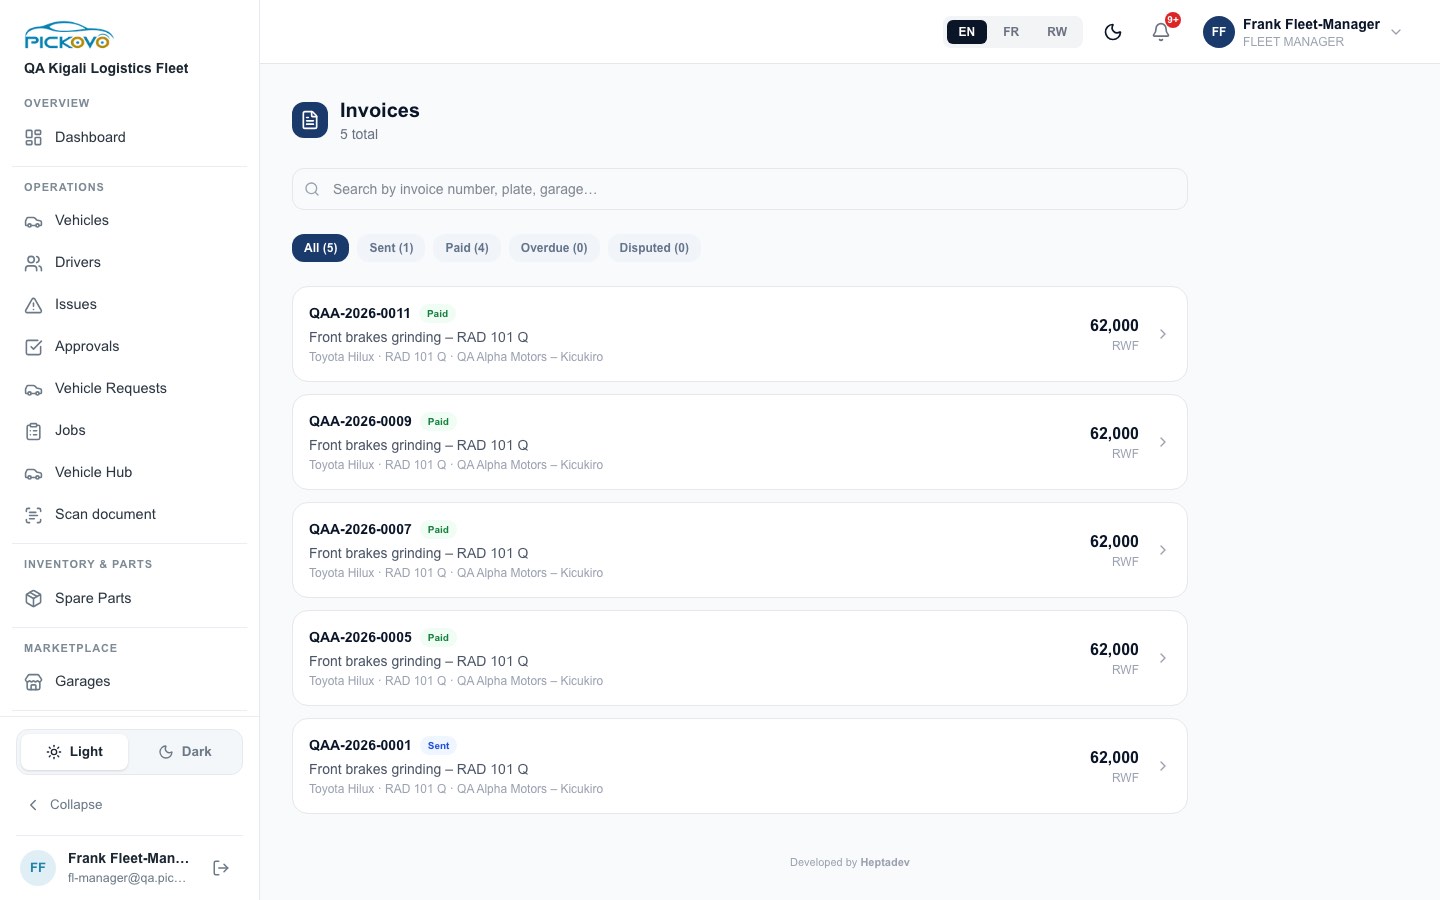
Figure 12: The same list at the end of a full repair: invoice QAA-2026-0011 for the brake job shows Paid once the garage recorded the payment.
On an invoice:
- Print / PDF prints it or saves it as a PDF.
- Dispute (only while the invoice is Sent or Overdue) opens Dispute this invoice. Explain the problem and select Submit Dispute. The invoice becomes Disputed and your reason is recorded on the invoice. Let the garage know as well, so they can correct it.
- Back to Invoices returns to the list.
Payments are recorded by the garage's cashier. You do not mark invoices as paid in the fleet workspace.
C.8 Vehicle requests
Purpose: answer drivers who ask for a vehicle.
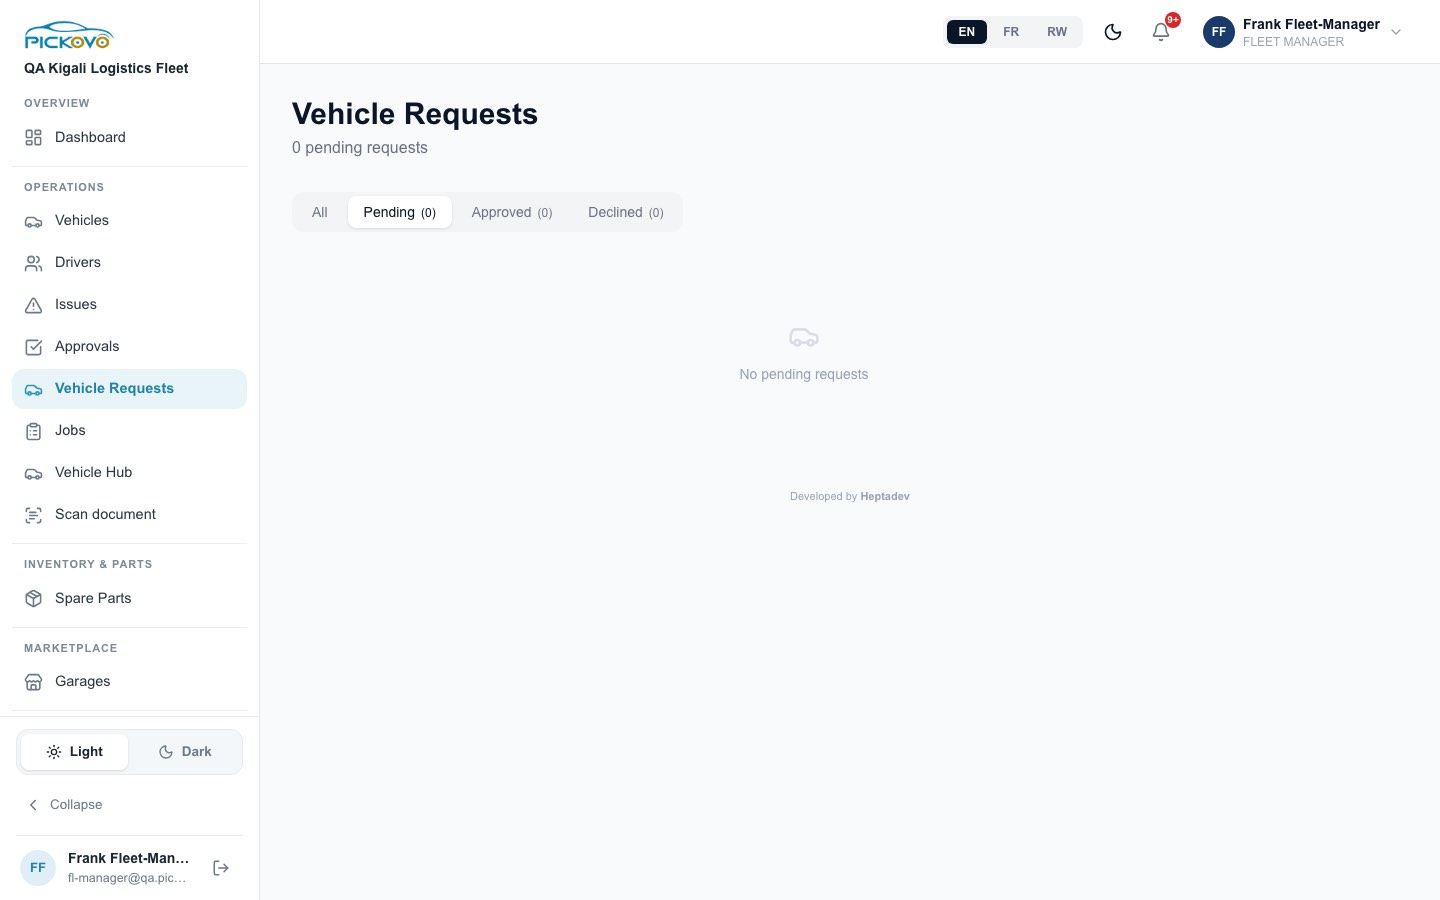
Figure 13: Vehicle Requests, Pending tab, with no pending requests.
Filter with All, Pending, Approved, Declined. Each request shows the driver, the vehicle asked for (or Any available vehicle), the driver's message, when it was submitted and who answered it.
- Select Approve or Decline on a pending request.
- When approving, you can choose a vehicle in Assign Vehicle (optional).
- Add a Note (optional): instructions for the driver, or the reason for declining.
- Confirm.
C.9 Garages (marketplace)
Purpose: find garages and start working with them.
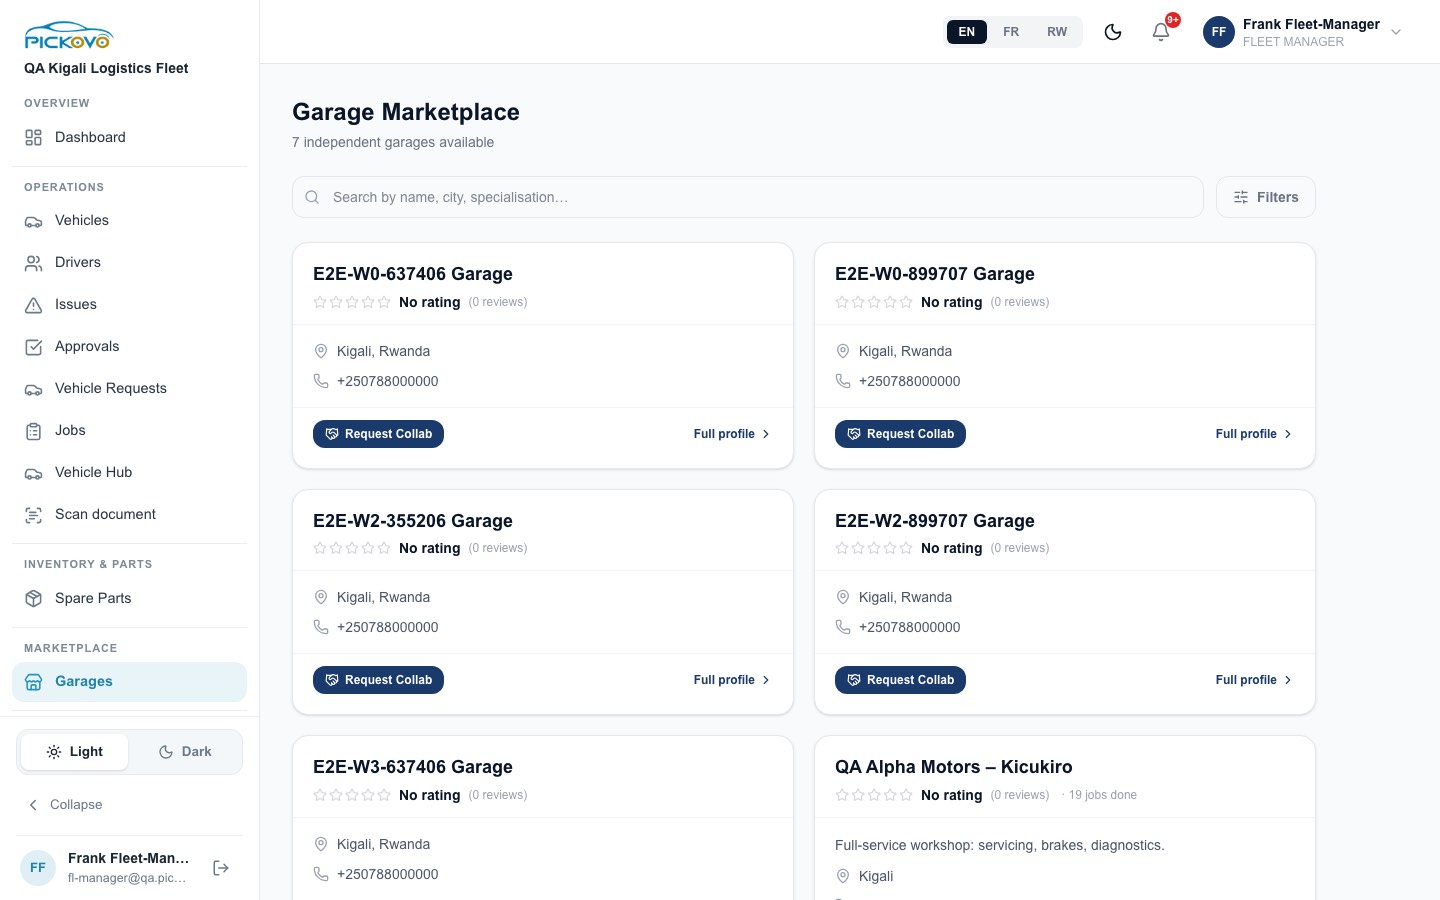
Figure 14: The Garage Marketplace: each card has Request Collab and Full profile.
- Search by name, city or specialisation, or select Filters to choose specialisations or Certified only.
- On a card, select Request Collab to ask the garage to work with your company. The button then shows Pending, and Partner once the garage accepts. If the garage refused, you can Re-request.
- Select Full profile for the garage's page. There you can:
- Request Collaboration with an introduction message, and exchange messages with the garage
- once the collaboration is active, Send Vehicle for Service (vehicle, service title, description)
- see your company's service history with the garage, and Review a closed job
An accepted collaboration is what lets you send vehicles to that garage.
C.10 Spare parts
Purpose: find spare-parts shops and ask them for parts.
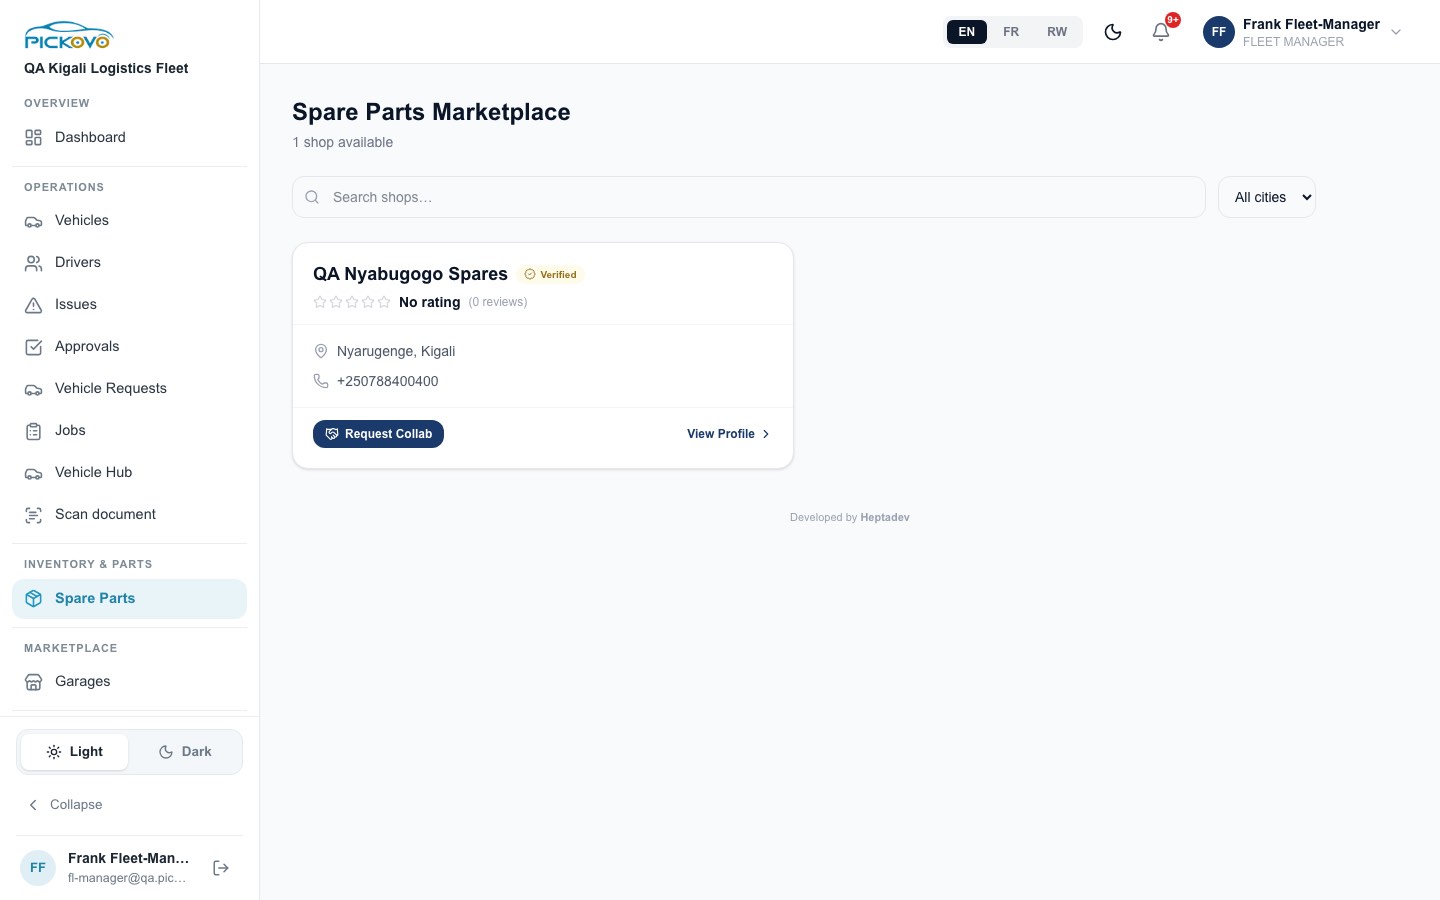
Figure 15: The Spare Parts Marketplace with one verified shop.
- Search shops or filter by city (All cities).
- Select Request Collab to ask the shop to work with you.
- Select View Profile to see the shop's details, catalogue preview (prices in RWF) and reviews.
- Once your collaboration is accepted, the profile shows Request Parts: add items (from the catalogue or a custom part name, with quantity), set Needed By and Notes, and submit. The shop answers with a quotation. Until then the profile tells you the request is pending or that you need an accepted collaboration.
C.11 Cost Intelligence
Purpose: see where your maintenance money goes and which vehicles cost too much.
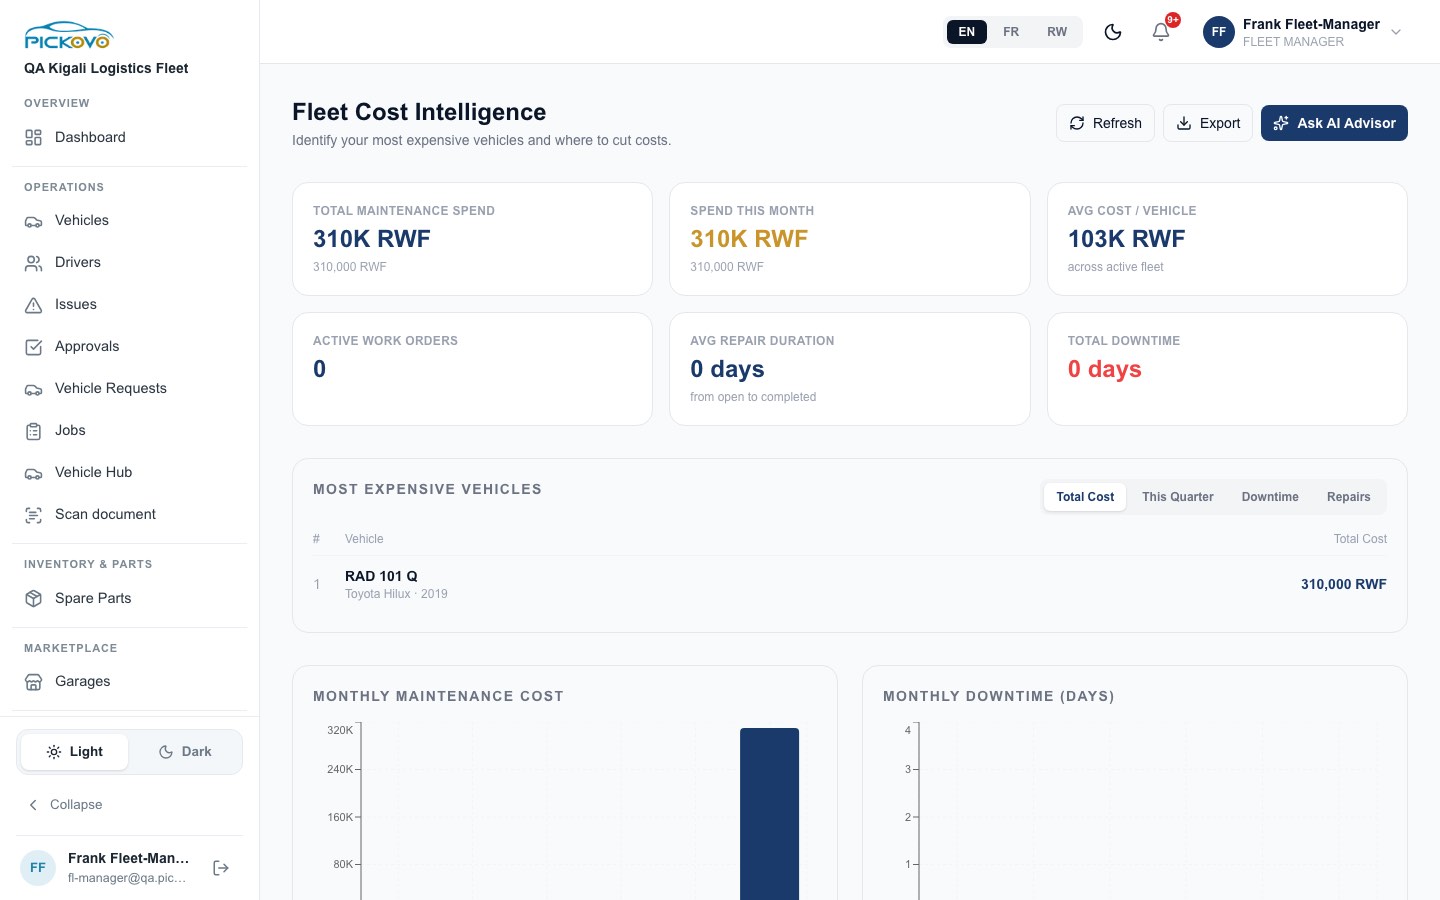
Figure 16: Fleet Cost Intelligence: spend, work orders, repair duration and downtime, with the most expensive vehicles.
- Cards: total maintenance spend, spend this month, average cost per vehicle, active work orders, average repair duration and total downtime.
- Most Expensive Vehicles, ranked by Total Cost, This Quarter, Downtime or Repairs.
- Charts: monthly maintenance cost, monthly downtime, repairs by category and parts vs labour. Also vehicle health scores and insight cards.
- Refresh reloads the figures. Export downloads them as a file. Ask AI Advisor writes cost-saving recommendations.
- Replacement & Anomaly Thresholds (select Configure): set the limits that flag a vehicle, such as max cost per vehicle, max repairs per quarter, max downtime, cost-to-value %, base asset value, annual depreciation % and the anomaly percentages. Select Save thresholds.
In the same panel you can see, but not change, the Quotation approval limit and Who pays roadside helpers: both show Set by your company admin.
C.12 Reports
Purpose: a printable analysis of maintenance cost and vehicle performance.
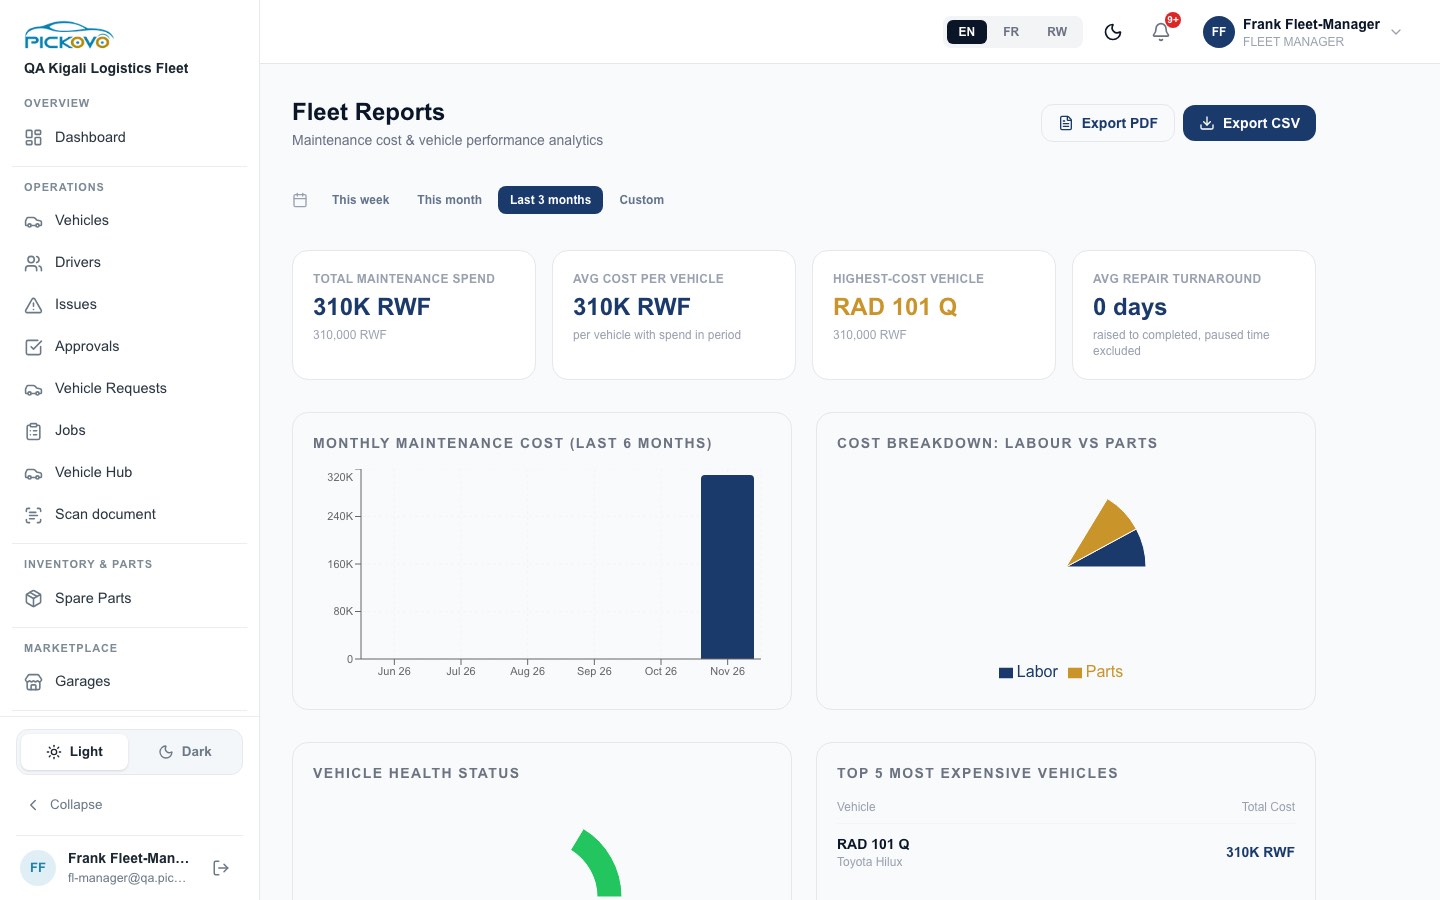
Figure 17: Fleet Reports for the last 3 months.
- Choose the period: This week, This month, Last 3 months or Custom.
- Read the figures: total spend, average cost per vehicle, highest-cost vehicle, average repair turnaround, the monthly cost chart, labour vs parts, vehicle health status and the top 5 most expensive vehicles. Further down: downtime, repairs completed, quote decision time, issue review time, service due, vehicles at a garage now, cost per vehicle, repeat repairs, invoices in the period, service quality, and About these figures.
- Export PDF opens your browser's print window. Export CSV downloads the data.
C.13 Team (users)
Purpose: add drivers and fleet members to your company.
Open https://fleet.heptadev.com/en/fleet/users (this page is not in your sidebar).
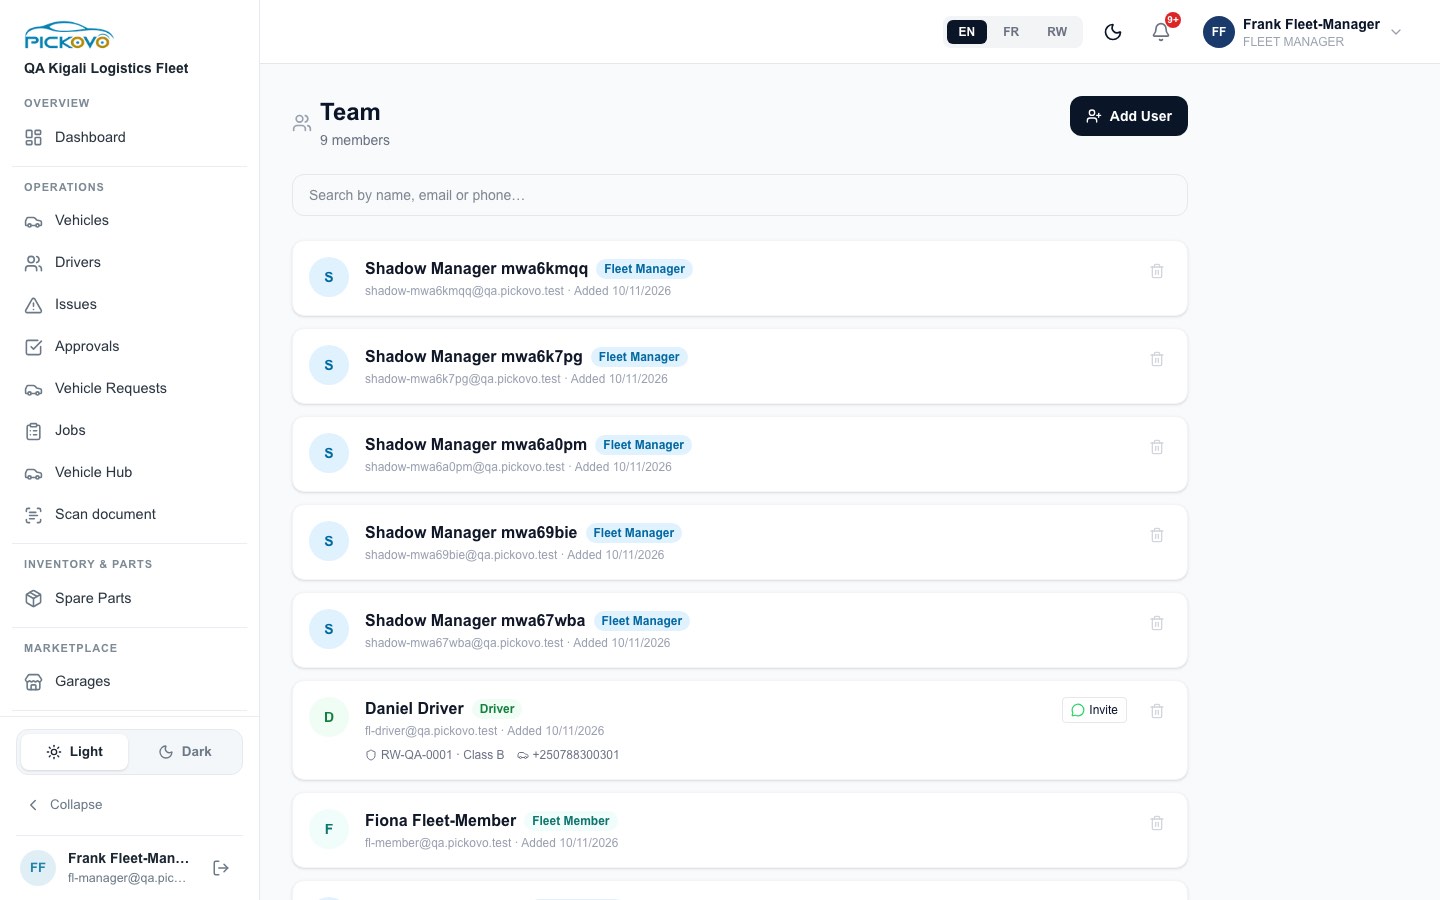
Figure 18: The Team page, listing managers, a driver (with an Invite button) and a fleet member. The "Shadow Manager" accounts were created by a security test before the fix described below; you cannot create such accounts.
To add someone
- Select Add User.
- Fill in Full Name, choose the Role and give an Email or Phone (at least one).
- Driver: also Licence Number, Licence Category and Driver Phone (if different).
- Fleet Member: read-only access to fleet data; cannot manage vehicles or users.
- Choose how they sign in:
- For a driver, Invite on WhatsApp (ticked by default, needs a phone number): the driver sets their own password through a link.
- Otherwise, give a Temporary Password.
- Save. For an invite, select Send on WhatsApp or Copy link. The link works once and expires after 7 days. For a password, the login details are shown once: pass them on privately.
You can add Drivers and Fleet Members only. The Role list also shows Fleet Manager, but saving it is refused: "Only the company admin can add a fleet manager."
For a driver with a phone number, Invite (or Resend invite) sends a new set-password link.
What you cannot do here: the bin icon next to each person does not remove anyone for your role, and the approval-limit control is shown only to the company admin. To remove someone, ask your company admin.
Passwords must be at least 8 characters with an upper-case letter, a lower-case letter, a number and a special character.
C.14 Settings (your profile)
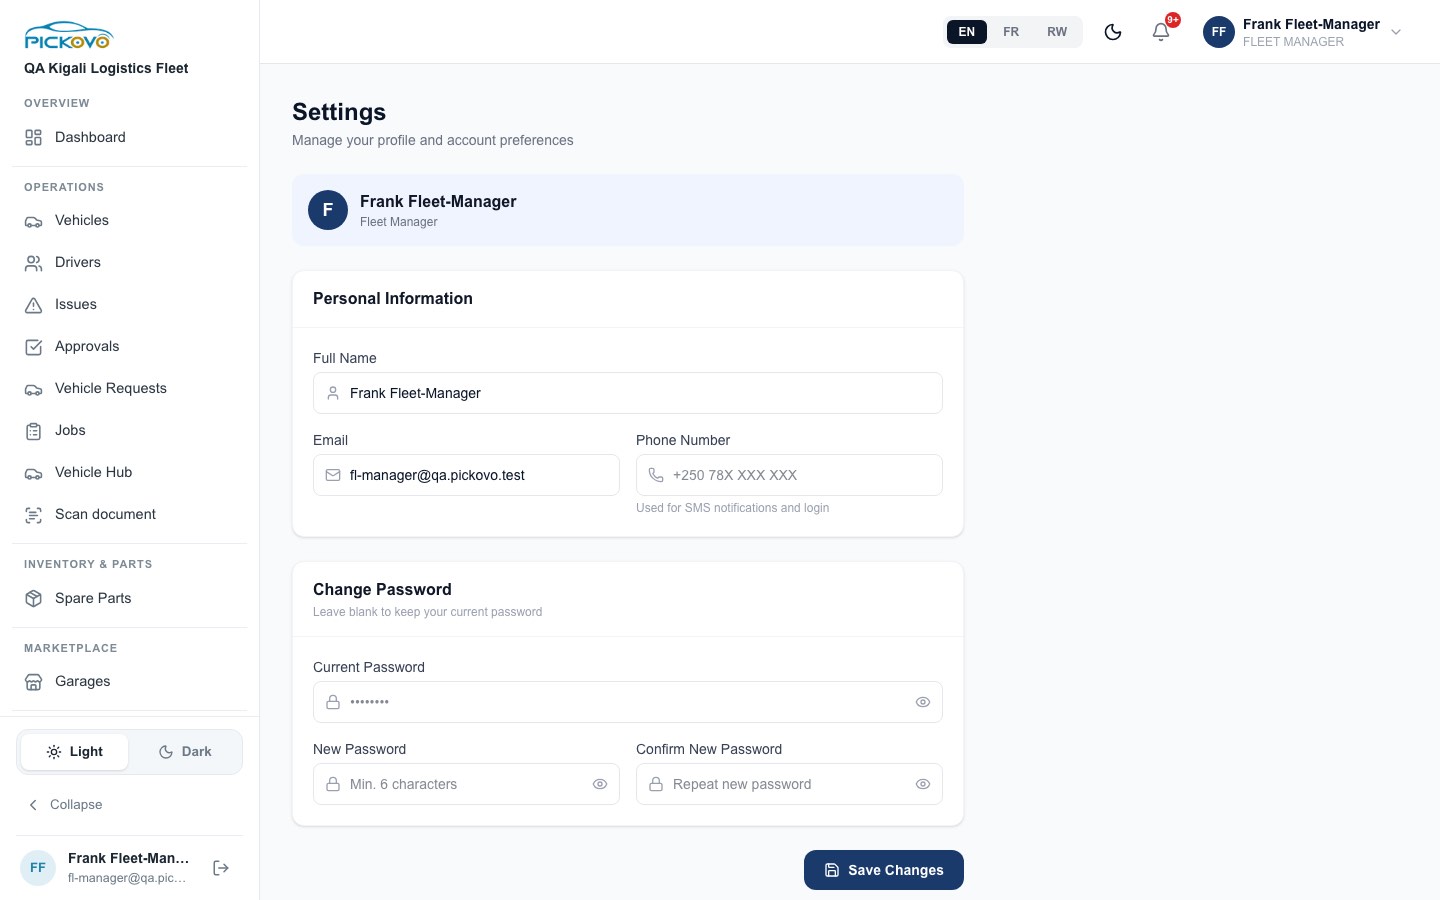
Figure 19: Settings: personal information and password.
- Select Settings in the sidebar.
- Change your Full Name, Email or Phone Number (used for SMS notifications and sign-in).
- To change your password, fill in Current Password, New Password and Confirm New Password. Leave them blank to keep your password. The new password must meet the rule above (the "Min. 6 characters" hint in the field is out of date).
- Select Save Changes.
Further down, Request account deletion starts a request to delete your account. Pickovo confirms your identity by email first.
Notification preferences (which events reach you in the app, by email or by SMS) are at https://fleet.heptadev.com/en/settings/notifications. Select Save Preferences after changing them.
C.15 Notifications
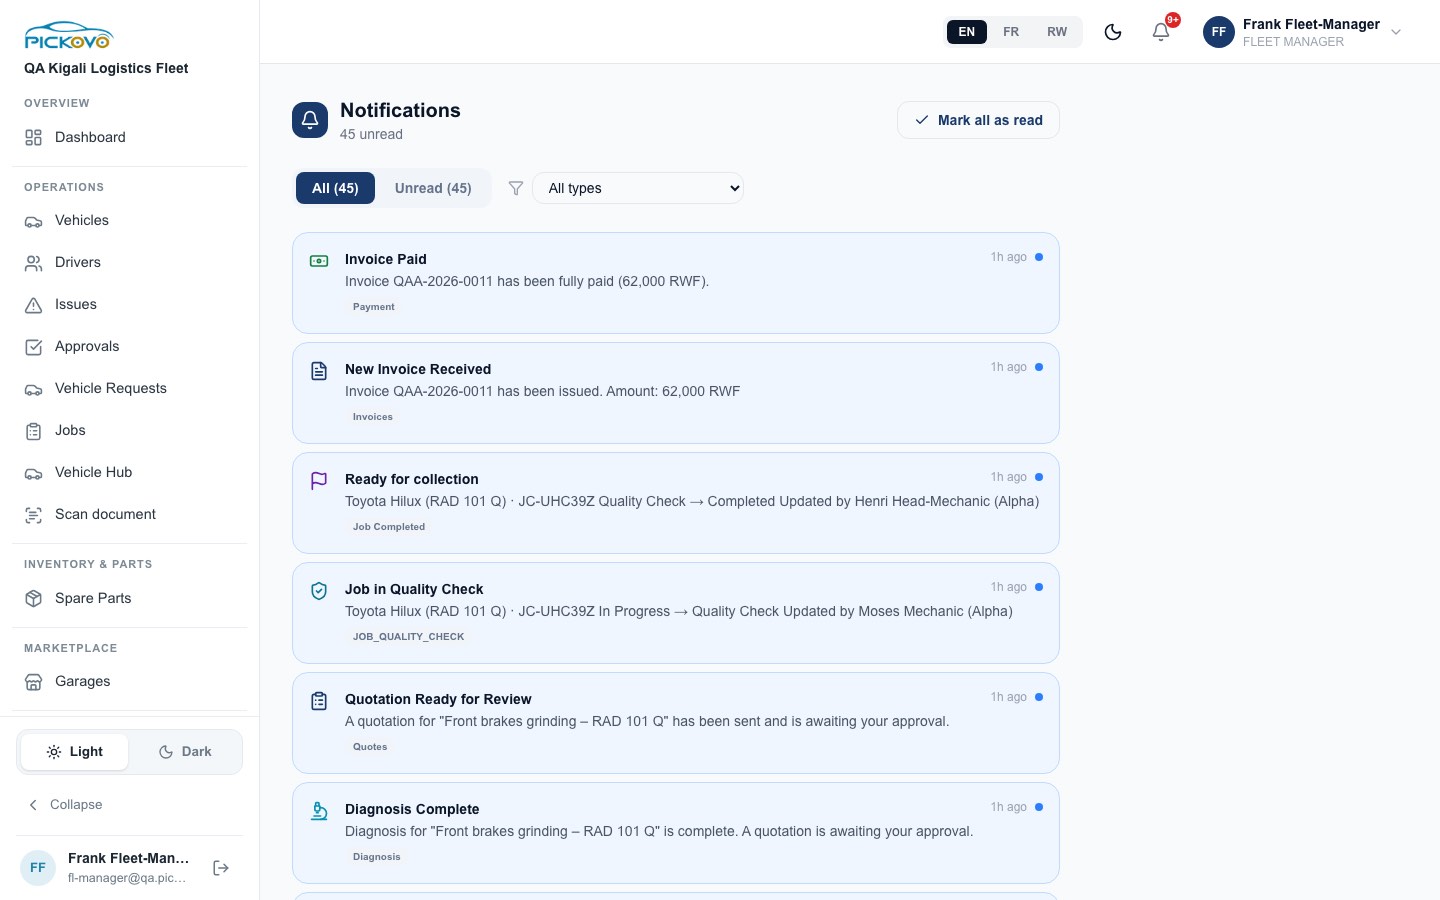
Figure 20: Notifications about the brake repair: invoice paid, invoice received, ready for collection, quality check, quotation ready and diagnosis complete.
- Select the bell in the top bar for the latest notifications, then View all notifications.
- Use All / Unread and the type list (All types) to filter.
- Select a notification to open the related job, quotation or invoice. It is marked as read.
- Mark all as read clears the unread count.
You are notified, for example, when a garage sends a quotation or a diagnosis, when a job moves stage, and when an invoice is issued or paid.
D. What you can and cannot do
| Area | View | Create | Edit | Delete | Approve / decide |
|---|---|---|---|---|---|
| Vehicles | Yes | Yes (form or CSV) | Yes (incl. driver, schedule) | Yes | - |
| Drivers | Yes | Yes | Yes | - | - |
| Driver issue reports | Yes | Yes | - | - | Yes approve / decline, send to garage |
| Quotations | Yes | - | - | - | Yes approve (within your limit), request changes, decline |
| Jobs | Yes | Yes (Request a Job, Send for Service) | - | - | Yes approve or cancel early-stage jobs |
| Invoices | Yes | - | - | - | Yes dispute (Sent / Overdue only) |
| Vehicle requests | Yes | - | - | - | Yes approve / decline |
| Garage and shop collaborations | Yes | Yes request | - | - | - |
| Spare-parts requests | Yes | Yes (with an accepted collaboration) | - | - | - |
| Cost thresholds | Yes | - | Yes | - | - |
| Team | Yes | Yes Drivers and Fleet Members only | - | - | - |
| Reports, Cost Intelligence | Yes (and export) | - | - | - | - |
You cannot: add another fleet manager; set or change any approval limit (yours or the company's); change who pays for roadside help; remove team members; move a job through the workshop stages or mark an invoice paid; open the company admin's activity log or AI settings, or any garage, spare-parts shop, regulatory or Pickovo admin page; see another company's vehicles, jobs or invoices.
E. Common workflows
Workflow 1: From a driver's report to a paid repair (W1)
Before you: the driver reports a problem in the Pickovo app (for example "grinding noise from the front brakes").
- You get a notification. Open Issues (or Approvals → Maintenance) and Approve the report.
- Select Send to Garage, pick the partner garage, check the title and description, and send.
Then the garage: the receptionist accepts the job, the head mechanic assigns a mechanic, the mechanic diagnoses the fault, and the garage sends a quotation. You are notified at each step ("Diagnosis Complete", "Quotation Ready for Review").
- Open Approvals → Quotations and open the quotation. Check the line items, ask questions in Discussion if needed, then Approve and confirm. (Above your limit? Your company admin must approve.)
Then the garage: repairs the vehicle, passes quality check, issues the invoice and records the payment.
- Open Invoices: the invoice shows Paid. Print / PDF it for your records.
- Open the vehicle and its History tab to see the repair and the total spent.
Workflow 2: Start working with a new garage
- Garages → search for a garage near your vehicles → Request Collab (or Full profile → Request Collaboration with a short introduction).
- Wait for the garage to accept. The card changes from Pending to Partner.
- You can now pick this garage in Send to Garage, Send for Service and Request a Job.
Workflow 3: Add a new driver and give them a vehicle
- Open the Team page (
/en/fleet/users) → Add User → Role Driver, name, phone, licence details, keep Invite on WhatsApp ticked → save → Send on WhatsApp. - The driver sets a password from the link and signs in to the Pickovo app.
- On Vehicles, point at the driver cell of a vehicle → Assign driver → choose the new driver.
Workflow 4: A driver asks for a vehicle
- The driver sends a request from the app. Open Vehicle Requests → Pending.
- Approve, choose a vehicle in Assign Vehicle and add a note with instructions, or Decline with a reason.
F. Troubleshooting
| Problem | What it means | What to do |
|---|---|---|
| You open a page and land back on your dashboard | Your role cannot open that page (for example company admin or garage pages) | Use the pages in your sidebar. Ask your company admin for anything else. |
| "Invalid email or password", even when you are sure the password is right | After 10 wrong attempts in 15 minutes, sign-in is paused for the account | Wait 15 minutes, or use Forgot password? |
| "…is above your approval limit… A company admin must approve it." | The quotation total is more than your limit | Ask your company admin to approve it, or ask the garage for a revised quotation. |
| "This quotation has expired. Ask the garage to re-quote." | The garage's offer ran out | Ask the garage, through the job's discussion or by phone, to send a new quotation. |
| "This quotation has already been answered" | Another manager or the company admin decided first | Refresh Approvals to see the decision. |
| Send to Garage / Send for Service greyed out or missing | Your company has no accepted collaboration with a garage | Request a collaboration in Garages and wait for acceptance. |
| "No accepted collaboration with this garage" | You picked a garage that is not your partner | Choose a partner garage, or leave the garage empty. |
| "Only the company admin can add a fleet manager" | Managers can add Drivers and Fleet Members only | Ask your company admin. |
| Thresholds save but the approval limit / roadside field is greyed out | Only the company admin sets these | Ask your company admin. |
| Dispute not shown on an invoice | Only Sent or Overdue invoices can be disputed | Contact the garage for invoices in other states. |
| Password change refused | The password policy was not met | Use at least 8 characters with upper case, lower case, a number and a special character. |
| A message about your plan or payment required | Your company's trial or subscription has ended, or the plan doesn't include the feature | Tell your company admin; they can check Billing. |
| A job does not move to the next stage | Workshop stages are changed by the garage only | Follow the job; contact the garage if it is stuck. |
G. Security and best practices
- Keep your password to yourself. Use a strong, unique password and change it in Settings if you think someone else knows it.
- Pass new users' passwords privately. For drivers, prefer the WhatsApp invite: they set their own password and you never see it. Invite links work once and expire after 7 days.
- Check before you approve. Read the line items and garage notes; use Request Changes rather than approving a quotation you are unsure of. Approval starts the work and commits your company to the price.
- Respect the approval limit. It exists so that large spending gets a second pair of eyes. Don't try to work around it.
- Use Dispute for wrong invoices so there is a written record, rather than settling it informally.
- Keep vehicle data current (drivers, mileage, insurance expiry, service schedule) so reports and overdue alerts are reliable.
- Sign out with Logout on shared computers.
- Tell your company admin when someone leaves the company so their access can be removed.