
Garage · HEAD_MECHANIC
Head Mechanic
For the workshop supervisor who runs the garage floor in Pickovo.
The screenshots in this guide were taken on a test system. Every name, garage, phone number and number plate in them (for example "QA Alpha Motors", "Henri Head-Mechanic (Alpha)", "RAC 418 K") is fictional test data.
A. Introduction
As head mechanic you supervise the workshop. Pickovo gives you the tools to:
- see every job in the garage on one board and move it through its stages;
- accept or decline incoming work and record the vehicle's condition at check-in;
- assign mechanics to jobs, reassign them, and add technicians and tasks;
- record a diagnosis and prepare the quotation;
- sign off (or reject) the quality check before a job is completed;
- generate the invoice for a completed job and close the job;
- register walk-in customers, see appointments, issue gate passes and follow complaints;
- read the operational and workshop reports (without revenue figures).
You work in the Pickovo web app. The Pickovo mobile app does not have a head-mechanic workspace.
About permissions. What a garage role can do is set by a list of permissions. This guide describes the defaults for a head mechanic. Your garage admin can switch permissions on or off for your role under Settings → Roles, so your screens may show more or fewer items than described here. Your default permissions are:
| Area | Granted by default |
|---|---|
| Workshop | See all jobs, create jobs, assign mechanics, manage walk-ins, view bookings, manage gate passes |
| Finance | Create invoices (generate an invoice from a completed job) |
| Reports | Operational reports |
| Quality | View complaints |
Not granted by default: stock and inventory, part-request approval, purchase orders, suppliers, buying spare parts, viewing the invoice list, recording payments, adjusting invoices, expenses, incentives, financial and daily reports, compliance. Staff, garage settings and permissions are reserved for the garage admin and can never be given to a head mechanic.
B. Getting started
Signing in
- Open https://fleet.heptadev.com/en/login (use
/fr/loginfor French or/rw/loginfor Kinyarwanda, or switch with the EN / FR / RW buttons at the top right). - In Email or Phone, enter the email address or phone number your garage admin registered for you.
- Enter your Password. The eye icon shows what you typed.
- Select Log in.
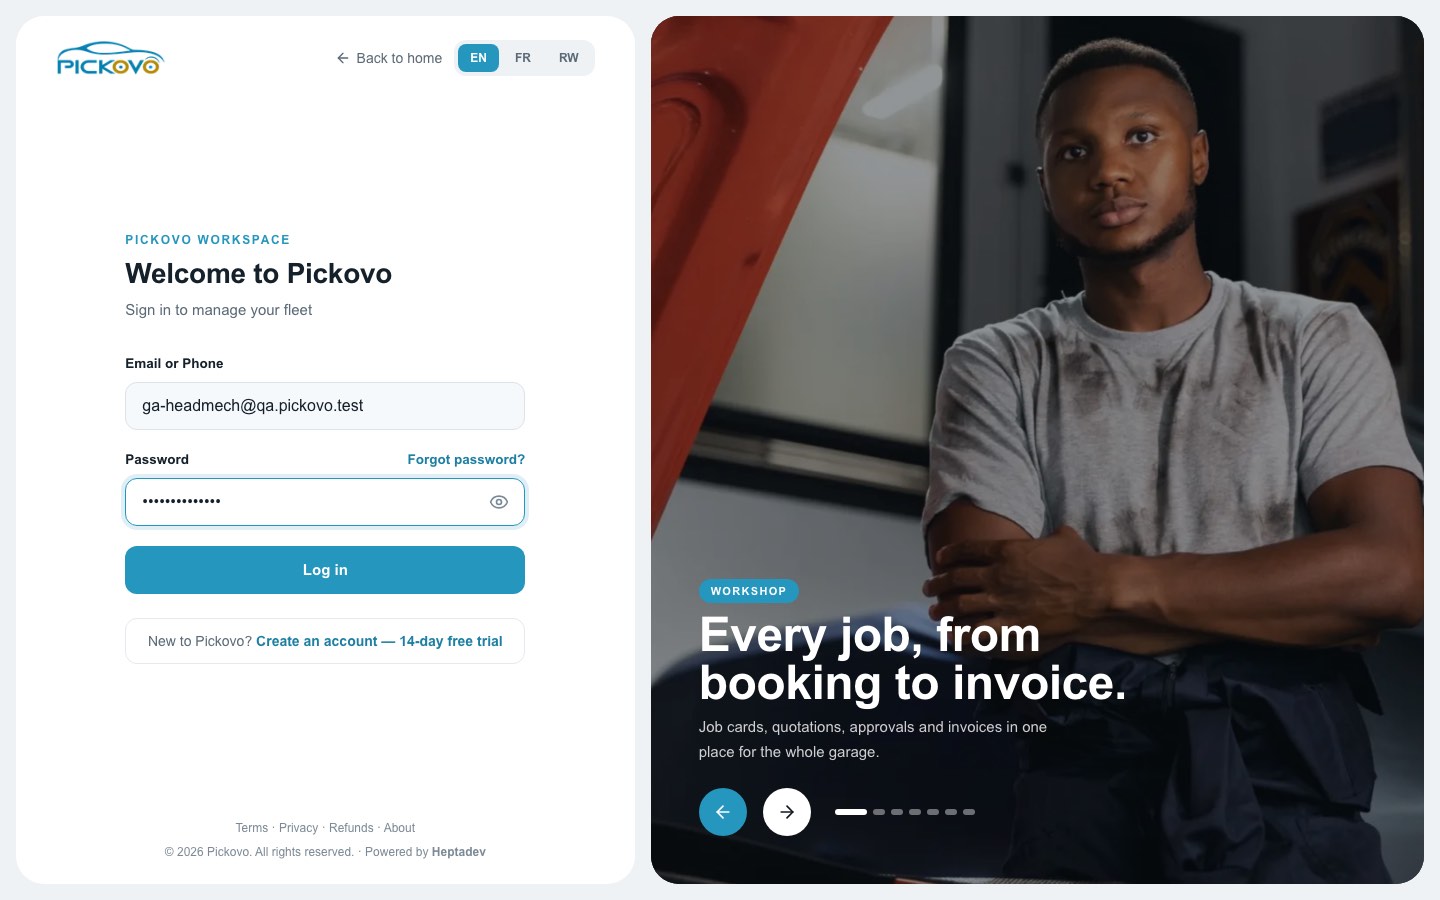
- If you have forgotten your password, select Forgot password? above the password field.
- If two-factor authentication is switched on for your account, Pickovo asks for the 6-digit code from your authenticator app after your password.
- After 10 wrong passwords within 15 minutes, sign-in is paused for that account. Wait and try again, or use Forgot password?.
Your dashboard
After signing in you land on the Workshop Dashboard, which shows the workshop floor at a glance.
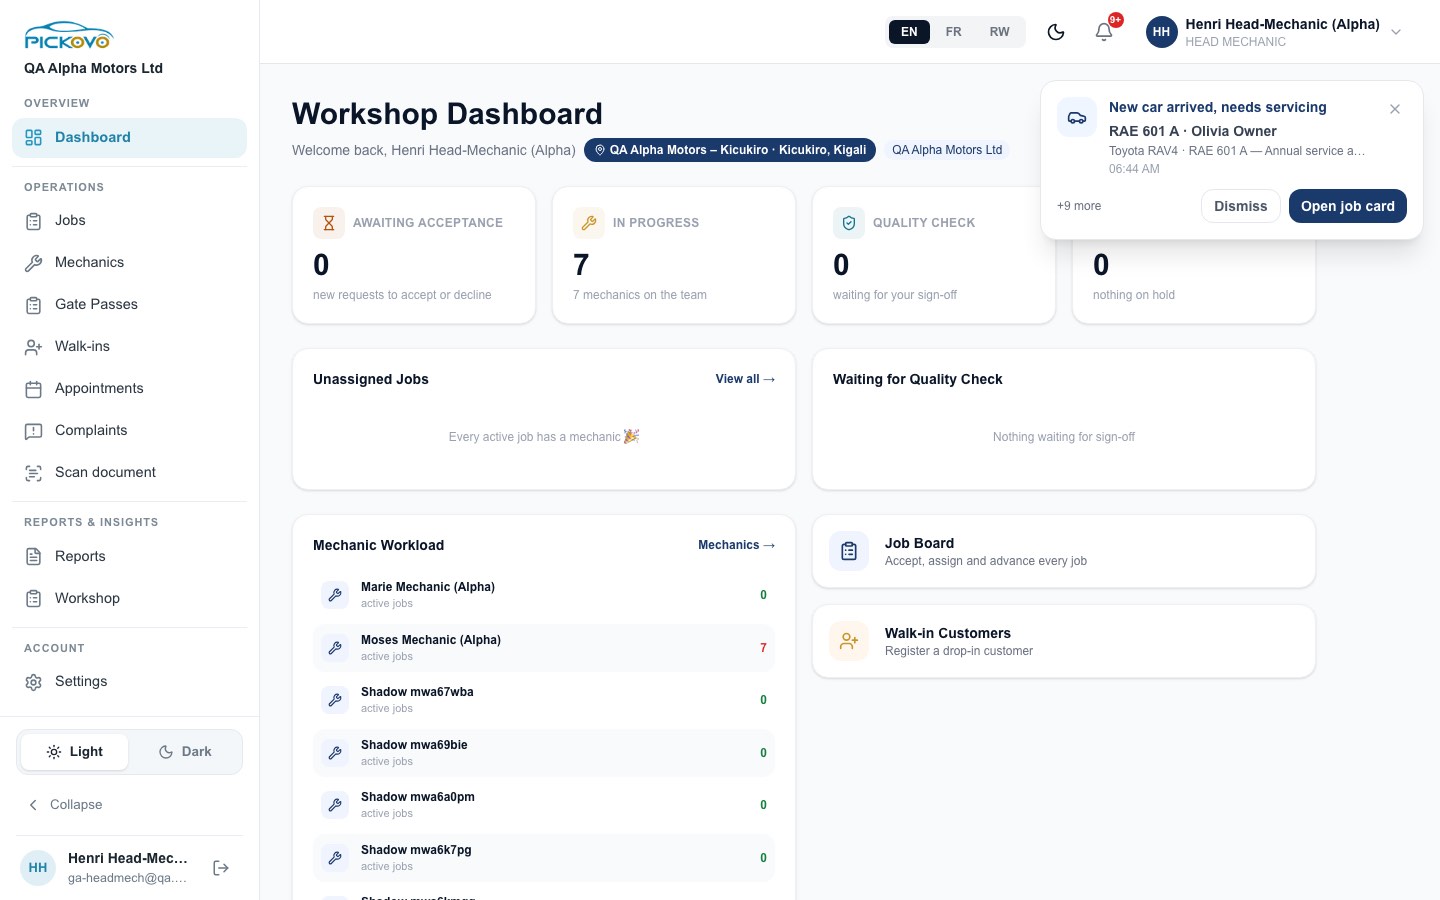
- Counters: Awaiting acceptance (new requests to accept or decline), In progress (with the number of mechanics on the team), Quality check (jobs waiting for your sign-off) and Paused (jobs on hold that need a decision).
- Unhappy customers: appears only when the front desk has recorded negative feedback that still needs follow-up. Each line opens the job.
- Unassigned Jobs: up to six active jobs with no mechanic, urgent ones first. View all → opens the jobs board.
- Waiting for Quality Check: the oldest jobs waiting for your sign-off, with the mechanic's name and how many times the job has been reworked.
- Mechanic Workload: each active mechanic with their number of active jobs. Mechanics → opens the Mechanics page.
- Job Board and Walk-in Customers shortcuts.
The header shows the garage branch, the language buttons, a dark-mode switch, the notification bell, and your name and role. Selecting your name opens a menu with Logout.
Alerts. A pop-up in the top-right corner (visible in most screenshots in this guide) tells you about events such as "New car arrived, needs servicing". Select Open job card to go to the job, or Dismiss to hide it. "+9 more" means more alerts are waiting.
Navigation
The left-hand menu shows:
| Section | Items |
|---|---|
| Overview | Dashboard |
| Operations | Jobs, Mechanics, Gate Passes, Walk-ins, Appointments, Complaints, Scan document |
| Reports & insights | Reports, Workshop |
| Account | Light / Dark switch, Collapse (shrinks the menu to icons), your name with the log-out button |
Your personal Settings page is at /settings.
Some pages are not in the menu but you can open them from links or by typing the address: Notifications (the bell), Reviews, Messages, Pickups, Roadside help and Accident reports.
C. Features
C1. Notifications
Purpose: a full list of everything Pickovo has told you about, such as status changes, quality checks and arrivals.
- Select the bell icon in the header.
- Use All or Unread to filter, and the All types list to show one kind of notification.
- Select a notification to read it. Select Mark all as read to clear the unread count.
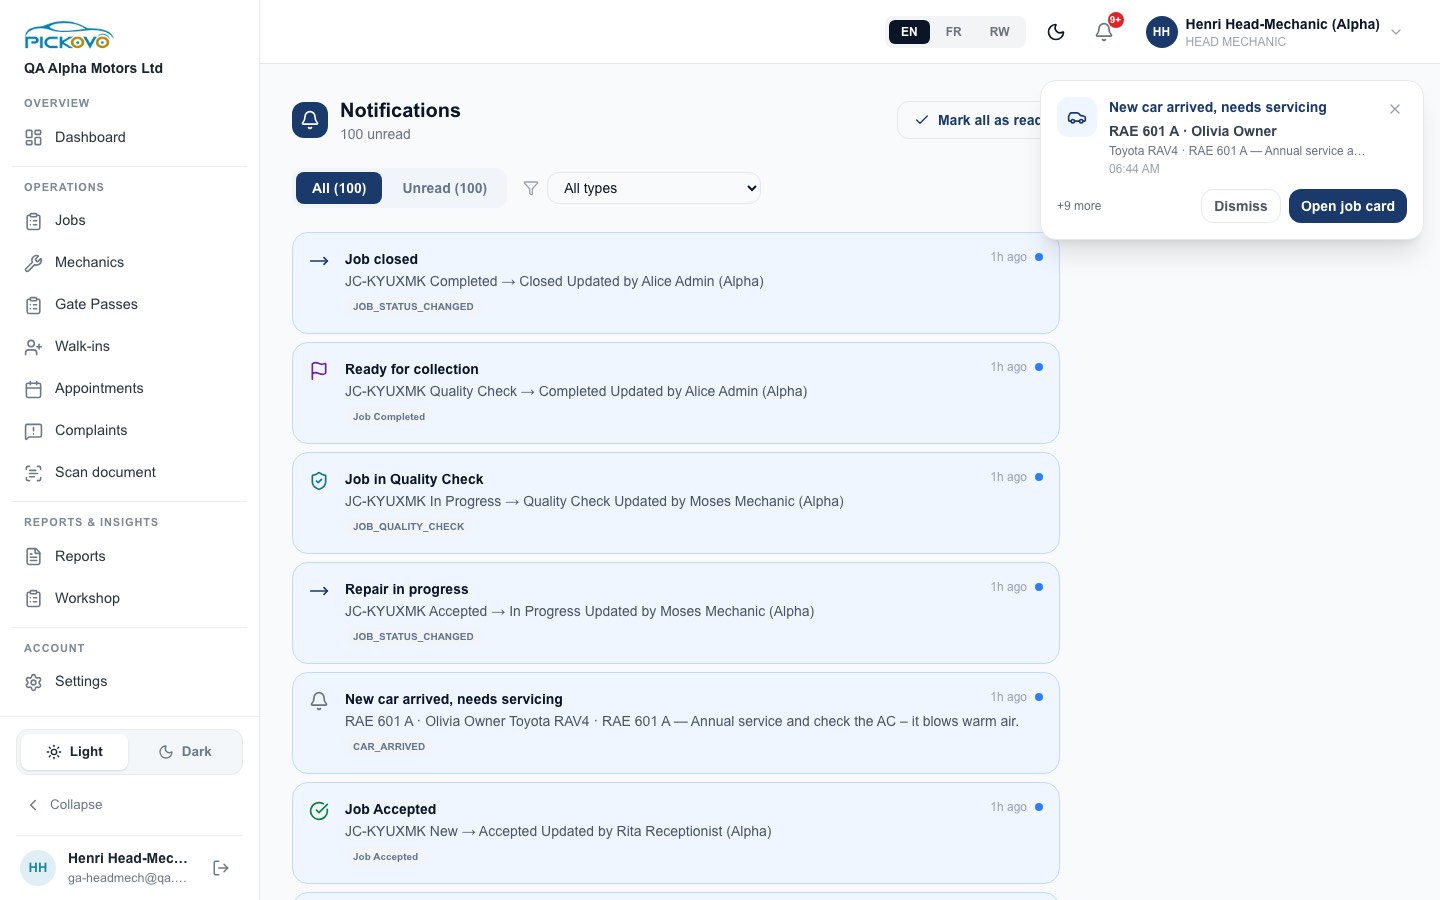
Each entry says what happened (for example "In Progress → Quality Check"), who did it and when.
C2. Jobs board
Purpose: see and move every active job in the garage.
- Select Jobs in the menu.
- Choose a view: Board (columns by status), Table or Cards.
- Search by job, plate or mechanic, or filter with All Statuses.
- To move a job, drag the card by its grip handle into another column, or use Move on the card. Pickovo always asks you to confirm.
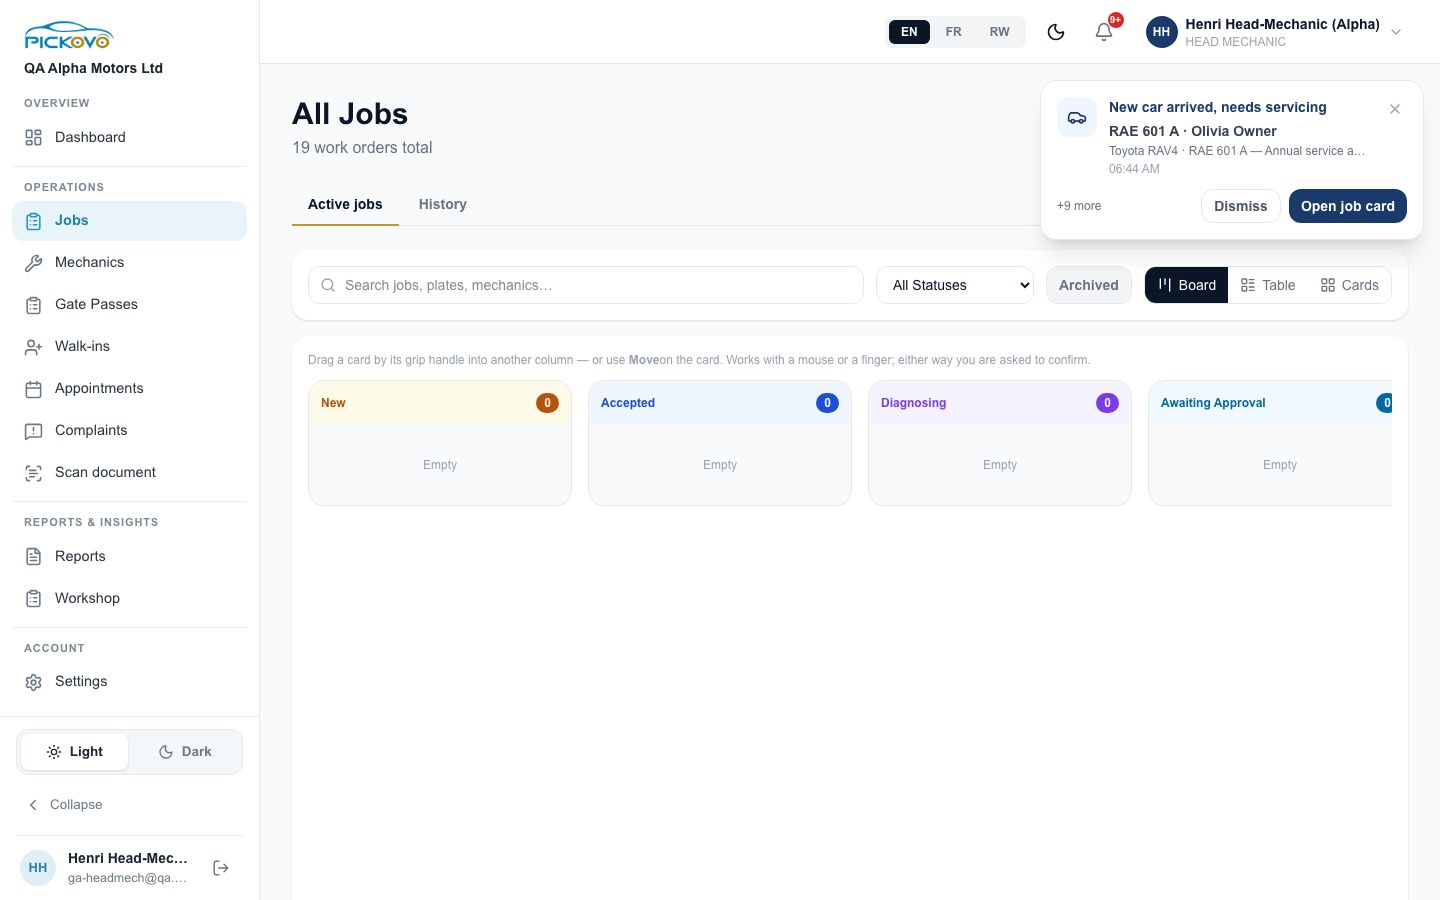
Other controls
- Active jobs / History tabs: History lists finished work.
- Archived: shows jobs that have been archived (head mechanics and admins only). Select ← Active Jobs to go back.
- New Job (top right): opens the new-job form (see C4).
Before a move, Pickovo checks what is missing. For example, moving to In Progress without a diagnosis or an approved quotation shows a warning that you may override. A move your role is not allowed to make is refused (see section F).
Job statuses you can move between
| From | You can move it to |
|---|---|
| New (Pending) | Accepted, Declined |
| Accepted | Diagnosing, In Progress |
| Diagnosing | Awaiting Approval, In Progress |
| Awaiting Approval | In Progress, Diagnosing |
| In Progress | Quality Check |
| Quality Check | Completed (pass), In Progress (fail, send back) |
| Completed | Closed |
Pausing and resuming is not a board move. It is done from the job card.
C3. The job card
Purpose: everything about one job, and the actions for its current stage.
Open a job from the board, the dashboard or an alert. The top shows the job title, a Call button (for the customer, driver or fleet manager, where a phone number is known) and a progress bar: Pending → Accepted → Diagnosing → Awaiting Approval → In Progress → Quality Check → Completed → Closed.
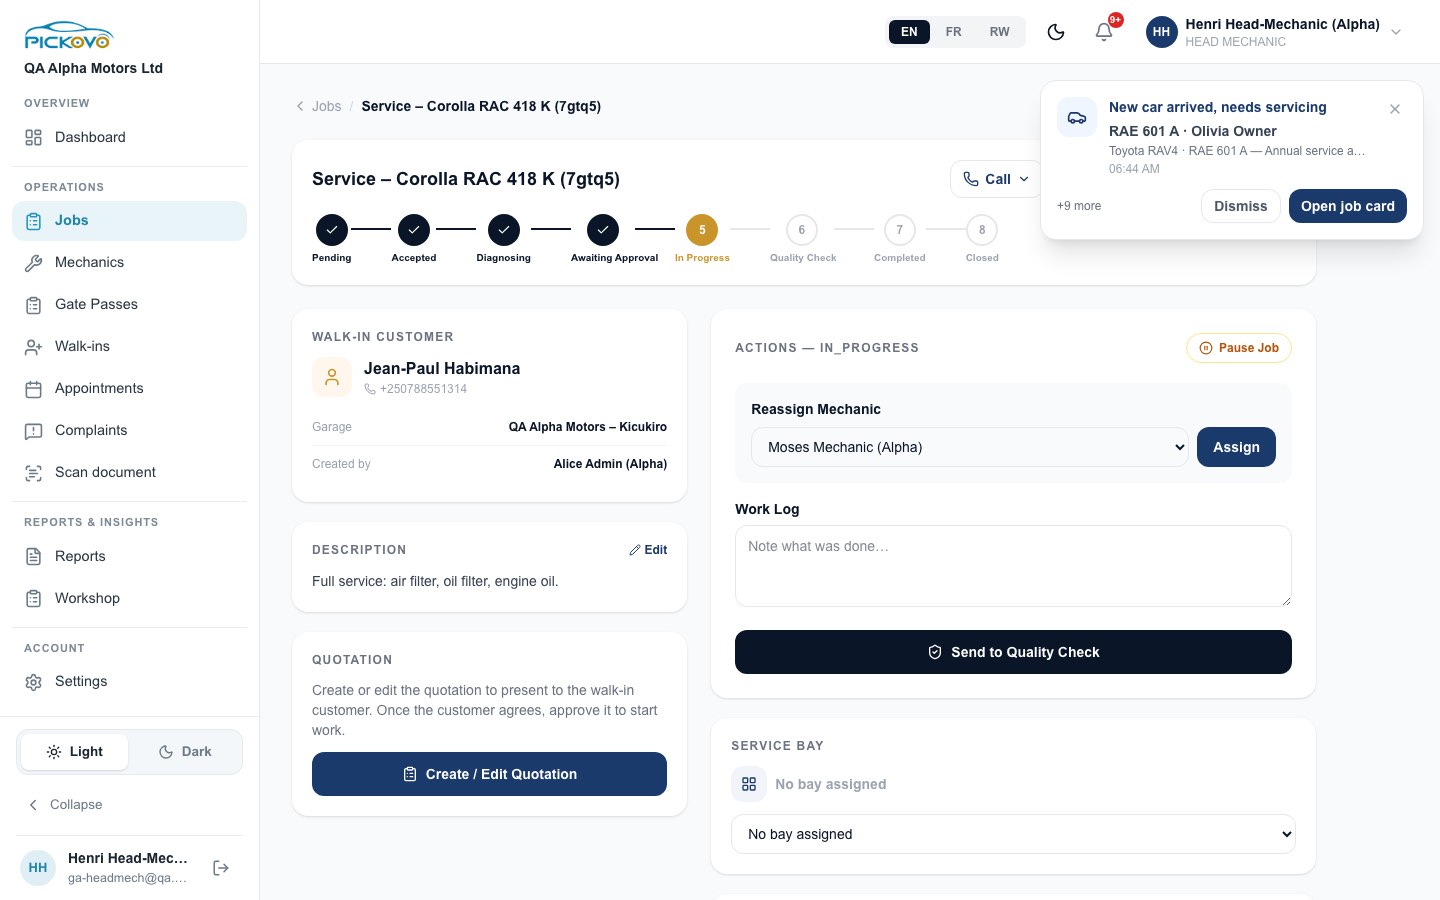
Left side: the customer or vehicle, garage, who created the job, the Description (select Edit to correct it while the job is open), the Quotation panel and the diagnosis summary.
Actions panel (right side), by status
| Status | What you can do |
|---|---|
| Pending | Accept Job opens Check In Vehicle: arrival date and time, odometer (km), fuel level and condition notes, all optional. Select Confirm. Decline Job turns the work away. This cannot be undone. |
| Accepted | Start Work Now (when nothing needs quoting), Start Diagnosis, or choose a mechanic under Assign Mechanic and select Assign. |
| Diagnosing | Assign/Reassign Mechanic, open the diagnosis form, or start work directly. |
| Awaiting Approval | For a fleet job, Approve & Start Work begins the repair. For a walk-in, the customer's approval is recorded from the quotation (see C3b). |
| In Progress | Reassign Mechanic, Send to Quality Check. |
| Quality Check | Pass Quality Check (marks it Completed) or Fail, Send Back (returns it to In Progress and adds 1 to the rework count). |
| Completed | Generate Invoice and Close Job. |
| Closed / Declined | Read-only. |
- If you start work on a job with no mechanic, Pickovo puts you on the job. You can reassign it afterwards.
- Pause Job is available from Accepted to Quality Check. Choose a reason (awaiting parts, customer approval or payment, bay or technician unavailable, external supplier, other) and add a note if you want. Select Resume Job to continue. Paused time is not counted in turnaround reports.
- Archive Job hides a Completed, Closed or Declined job from active lists. It is still kept in reports.
Other panels on the job card
- Service bay: choose the bay the car is in.
- Technicians: add technicians as Lead or Assistant, or remove them.
- Tasks: split the work and assign tasks to mechanics.
- Tag a colleague to review the job.
- Warranties: issue a warranty on the work.
- Inspection: fill in an inspection checklist from your garage's templates.
- Scan requisition: upload a photo of a paper parts requisition. Pickovo's AI lists the parts and checks the shelf. You correct the list, then select Submit. Nothing is sent until you confirm.
- Parts: request a part from the stock room for this job, and see what has been requested and issued.
- Customer feedback (Completed and Closed jobs): record the customer's rating and mark a complaint resolved.
- Notes: internal notes and customer-facing notes.
- Customer progress link: generate a link that lets the customer follow the job.
- History: every status change and who made it.
Important: text typed in the Work Log box under In Progress is not saved in this build. Write anything you need to keep in the Notes panel instead.
C3a. Diagnosis
- On an Accepted or Diagnosing job, open the diagnosis form from the Actions panel.
- Optionally use the AI helper to suggest findings.
- Under Diagnosis Items, select Add Item and enter the Issue Description, Severity (Low/Medium/High), Labour Hours and Labour Cost (RWF).
- Add General Notes, up to 5 Photos (JPEG, PNG or WebP, max 10 MB each) and an optional Video URL.
- Select Save & Send for Approval.
You need at least a note or one item. Saving moves the job to Awaiting Approval, and for a fleet job the fleet managers are notified. The form only opens while the job is Accepted or Diagnosing. Otherwise you are sent back to the job card.
C3b. Quotation
- Select Create / Edit Quotation on the job card. The labour lines from the diagnosis are filled in for you.
- Add lines with Add Labour and Add Part, and set the quantities and unit prices. The labour subtotal, parts subtotal and grand total update as you type.
- Fill in Estimated days, Expires on and Garage notes if needed.
- Select Save Draft.
- For a walk-in customer, once they agree, select Customer Approved, Start Work.
Restrictions: sending a quotation to a fleet (Send to Fleet), sharing it and sending it to a customer are done by the garage admin (and, for sharing, the front desk), not by a head mechanic. An approved quotation is locked. If a fleet asks for a revision, update it and the admin re-sends it.
C3c. Invoice from a completed job
- On a Completed job, select Generate Invoice.
- Pickovo builds the invoice from the approved (or sent) quotation's labour lines and the parts issued to the job, then opens it.
- On the invoice you can select Download PDF (print view) or PDF File (direct download).
- If an invoice already exists for the job, Pickovo opens that one instead.
- Editing, sending, signing and collecting payment need other permissions (cashier or admin by default). You cannot open the invoice list.
- A job cannot be Closed until it has an invoice.
C4. Creating a job
- Select New Job on the jobs board (or + New Job next to a walk-in customer).
- Choose Fleet Vehicle or Walk-in Customer, then select the vehicle or customer. You can add a new walk-in customer from the form.
- Enter the Job Title (required), Description, Priority (Normal/Urgent) and Deadline.
- Select Create Job.
When you book an appointment from the form, you must choose a mechanic. Pickovo warns you if that mechanic is already booked at that time.
C5. Mechanics
Purpose: see your team, its workload and its skills, and add mechanics to the roster.
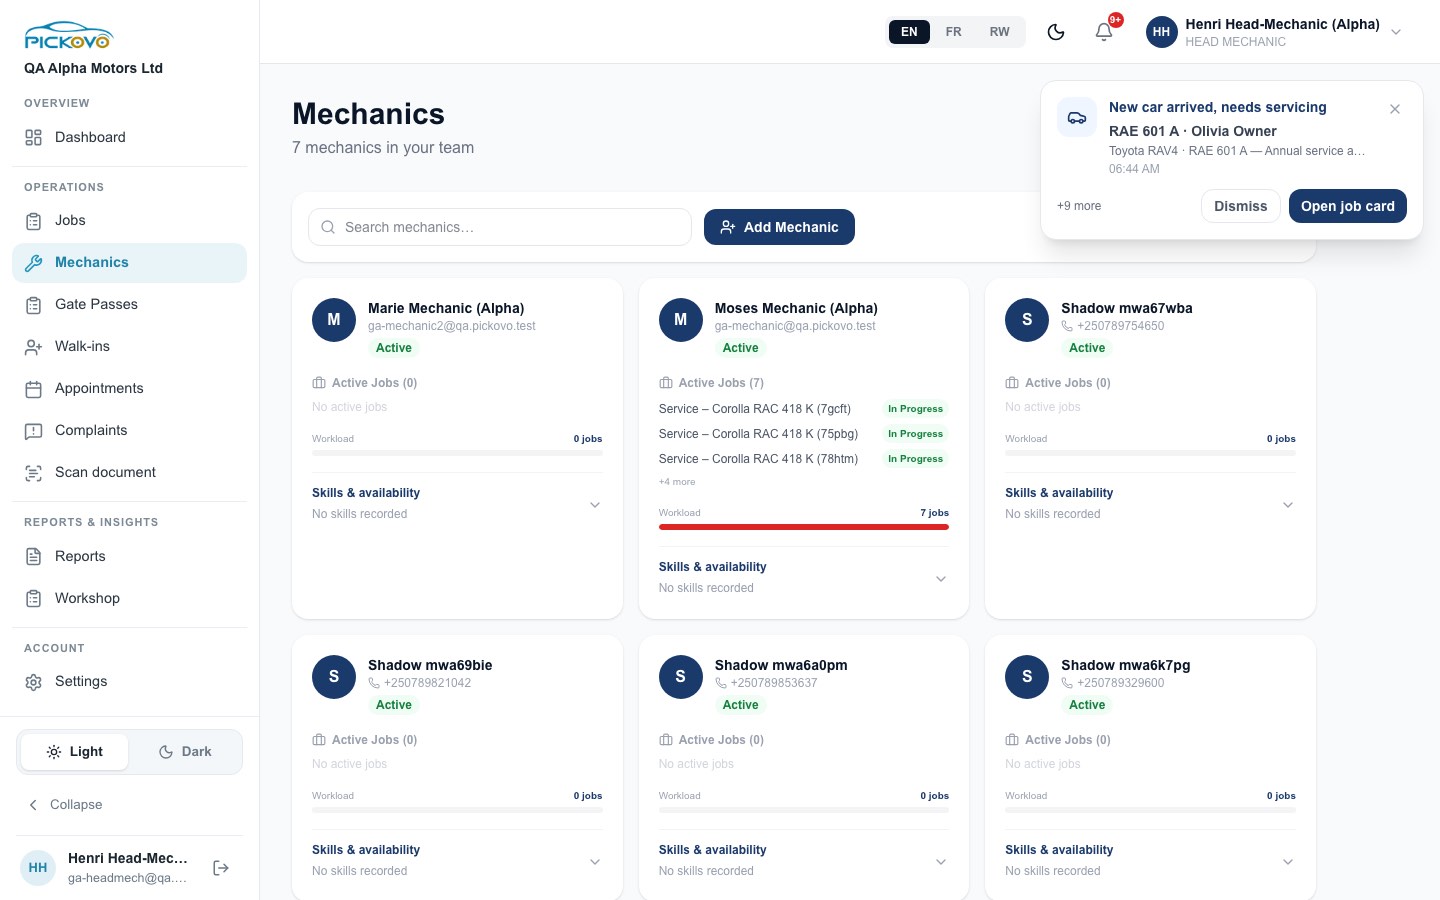
- Each card shows the mechanic's contact details, Active/Inactive status, up to three active jobs ("+N more"), and a Workload bar.
- Open Skills & availability to view or edit skills, working days, shift times, years of experience, certifications and notes.
- Search mechanics… filters the list.
- If Pickovo has switched on owner choice of mechanic for your garage, a switch lets you allow car owners to book a mechanic.
Adding a mechanic
- Select Add Mechanic.
- Enter the Full name (required), and optionally the phone, skills and certifications (separate them with commas).
- Select save.
Leave Give login unticked. Only the garage admin can give a mechanic a login account. If you tick it, Pickovo refuses with "Only an admin can give a mechanic a login". A mechanic without a login can still be assigned jobs and appears in reports.
This page lists people with the Mechanic role only. Head mechanics are not listed here, but they do appear in the job card's mechanic list and can be assigned.
C6. Walk-in customers
Purpose: register drop-in customers and their vehicles.
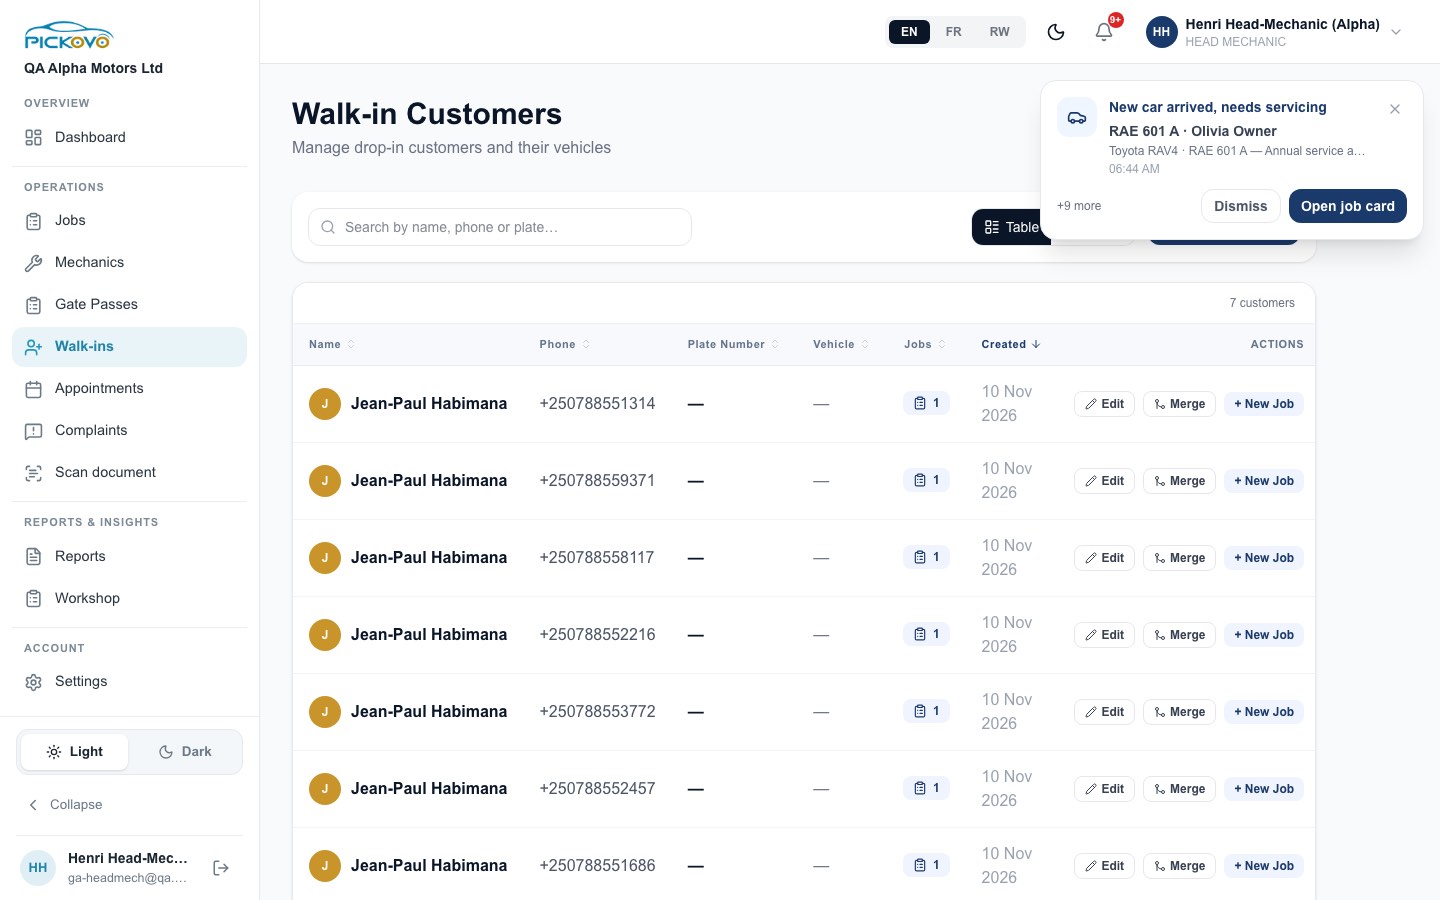
- Select Walk-ins.
- Select Add Customer and enter the customer's full name, phone and email, and the vehicle details (plate number, year, make, model, vehicle type). You can add more than one vehicle with Add another vehicle.
- Select Save Customer.
Row actions:
- Edit: correct the details. The change applies everywhere, including past jobs, and is recorded in the activity log.
- Merge: combine a duplicate record into this one.
- + New Job: open a job for this customer.
You can search by name, phone or plate, and switch between table and card views.
C7. Appointments
Purpose: see bookings car owners made in the Pickovo app, and your scheduled jobs.
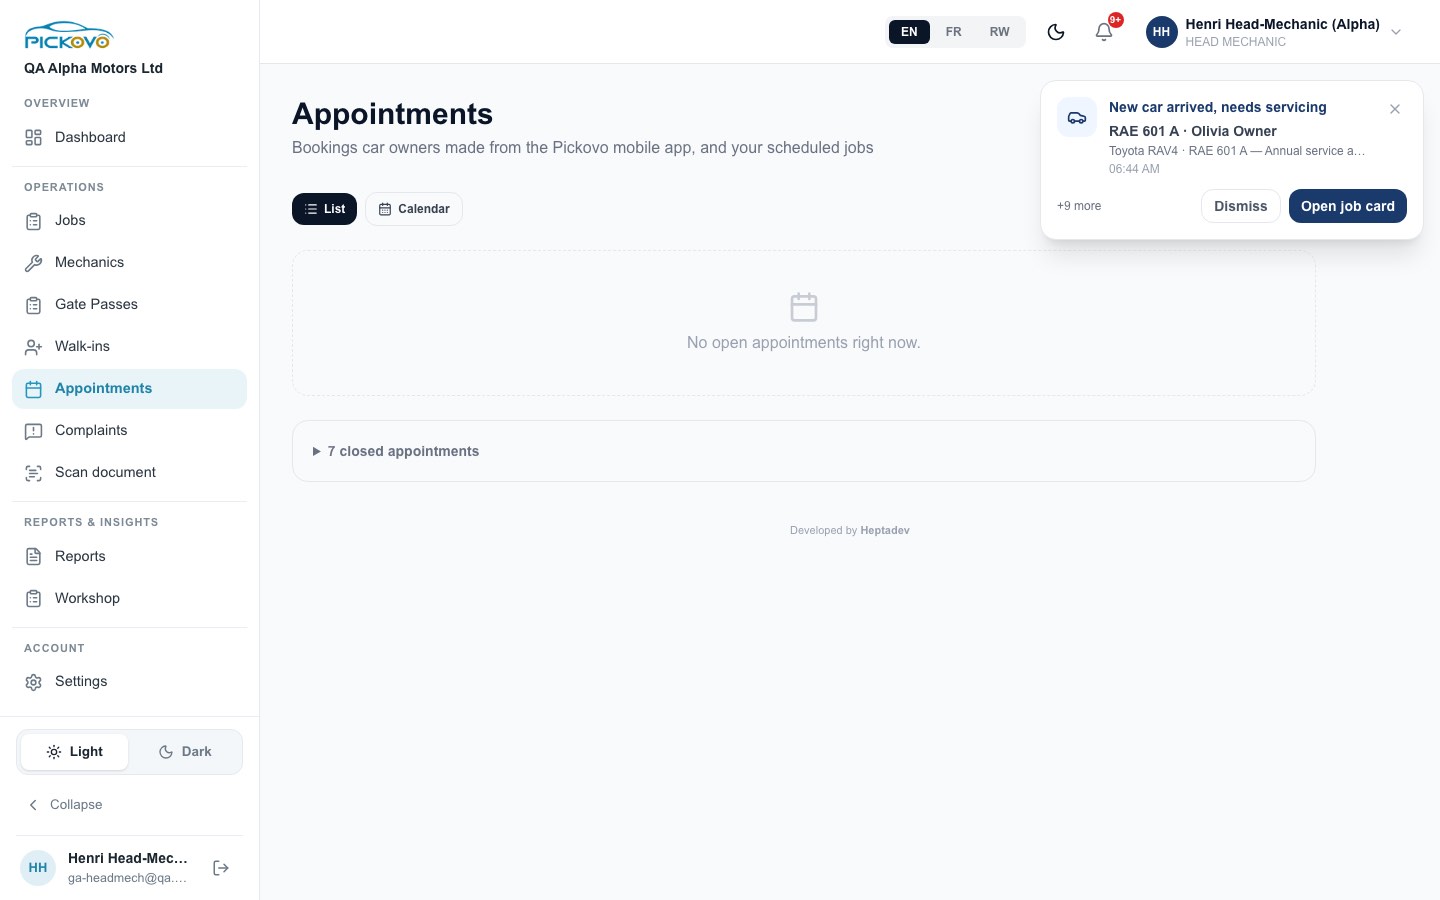
- Switch between List and Calendar. The calendar can be filtered by mechanic.
- For an app booking: Confirm or Move to the next status, Change time (pick a new date and time, then Save), or Cancel. Once a booking has a job card, Open job card takes you to it.
- Scheduled jobs can be edited, and cancelled while they are still Pending.
- The closed appointments row expands to show past bookings.
- The Message owner and Accident report shared links appear only when those features are switched on for your garage.
C8. Gate passes
Purpose: a written record that lets a vehicle or items leave the yard.
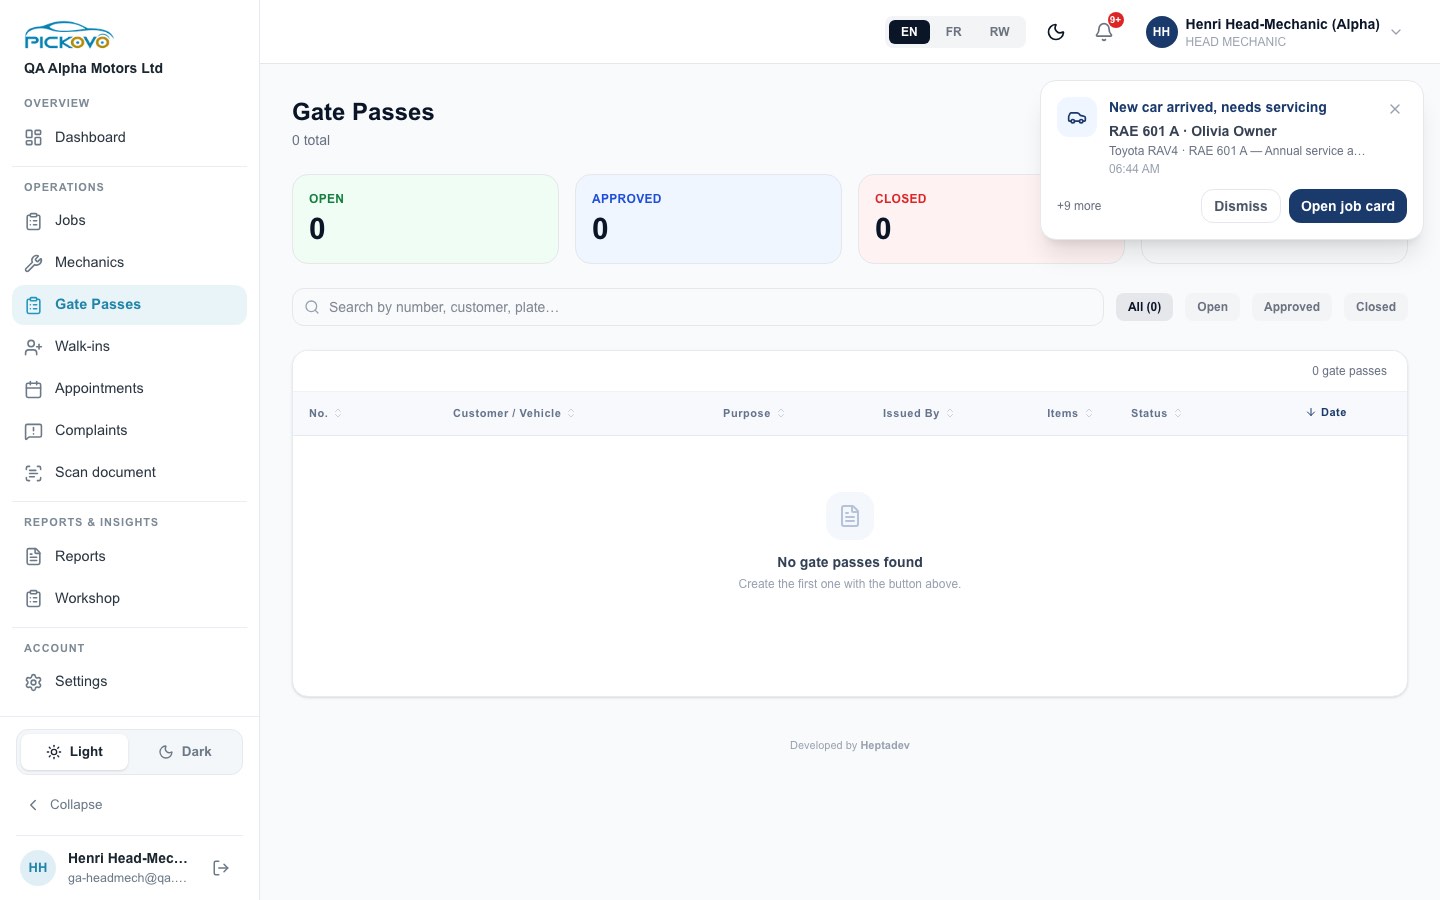
- Select Gate Passes, then New Gate Pass.
- Optionally use Auto-fill from Job Card.
- Fill in the Customer Name, Vehicle Plate, Purpose (After Service, Test Drive, External Repair, Customer Pickup, Other), Date & Time, Purpose Note, Authorized By, Received By and any Items / Parts.
- Save. The pass appears as Open.
You can search by number, customer or plate, and filter by Open, Approved or Closed. Approving and closing a gate pass is done by the garage admin.
C9. Complaints
Purpose: a record of every customer complaint, who is handling it and its deadline. The regulator can see this record.
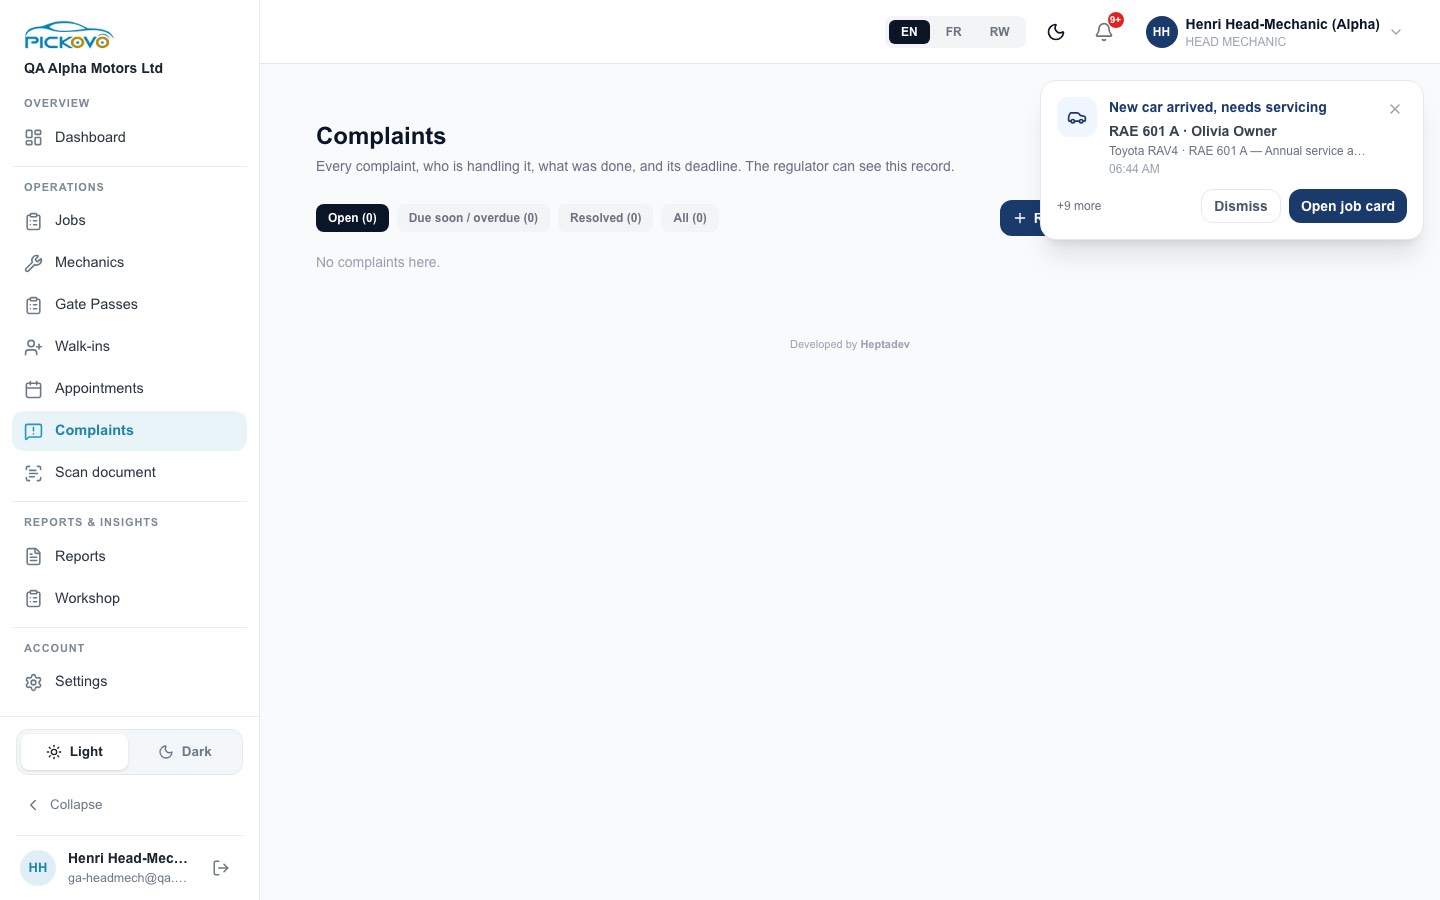
- Select Complaints, then Record complaint.
- Enter the customer name, phone and email, the Category (poor repair quality, delay, unexpected charge, parts, warranty not honoured, staff conduct, other), the Related job card, Assign to, Respond by (14 days by default) and What is the complaint?.
- Select Record complaint.
On a complaint you can add notes to the Follow-up log, reassign it, change the deadline, resolve it (saying how) and reopen it with a reason.
C10. Reports
Purpose: job performance and quality figures for your garage. Revenue is hidden from your role.
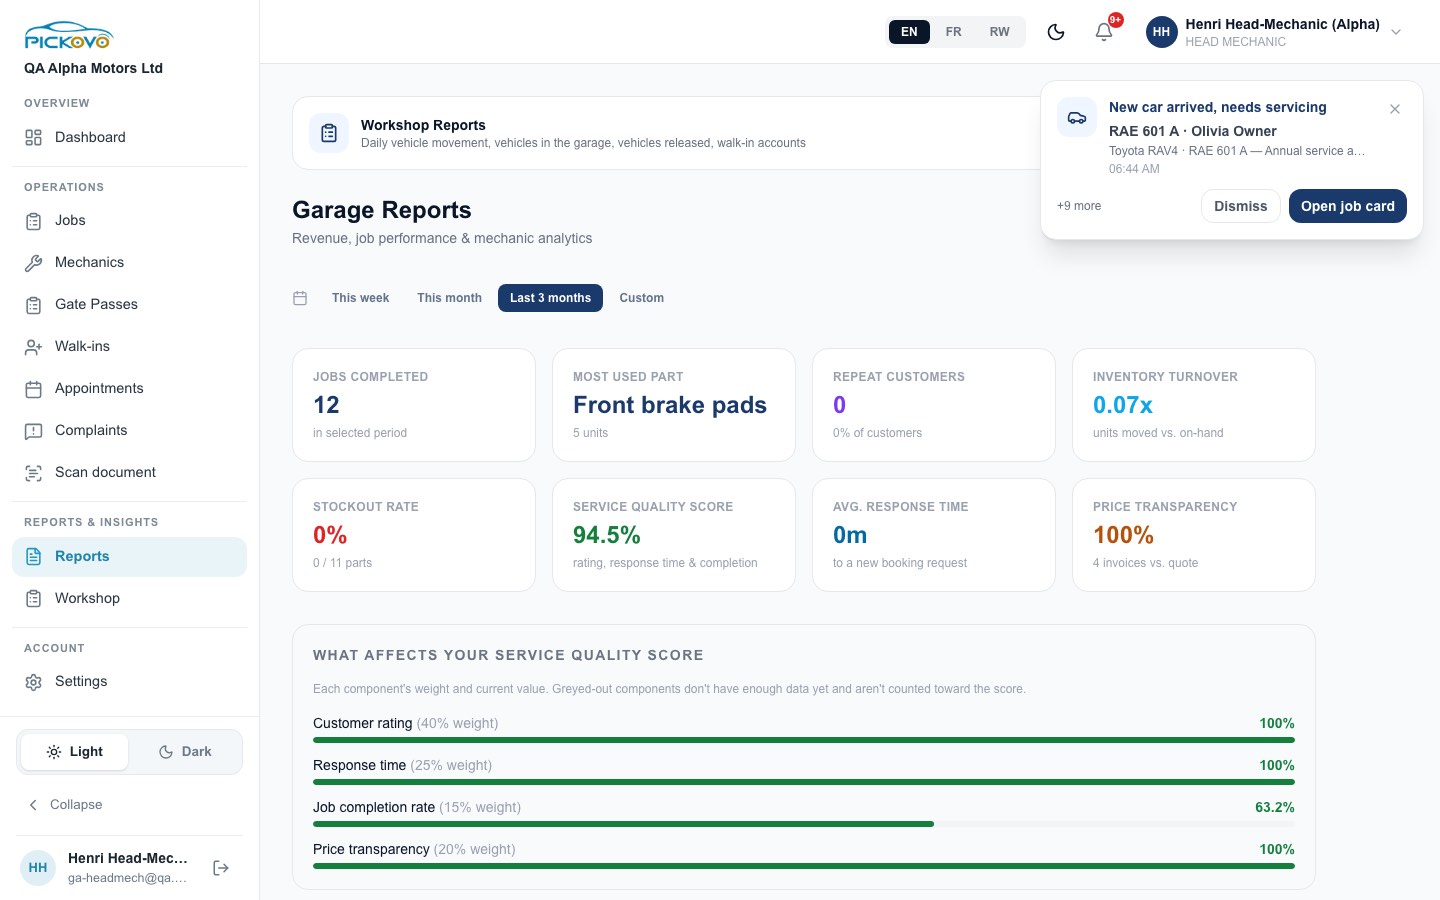
- Choose a period: This week, This month, Last 3 months or Custom.
- The tiles show jobs completed, most used part, repeat customers, inventory turnover, stock-out rate, service quality score, average response time and price transparency.
- What affects your service quality score shows each part of the score (customer rating 40%, response time 25%, job completion rate 15%, price transparency 20%). Greyed-out parts do not have enough data yet.
- The Workshop Reports banner at the top opens the workshop report.
C11. Workshop reports
Purpose: daily vehicle movement, what is on the yard, and what went out.
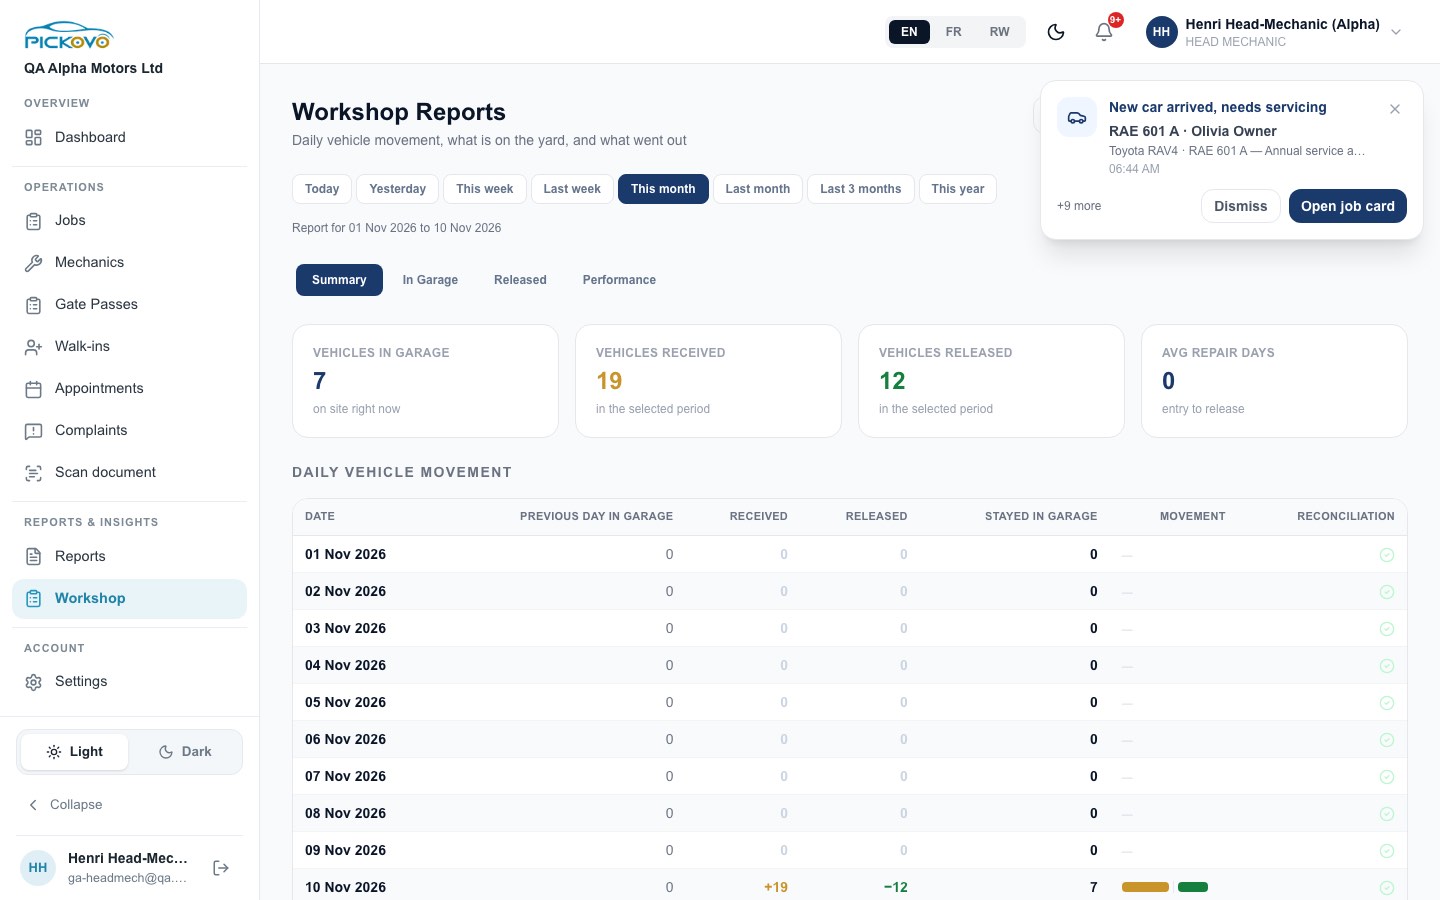
- Select Workshop.
- Pick a period (Today through This year).
- Use the tabs: Summary, In Garage, Released and Performance.
- Use Filters to narrow by technician, client or garage, then Export PDF or Export Excel.
On the Performance tab you can Add observation for a day (for example "Of the 14 trucks, 2 will be released…"). Money figures and the daily end-of-day report are not shown to your role by default.
C12. Reviews
Purpose: read what car owners said about finished jobs in the Pickovo app. Open it at /garage/reviews.
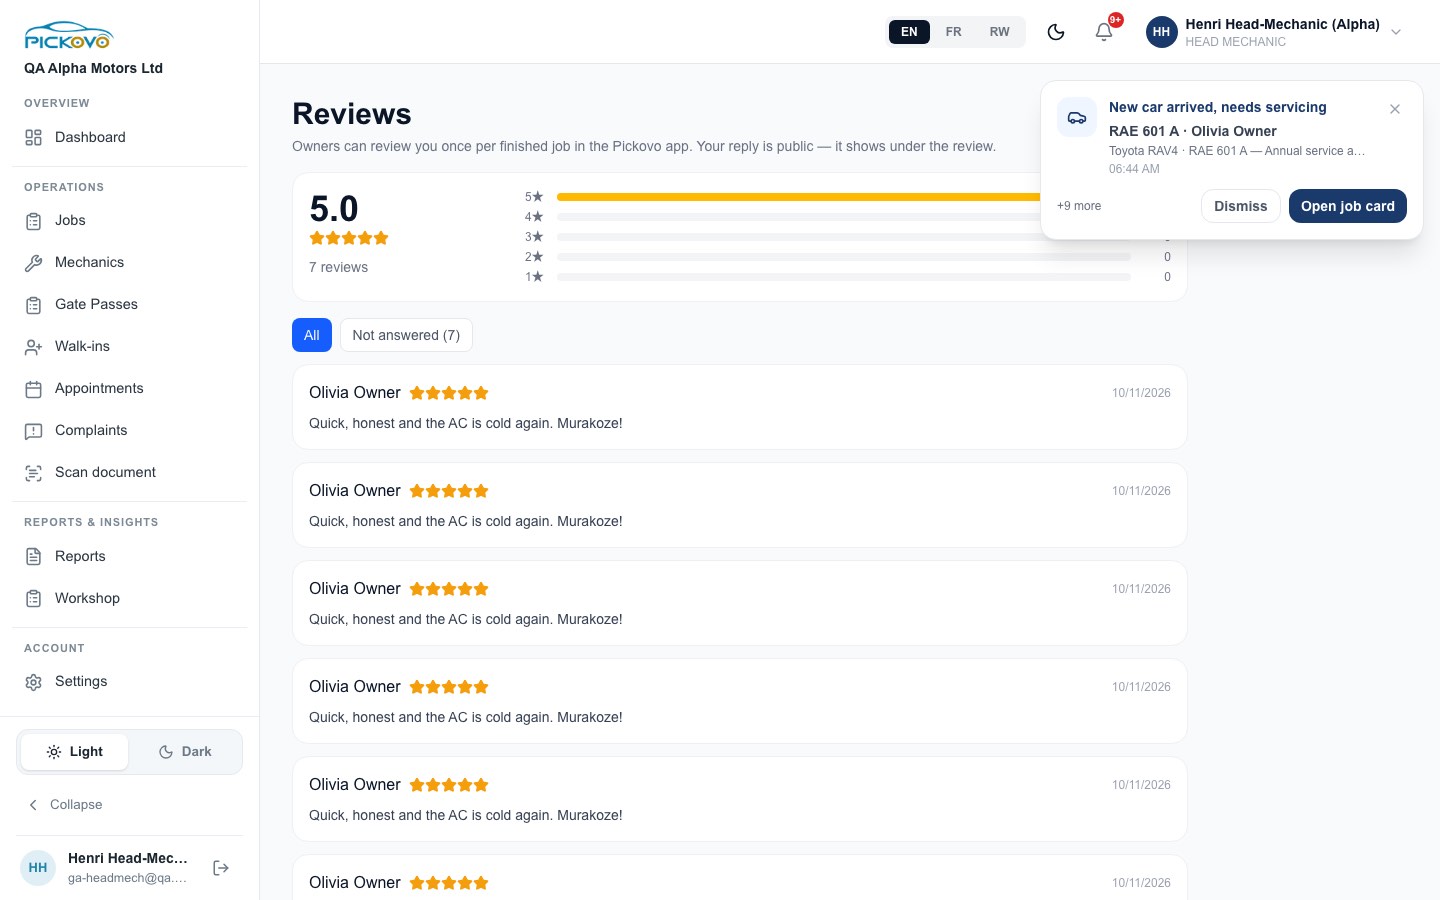
You can see the rating breakdown and filter by All or Not answered. Replies are public and are written by the garage admin or the receptionist. As head mechanic you can read reviews but not reply.
C13. Car-owner app features (switched on per garage)
Accident reports, Messages, Pickups and Roadside help serve car owners who use the Pickovo app. Every garage feature is off by default, and Pickovo turns each one on per garage. When a feature is off, the page says so:
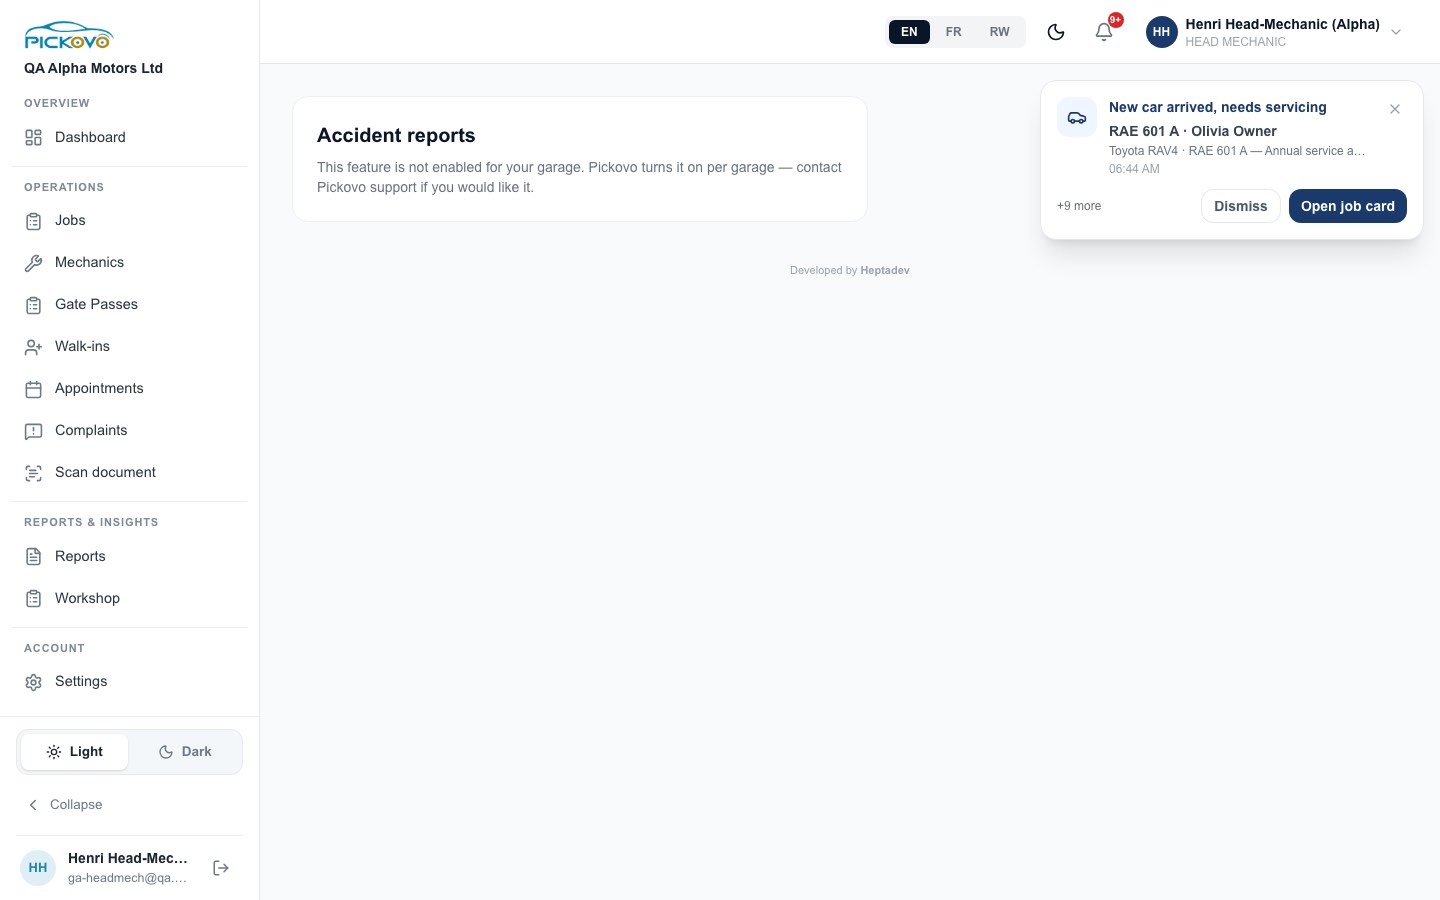
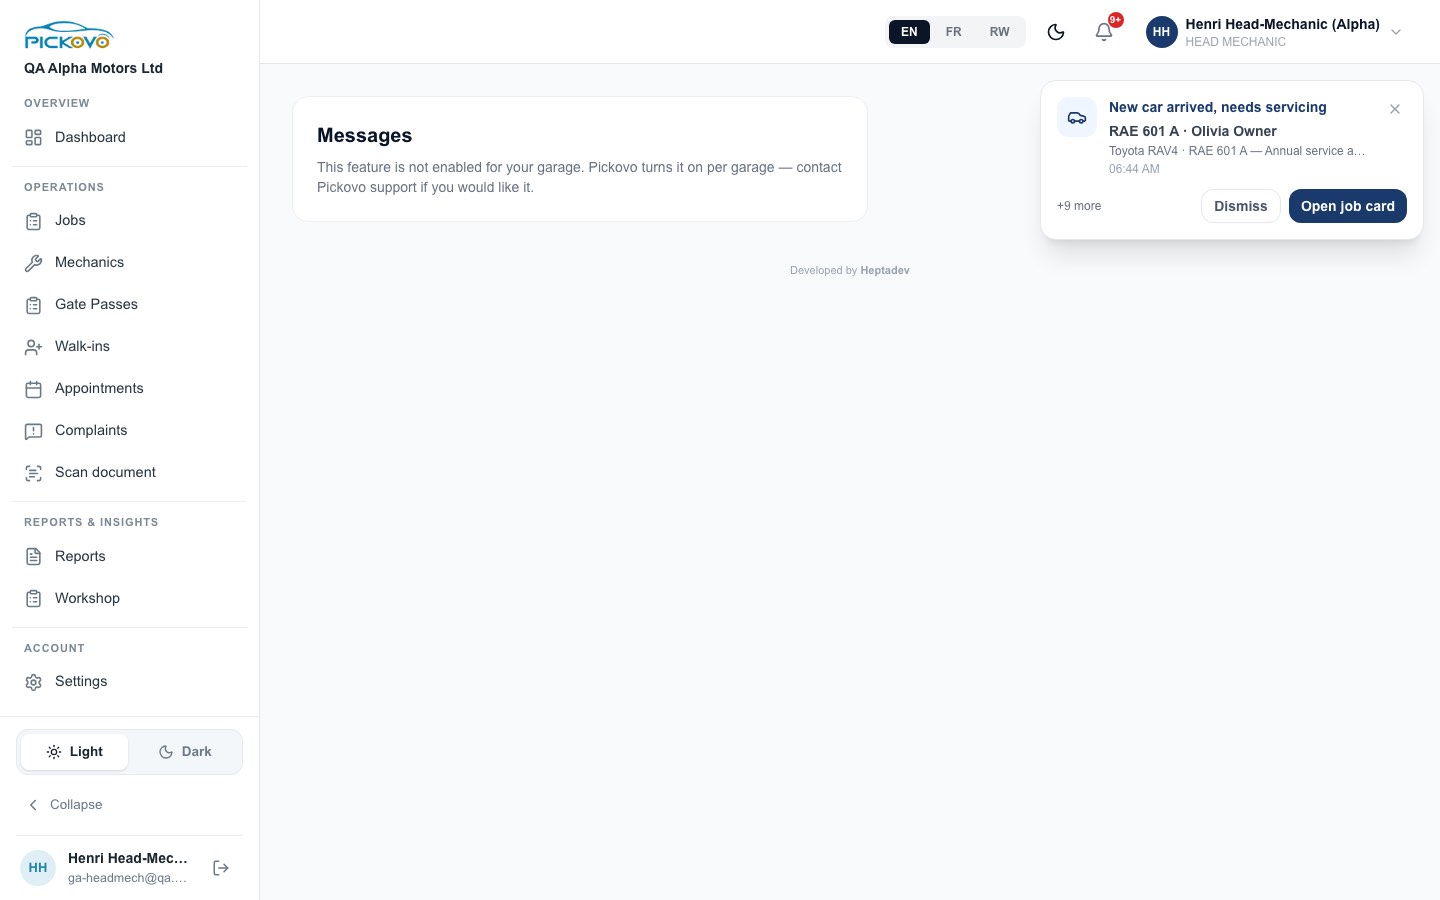
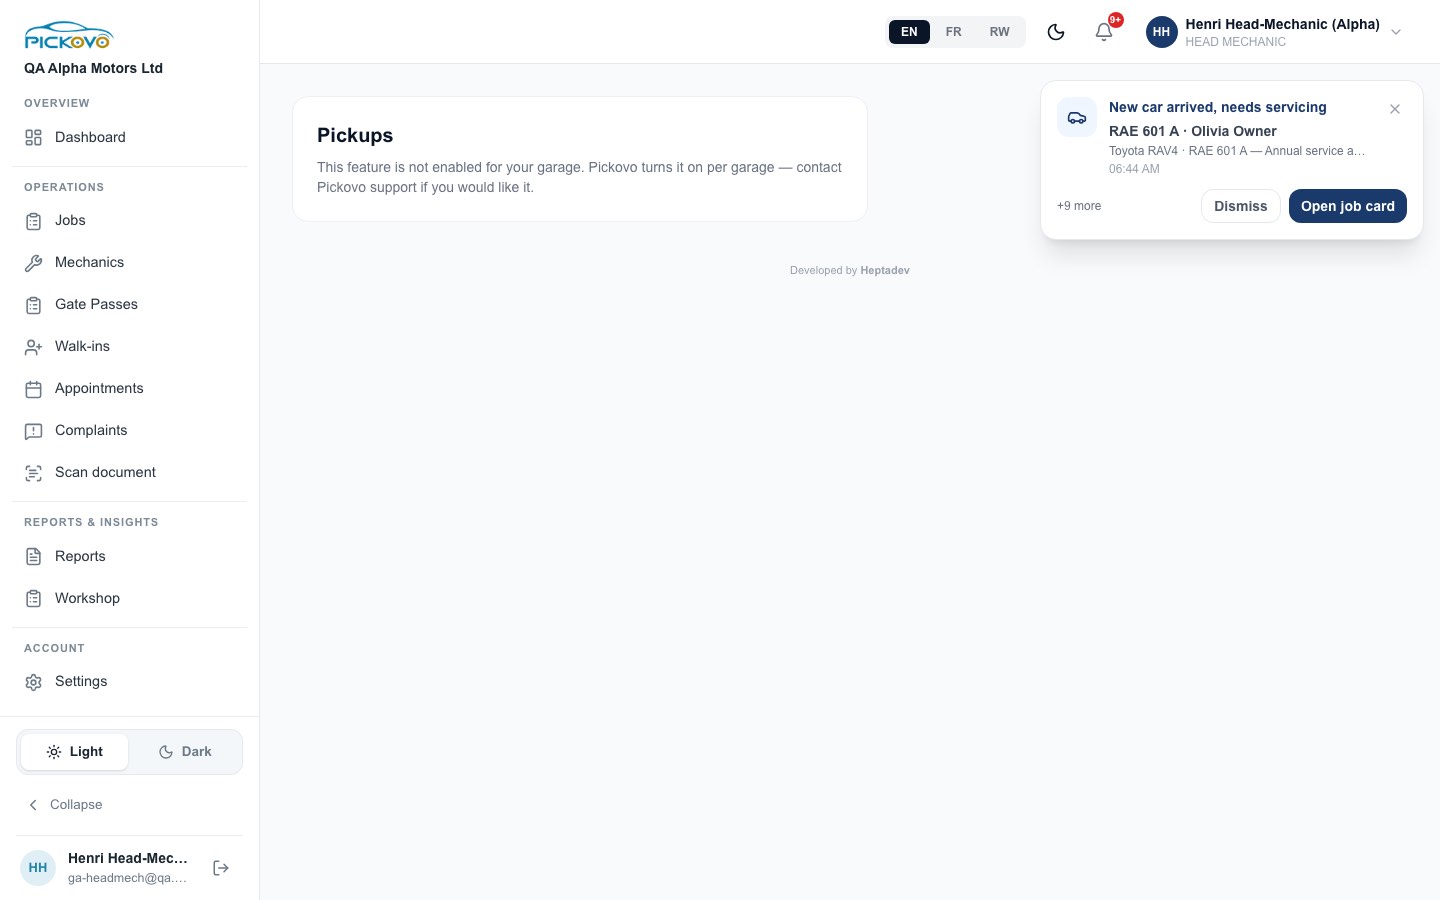
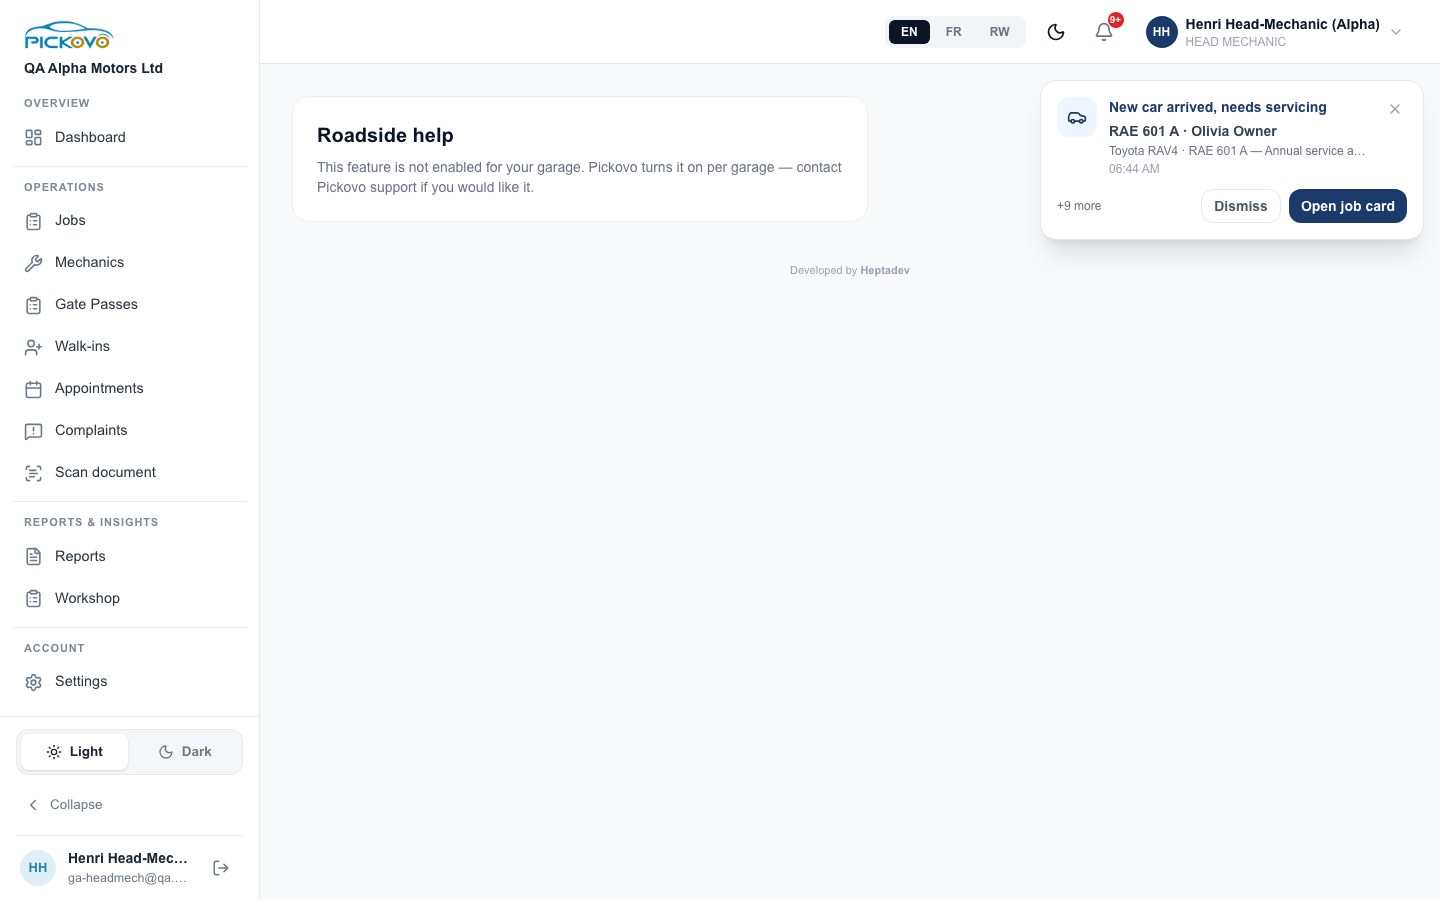
Your role is allowed to open these pages. Whether they work depends only on the feature switch. Ask your garage admin to contact Pickovo support if your garage needs one.
C14. Scan document
Purpose: turn a photo of a paper document into editable text.
- Select Scan document.
- Take photo or Upload image (JPEG, PNG or WebP, up to 10 pages).
- Select Extract text, then check the result carefully. The AI can misread names, numbers and dates.
- Give the document a title, save it if you want, and download it as a PDF.
Pictures are not stored. Only the text you choose to save is kept.
C15. Your personal settings
At /settings you can:
- update your Personal Information (full name, email, phone number);
- use Change Password (enter your current password, then the new one twice);
- keep your own skills and availability up to date;
- delete your account.
The Notifications settings page (/settings/notifications) controls how you are notified.
D. What you can and cannot do
Based on the measured page-access results for the head-mechanic test account and the default permissions. Your garage admin may have changed these.
| Area | View | Create | Edit | Delete / Archive | Approve / sign off | Notes |
|---|---|---|---|---|---|---|
| Jobs board and job cards | Yes | Yes | Yes | Yes archive finished jobs | Yes quality check, close | Moves follow the status table in C2 |
| Assign mechanics, technicians, tasks | Yes | Yes | Yes | Yes remove | - | |
| Diagnosis | Yes | Yes | - | - | - | Saving sends it for approval |
| Quotations | Yes | Yes | Yes (until approved) | - | Yes walk-in customer approval only | Sending to a fleet is for the admin |
| Invoices | Yes the one you generate | Yes from a completed job | - | - | - | No invoice list, payments or edits |
| Part requests | Yes on the job | Yes | - | Yes withdraw your own pending request | - | The stock room approves |
| Mechanics roster | Yes | Yes without login | Yes skills | - | - | Logins are admin-only |
| Walk-in customers | Yes | Yes | Yes including merge | - | - | |
| Appointments | Yes | Yes | Yes change time | Yes cancel | Yes confirm | |
| Gate passes | Yes | Yes | - | - | - | Admin approves and closes |
| Complaints | Yes | Yes | Yes assign, note, resolve, reopen | - | - | |
| Reports, Workshop reports | Yes | Yes observations | - | - | - | No revenue |
| Reviews | Yes | - | - | - | - | No replies |
| Notifications, Scan document, own Settings | Yes | Yes | Yes | - | - |
Cannot access (default): Invoices list, Inventory (and its stock movements, part-request queue, purchase orders and change requests), Deadstock, Suppliers, Spare parts, Marketplace, Expenses, Incentives, Supplier report, Compliance, Certification, Garage Family, Garage Settings and Roles, Activity log, Billing, and the mechanic app (/mechanic). Opening one of these sends you back to your dashboard. The Marketplace page sends you back even if the related permission is granted, because it checks a narrower permission of its own.
E. Common workflows
E1. A fleet vehicle repair (from issue to payment)
Before you: a fleet driver reports a problem. The fleet manager approves it and sends the job to your garage, where it arrives as New. You receive a "New car arrived" alert.
- Accept (you or the receptionist): open the job, select Accept Job, record the check-in details and select Confirm.
- Assign: choose the mechanic under Assign Mechanic and select Assign. The mechanic can now open the job.
- Diagnose (mechanic): the mechanic starts the diagnosis and files it. The job moves to Awaiting Approval.
- Quote (you or the admin): prepare the quotation with Create / Edit Quotation and select Save Draft. The garage admin sends it to the fleet.
- Approval (fleet manager): the fleet approves the quotation and the repair starts.
- Repair (mechanic): the mechanic takes parts from stock and works the job, then selects Send to Quality Check. The mechanic cannot pass their own quality check.
- Quality check (you): inspect the work. Select Pass Quality Check to complete the job, or Fail, Send Back to return it for rework.
- Invoice (cashier or you): select Generate Invoice on the completed job.
After you: the admin sends the invoice to the fleet and the cashier records the payment. The job is then closed with Close Job (you can do this once the invoice exists).
E2. A walk-in customer, start to finish
- Select Walk-ins, then Add Customer. Fill in the customer and vehicle details and select Save Customer.
- Select + New Job on the customer's row. Enter the title and description and select Create Job.
- On the job card, select Accept Job and record the check-in.
- Either select Start Work Now (when there is nothing to quote), or select Start Diagnosis, record the diagnosis, then build the quotation and present it to the customer.
- When the customer agrees, select Customer Approved, Start Work on the quotation.
- The mechanic repairs the vehicle and sends it to Quality Check. You pass or fail it.
- Select Generate Invoice. The cashier collects the payment.
- Select Close Job. If the car is leaving the yard, create a Gate Pass with Auto-fill from Job Card.
E3. Getting parts for a job
- On a job that is Accepted, Diagnosing, Awaiting Approval, In Progress, Paused or Quality Check, either request the part in the Parts panel (search for it, or request a part that is not on the shelf by name), or use Scan requisition to upload a paper requisition and select Submit.
- The stock manager is notified and approves or rejects the request. Stock is only taken off the shelf when they approve. A rejection always gives a reason.
- The approved and issued parts appear on the job and later on the invoice.
You cannot request parts for a job that is Completed, Closed, Declined or archived. You can withdraw your own request while it is still pending.
F. Troubleshooting
| What you see | Why | What to do |
|---|---|---|
| You are sent back to the dashboard when you open a page | Your role does not hold the permission for that page | Ask your garage admin. Permissions are set under Settings → Roles. |
| "This feature is not enabled for your garage" | Pickovo switches car-owner features on per garage | Ask your garage admin to contact Pickovo support. |
| Sign-in refused after many attempts | 10 wrong passwords within 15 minutes pauses sign-in | Wait, then try again, or use Forgot password?. |
| "Cannot transition from X to Y" | That move is not allowed for your role (see C2) | Use the next allowed step. A job must go to Quality Check before Completed. |
| "This job is paused. Resume it before changing its status." | Paused jobs cannot move | Select Resume Job first. |
| "A mechanic must record a diagnosis before this job can be approved at Quality Check." | A head mechanic can only pass a quality check on a job that has a diagnosis on record | Record the diagnosis first, or have the mechanic record it. |
| "This job needs an invoice before it can be closed." | Closing requires an invoice | Select Generate Invoice, then close. |
| "This job has already moved to …" | Someone else moved the job at the same time | Refresh the page and check the job's current status. |
| "Only an admin can give a mechanic a login" | Login accounts are admin-only | Add the mechanic without a login, or ask the admin. |
| Send to Fleet, sharing or the Sign button on an invoice gives an error | Those steps belong to the admin, front desk or cashier | Hand over to the right person. |
| Generate Invoice fails | The garage's Pickovo plan or trial is not active, or the plan's invoice quota is used up | Ask your garage admin. |
| Work Log text has disappeared | The Work Log box is not saved in this build | Use the Notes panel. |
| The diagnosis page sends you back to the job | The form only opens while a job is Accepted or Diagnosing | Check the job's status. |
| A head mechanic is missing from the Mechanics page | That page lists the Mechanic role only | They can still be assigned from the job card. |
G. Security and best practices
- Keep your sign-in to yourself. Never share your password. Each action on a job (accept, assign, quality check, invoice) is recorded under your name.
- Use a strong password and change it under Settings → Change Password if you think someone else knows it.
- Two-factor authentication: if two-factor is switched on for your account, keep your authenticator app on a phone only you use. In this build, the screen that switches two-factor on is only on the garage admin's settings page.
- Log out on shared workshop computers (select your name, then Logout, or use Logout in the menu).
- Respect separation of duties. Pickovo stops a mechanic from passing their own quality check. As supervisor, do the inspection properly before selecting Pass Quality Check, and do not use your access to push your own repairs through without review.
- Check AI results. Diagnosis suggestions, requisition scans and scanned documents are read by AI and can be wrong. Check names, numbers and quantities before saving.
- Protect customer data. Phone numbers, plates and customer progress links are personal data. Share a progress link only with the vehicle's customer.
- Keep your phone number in the same format your admin registered (for example +250…). Changing its format can affect phone sign-in.
- Report anything unexpected, such as a page showing another garage's data, to your garage admin straight away.