
Garage · MECHANIC
Mechanic
For workshop technicians who repair the vehicles they are given.
All names, plates, garages and amounts in the screenshots are fictional test data (for example "QA Alpha Motors", "Moses Mechanic (Alpha)" and plate "RAD 101 Q"). They are not real customers or vehicles.
A. Introduction
What the Mechanic role is for
As a mechanic in Pickovo, you work on the jobs your garage gives you. Pickovo gives you a simple workspace, the mechanic app, that shows only your own jobs. For each job it tells you which car to work on, what is wrong and the one next thing to do.
Your responsibilities
- Accept the jobs offered to you, then find the problem (diagnose it).
- Record what you found, with photos, so the front desk can price the work and ask the customer.
- Do the repair once the work has been approved.
- Ask the stock room for the parts you need.
- Stop the job and give the reason when you are waiting for something.
- When the repair is finished, send it for checking. A supervisor then checks your work. You cannot pass your own quality check.
- Raise gate passes when a vehicle has to leave the premises.
What you can do in Pickovo
- See your open jobs, today's numbers and what to do next on your Dashboard.
- Work each job from My Jobs, on a phone or a computer, even when the internet drops for a while.
- Request parts and follow each request until the stock room issues the part.
- Tag a colleague on a job to ask for help.
- See your booked jobs on a calendar (Appointments, shown as "My Schedule").
- Create gate passes.
- Read notifications about your jobs and parts.
- Turn paper documents into text with the Scan document tool.
B. Getting started
Signing in
- Open https://fleet.heptadev.com/en/login. For French, use
/fr/login. For Kinyarwanda, use/rw/login. You can also switch language with the EN / FR / RW buttons at the top right of the page. - In Email or Phone, enter the email address or phone number your garage registered for you.
- Enter your Password. Click the eye icon if you want to check what you typed.
- Click Log in.
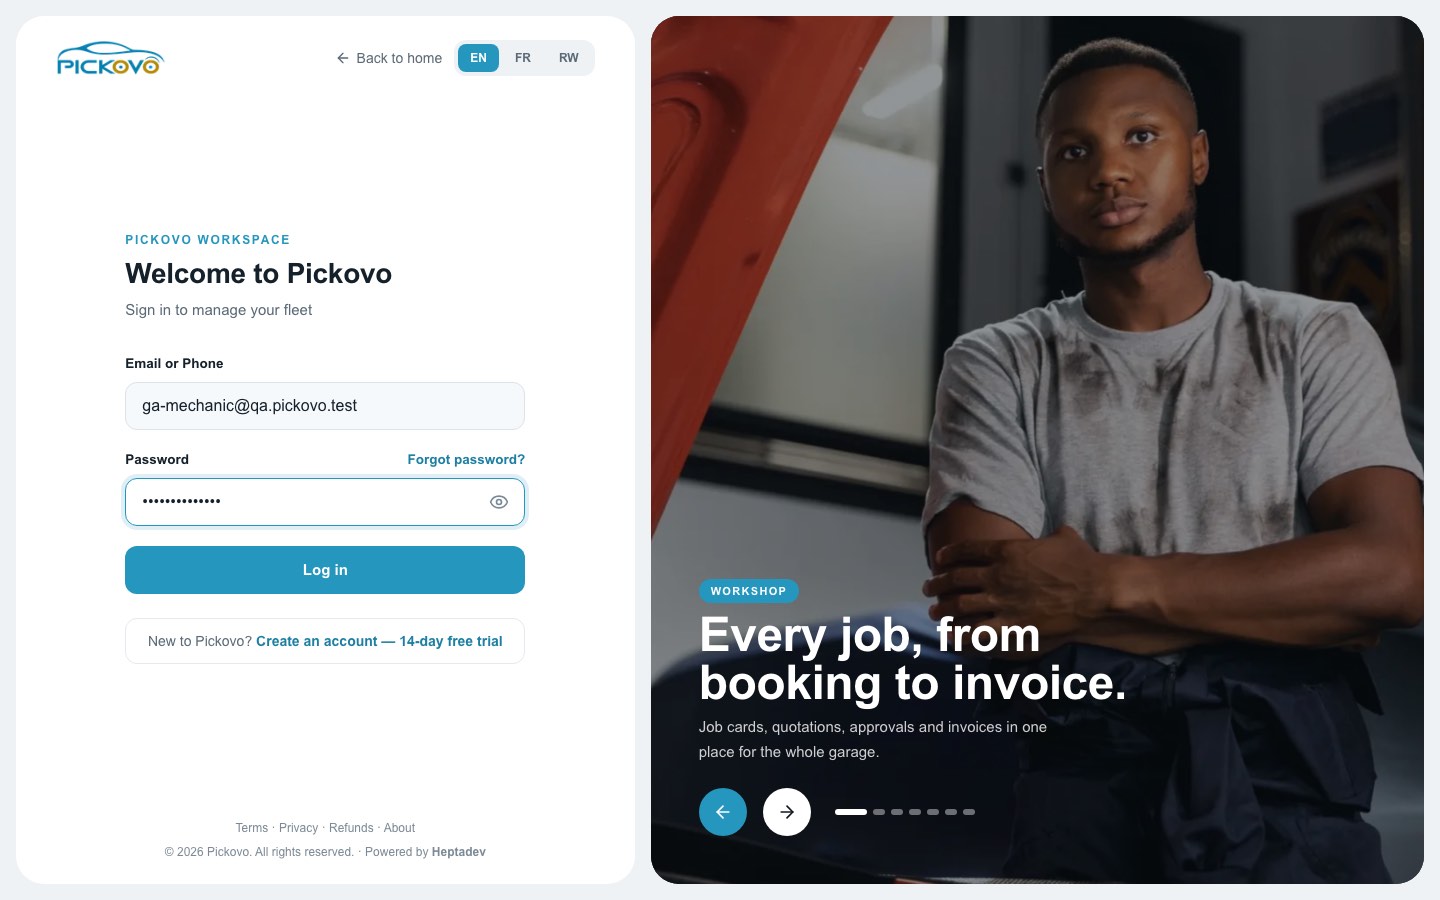
Figure 1: The Pickovo sign-in page.
- Forgot password? Use this link on the sign-in page to reset your password.
- Too many wrong passwords. After 10 wrong passwords within 15 minutes, Pickovo pauses sign-in for your account. Wait, then try again, or use Forgot password?.
- Not for mechanics. You do not need Create an account, 14-day free trial. That link is for new businesses. Your garage admin creates your account.
When you sign in, Pickovo opens your mechanic Dashboard (/mechanic).
First look at the Dashboard
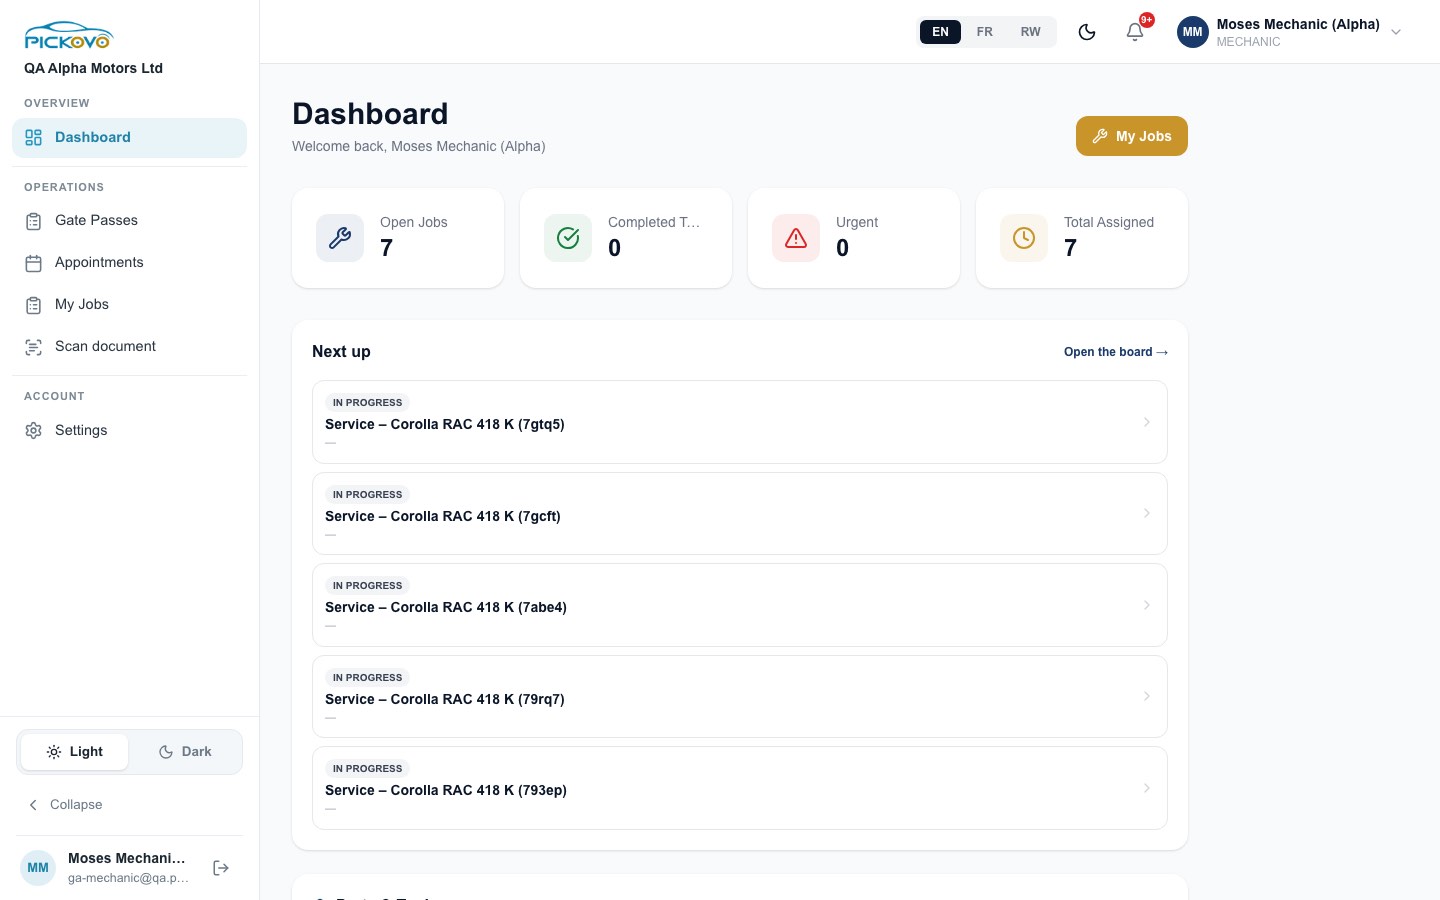
Figure 2: The mechanic Dashboard: four counters, the My Jobs button and the Next up list.
The Dashboard is a summary of your day:
| Item | What it shows |
|---|---|
| Open Jobs | Your jobs that are new, being diagnosed, waiting for approval or being repaired |
| Completed Today | Your jobs that reached "completed" today |
| Urgent | Your urgent jobs that are accepted, being diagnosed or being repaired |
| Total Assigned | All your jobs that are not closed |
| My Jobs (gold button) | Opens your full job list |
| Next up | Up to five jobs that need you now (new, diagnosing or in progress), urgent first. Click a row to open the job |
| Open the board → | Opens My Jobs |
Further down the page is a read-only parts and tools panel. Mechanics have no Inventory menu, so this panel tells you whether the parts you are waiting for have arrived. It lists:
- recent part requests, marked Requested, Ordered or In store
- the latest stock movements
- parts that are running low
Navigation overview
The left-hand menu (sidebar) contains:
| Section | Item | Goes to |
|---|---|---|
| Overview | Dashboard | Your summary (Figure 2) |
| Operations | Gate Passes | The garage's gate passes |
| Operations | Appointments | "My Schedule", a calendar of your booked jobs |
| Operations | My Jobs | Your job list, where you do the work |
| Operations | Scan document | The AI document scanner |
| Account | Settings | Your profile, password, skills and notification choices |
At the bottom of the sidebar are the Light / Dark switch, Collapse (shrinks the sidebar to icons; point at an icon to see its name), and your name and email with the log-out button.
The top bar contains:
- the EN / FR / RW language switch
- a light/dark toggle (moon icon)
- the notification bell, with a red badge that shows how many notifications are unread
- your name and role, with a menu
C. Features
C.1 Notifications
Purpose: see what has happened on your jobs. For example, you were made lead on a job, a parts request was seen or issued, or a job changed stage.
Steps
- Click the bell icon in the top bar.
- Use All or Unread to filter the list. Use the All types drop-down to show one kind of notification.
- Click a notification. Pickovo marks it as read and, when it is linked to a job or request, opens that item.
- Click Mark all as read to clear the unread count.
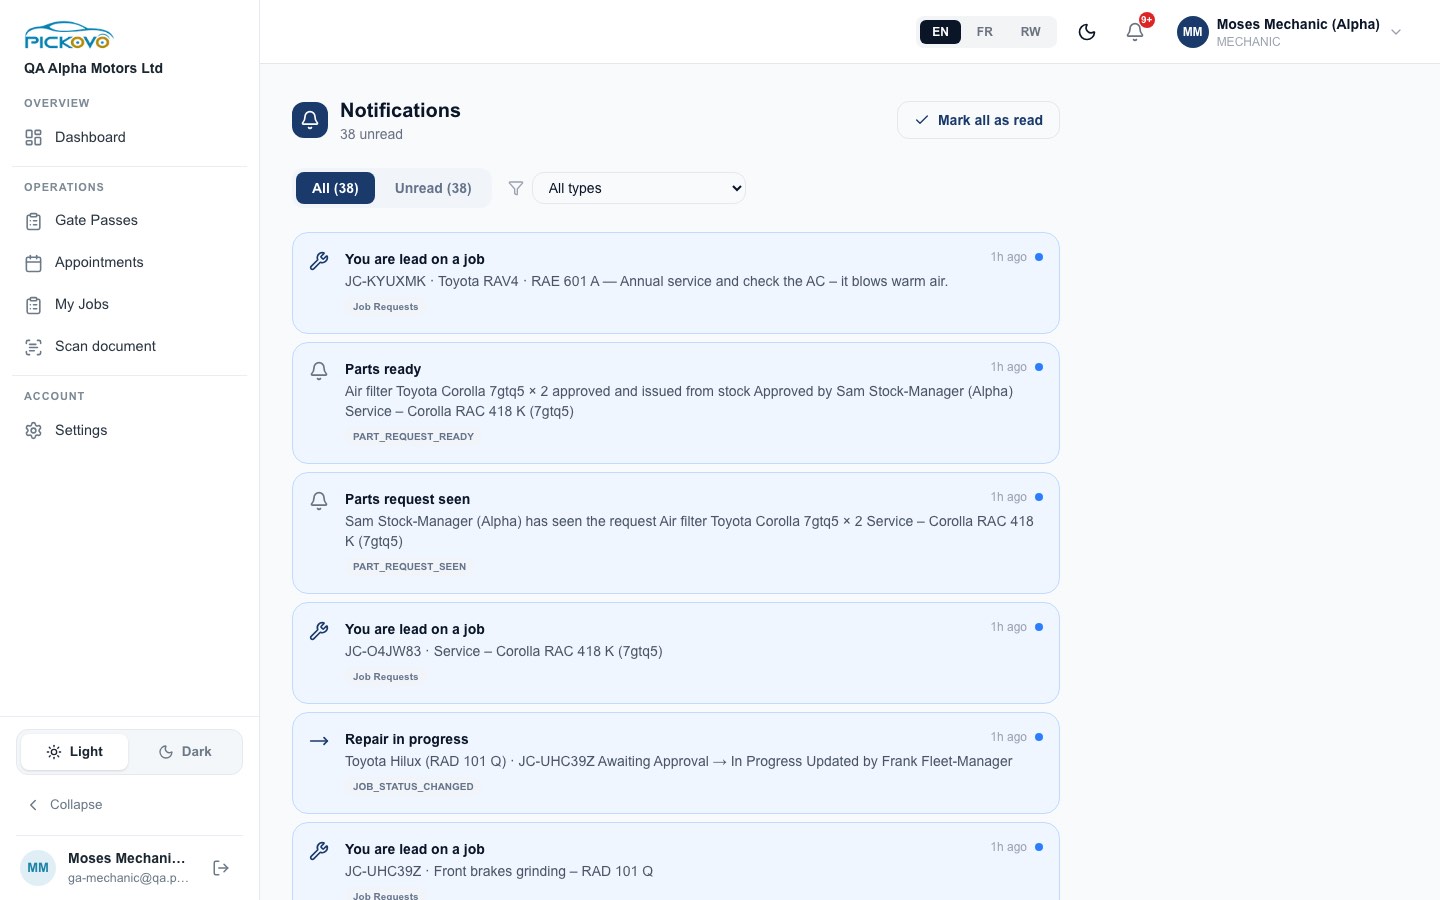
Figure 3: Notifications: "You are lead on a job", "Parts ready" and "Parts request seen" messages.
What you can expect to see
| Notification | Meaning |
|---|---|
| You are lead on a job | A job has been assigned to you |
| Parts request seen | The stock manager has opened your request |
| Parts ready | Your part was approved and issued from stock |
| Repair in progress (job status changed) | Someone moved one of your jobs, for example after the customer approved the price |
You can choose which notifications you receive under Settings (see C.9).
C.2 My Jobs (your job list)
Purpose: see all your jobs in one place and do the next step on each, straight from the list.
Steps
- Click My Jobs in the sidebar, or the gold My Jobs button on the Dashboard.
- Jobs are grouped as follows:
- Working now: you are diagnosing or repairing.
- My jobs: offered to you or newly accepted.
- Waiting: waiting for approval, stopped, or being checked.
- Finished: folded away. Click the bar to show these jobs.
- Each card shows:
- the plate (large)
- the vehicle
- the customer's complaint
- the status in plain words, with an icon
- an Urgent label, if the job is urgent
- Press the big dark button to do the next step, for example Repair done, send for checking. Some steps need the job screen, such as recording findings or continuing a stopped job. For those, the button opens the job.
- Click Open job to see the whole job.
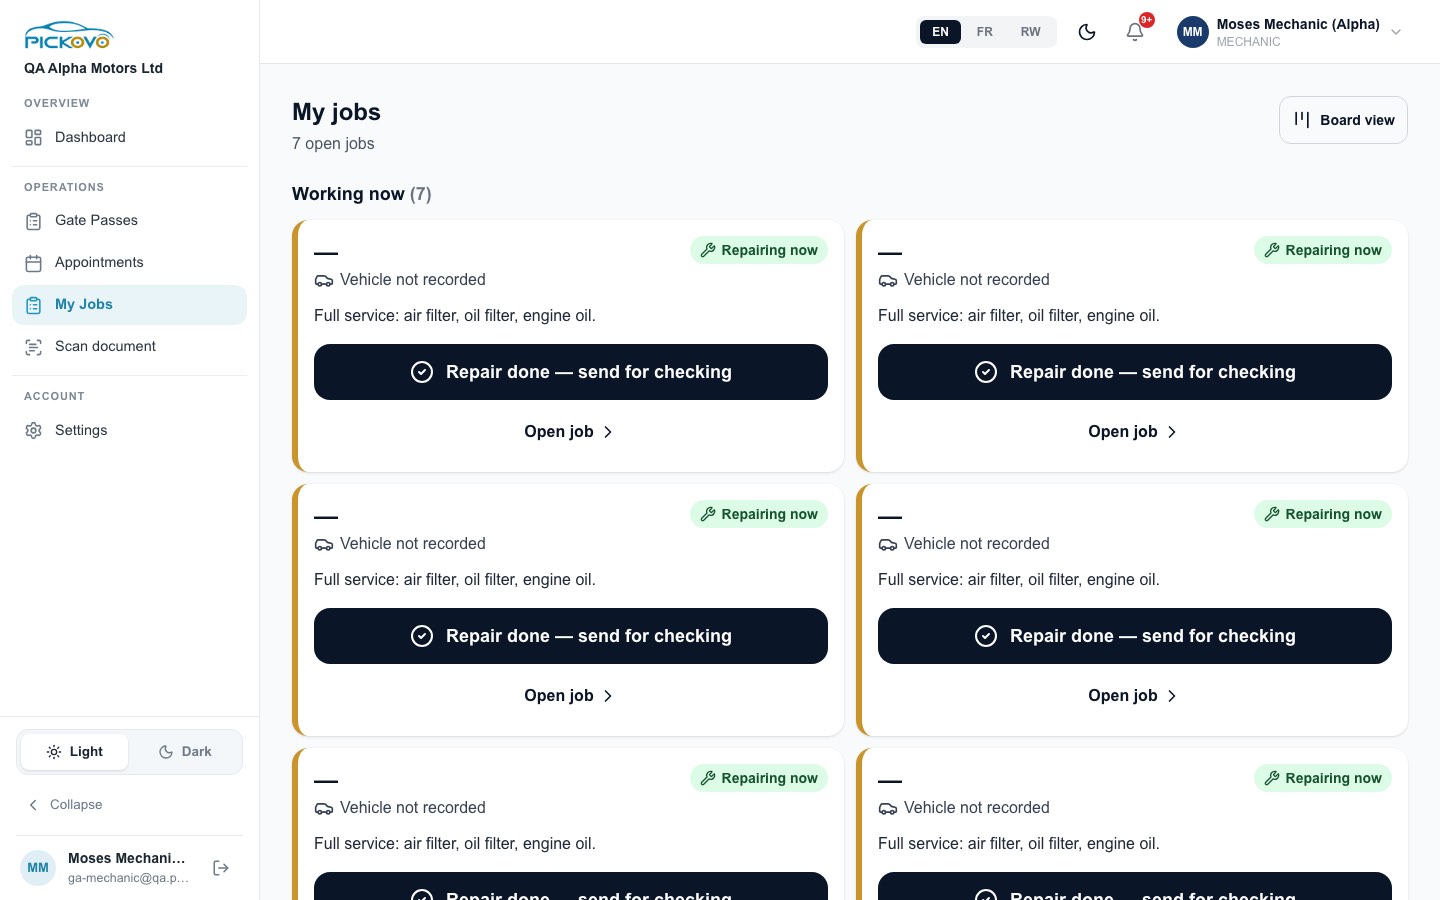
Figure 4: My Jobs, "Working now" group: each card offers "Repair done, send for checking" and "Open job".
Buttons and labels
- Board view / Simple view (wider screens only): switches between these cards and a drag-and-drop board. On the board, you can only drop a card into a column you are allowed to move it to.
- Vehicle not recorded: the front desk did not record a vehicle on this job. Check the job description or ask the front desk.
- Yellow message on a card: you cannot act on the job yet. The message says why, for example "Waiting for the customer to agree the price."
Expected outcome: after you press a step button, the card's status changes and Saved appears. If you are offline, you see Saved on this phone. It will send when internet is back. (see C.3, "Working without internet").
The list updates by itself about every 8 seconds when a supervisor or another device moves one of your jobs.
Restrictions: you see only the jobs where you are the lead mechanic or a member of the job's team. You cannot see the garage-wide jobs board.
C.3 Working on a job (the job screen)
Purpose: everything you need for one car, on one screen. On a phone the sections run top to bottom. On a computer they are in two columns.
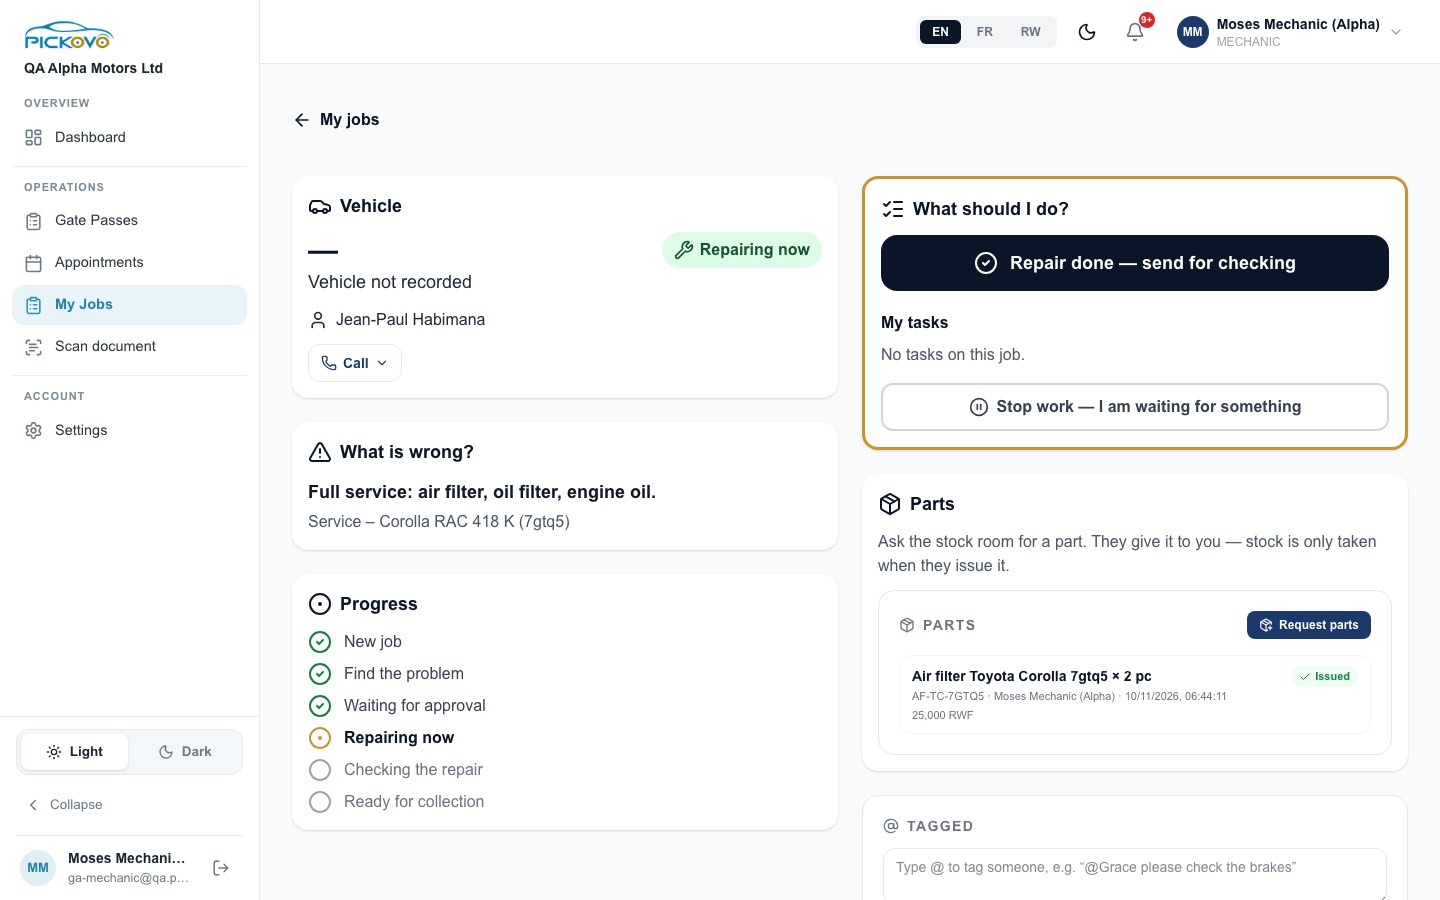
Figure 5: A walk-in job being repaired: Vehicle with customer name and Call button, What is wrong, Progress, What should I do (with "Stop work"), and Parts with "Request parts".
The sections
| Section | What it contains |
|---|---|
| Vehicle | Plate, vehicle and status. For a walk-in customer it also shows their name and a Call menu, which lets you phone them or send a text message. Shows odometer, fuel level and condition notes when these were recorded at check-in |
| What is wrong? | The customer's complaint. Once a diagnosis exists, it also shows Found by (name), each problem with its severity (Small, Medium, Serious), the notes and the photos |
| What should I do? (gold border) | The one next step for you, as a big button, or a message saying who acts next |
| Parts | Your part requests and the parts issued to this job (see C.4) |
| Tagged | Tag a colleague on this job (see C.5) |
| Progress | The job's stages: New job → Find the problem → Waiting for approval → Repairing now → Checking the repair → Ready for collection. Ticked stages are done; the gold dot is the current stage |
| More (at the bottom) | Notes, the inspection checklist, warranties, the job's history, and Open the full job card |
The next step for each stage
The "What should I do?" button follows the garage's fixed job rules:
| Job stage (as you see it) | What you can do |
|---|---|
| Waiting for the garage (offered to you) | Accept this job |
| New job | Find the problem (main button) or Start repair now |
| Find the problem | Record what is wrong, or No price needed, start repair when nothing needs the customer's approval |
| Waiting for approval | Nothing. "Waiting for the customer to agree the price. The front desk will tell you when to start." |
| Repairing now | Repair done, send for checking. You can also tick off My tasks here |
| Stopped | Continue work |
| Checking the repair | Nothing. "Your repair is being checked. A supervisor will do this." |
| Ready for collection / Finished | Nothing. The job is done |
Recording what is wrong (diagnosis)
- On a new job, press Find the problem. The job moves to "Find the problem".
- Press Record what is wrong.
- Tap every problem you found, for example Brakes, Oil / leak, Battery, Tyres, Suspension, Engine, Wiring / electrical, Cooling / radiator, Gearbox / clutch, Lights, Exhaust / smoke or Body / panel.
- For each problem, choose how bad it is: Small, Medium or Serious.
- Use Something else? for anything not in the list.
- Press Take a photo to add up to 5 photos. Add a Note if useful.
- Press Send findings.
Expected outcome: the job moves to Waiting for approval. The front desk prepares the price and asks the customer.
Your answers are saved on the phone as a draft while you type. If you are called away, nothing is lost. Sending findings and uploading photos need an internet connection.
For a fuller report, use Open the full diagnosis form (with AI suggestions). This link appears below the buttons while the job is new or being diagnosed.
Stopping and continuing work
- When you are waiting for something, press Stop work, I am waiting for something. This is available while the job is new, being diagnosed or being repaired.
- Choose a reason:
- Waiting for parts
- Waiting for customer approval
- Waiting for payment
- No bay available
- Technician unavailable
- With external supplier
- Other (a note is required)
- Confirm. The job shows "Stopped: reason".
- When you can carry on, press Continue work. The job returns to the stage it was at before you stopped it.
Stopping and continuing need an internet connection.
Finishing a repair
- Make sure your tasks are done. Under My tasks, tap your own tasks when you finish them.
- Press Repair done, send for checking. The job moves to Checking the repair.
- A supervisor (head mechanic or garage admin) checks the work. They then either mark the job completed or send it back to you for more repair.
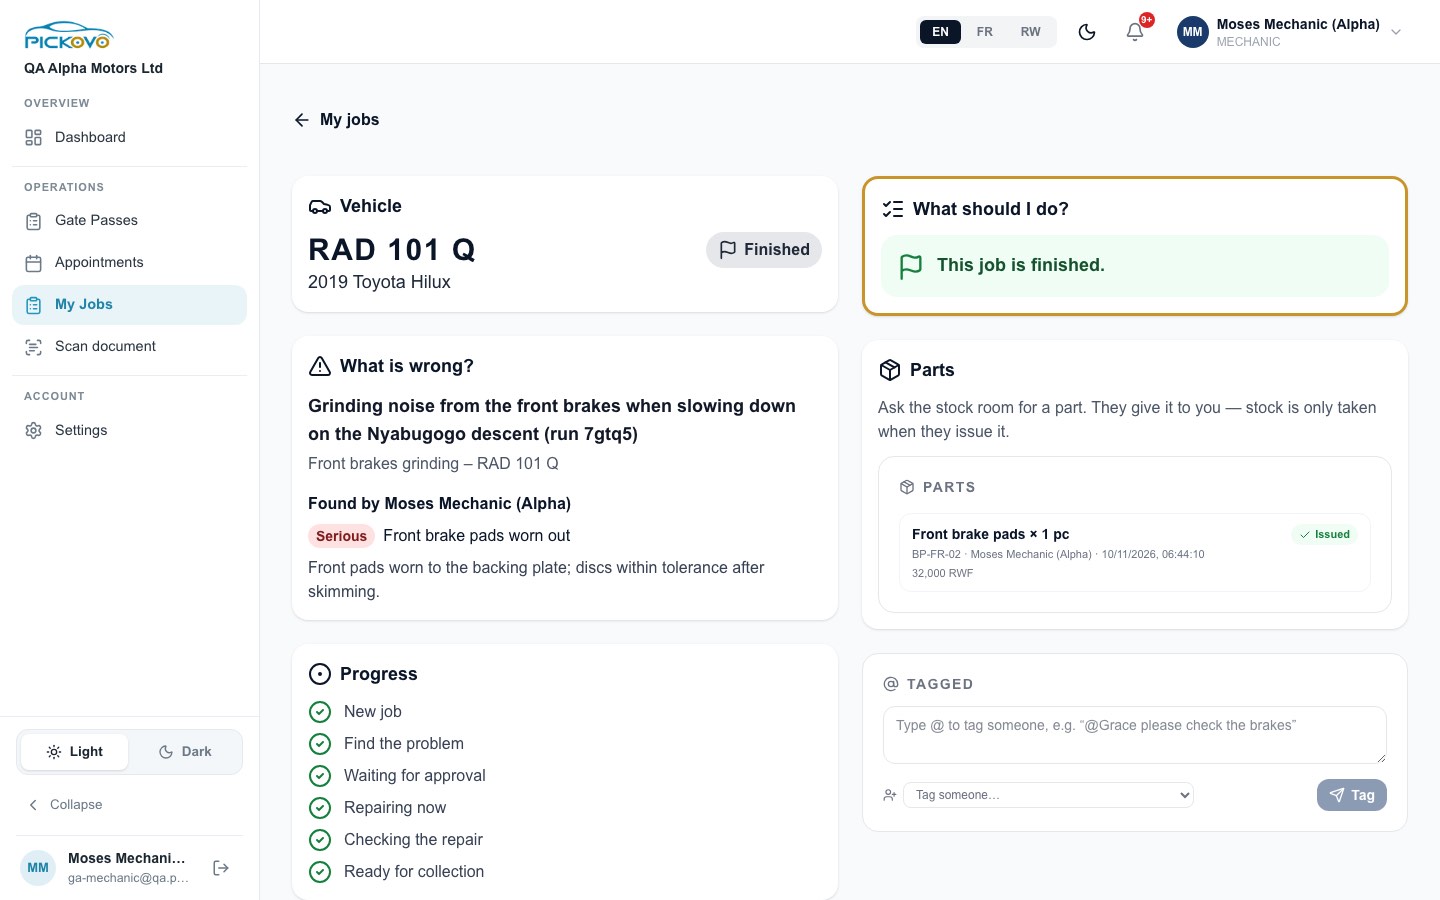
Figure 6: A finished job: every Progress stage is ticked, the diagnosis is shown under "Found by", and the issued brake pads are listed in Parts.
Working without internet
The sync bar at the top of My Jobs and the job screen shows your connection status:
- No internet. You can keep working. You are offline.
- Saved on this phone. Waiting for internet (n changes). Status changes you made offline are stored on the device and sent when the connection returns.
- This job has changed. Refresh to continue. A stored change was refused because someone else moved the job in the meantime. Refresh and check the job.
Restrictions on the job screen
- You can open a job only if you are its lead mechanic or a member of its team. Any other job shows "not found".
- You cannot decline a job. Turning work away is for the front desk or a supervisor.
- You cannot approve a quotation, pass a quality check, complete a job or close it.
- Once a job is completed, closed or declined, it is read-only for you. You cannot request parts or change its status.
C.4 Requesting parts
Purpose: ask the stock room for the parts a job needs. The stock room gives you the part, and stock is only taken off the shelf when they issue it.
Steps
- Open the job and go to Parts.
- Press Request parts.
- In Part, search by name, part number, SKU, supplier or shelf location, and pick the part.
- If the shelf has none, Pickovo warns "None on the shelf, the stock room will have to order it." You can still send the request.
- If the part is not in the list at all, you can add it by name. Pickovo creates the catalogue line with no stock so you can still request it.
- Enter How many. Optionally add a Note saying what the part is for.
- Press Send to stock, or Cancel to close the form.
What each status means
| Label | Meaning |
|---|---|
| Waiting for stock | The stock room has not answered yet. You can write to them or send a reminder in the request's message thread, or withdraw the request (the ✕ button) |
| Issued | The part was approved and taken from stock for this job |
| Declined | The stock room refused the request. Their reason is shown under the part |
| Withdrawn | You cancelled the request |
You are notified when the stock room sees your request ("Parts request seen") and when it is issued ("Parts ready"); see Figure 3.
Restrictions
- You cannot take parts off the shelf yourself or approve your own request. The stock manager or garage admin reviews it.
- Only the person who made a request can withdraw it, and only while it is still waiting.
- You cannot request parts for a job that is finished or archived. You also cannot use a part that belongs to another garage branch.
C.5 Tagging a colleague
Purpose: ask a supervisor or colleague to look at something on the job.
Steps
- In the Tagged box, type
@and start typing a name. You can also pick a person from Tag someone…. - Write your message, for example "@Grace please check the brakes".
- Press Tag.
The person is notified that they were tagged on the job. Tapping the notification opens the job.
C.6 Appointments (My Schedule)
Purpose: see when your jobs are booked, on a calendar.
Steps
- Click Appointments in the sidebar. The page is titled My Schedule.
- Switch between Month and Week view. Use ‹ and › to move between periods, and Today to come back to today.
- Each entry shows the vehicle and plate. If a day has more entries than fit, click +n more to see them all.
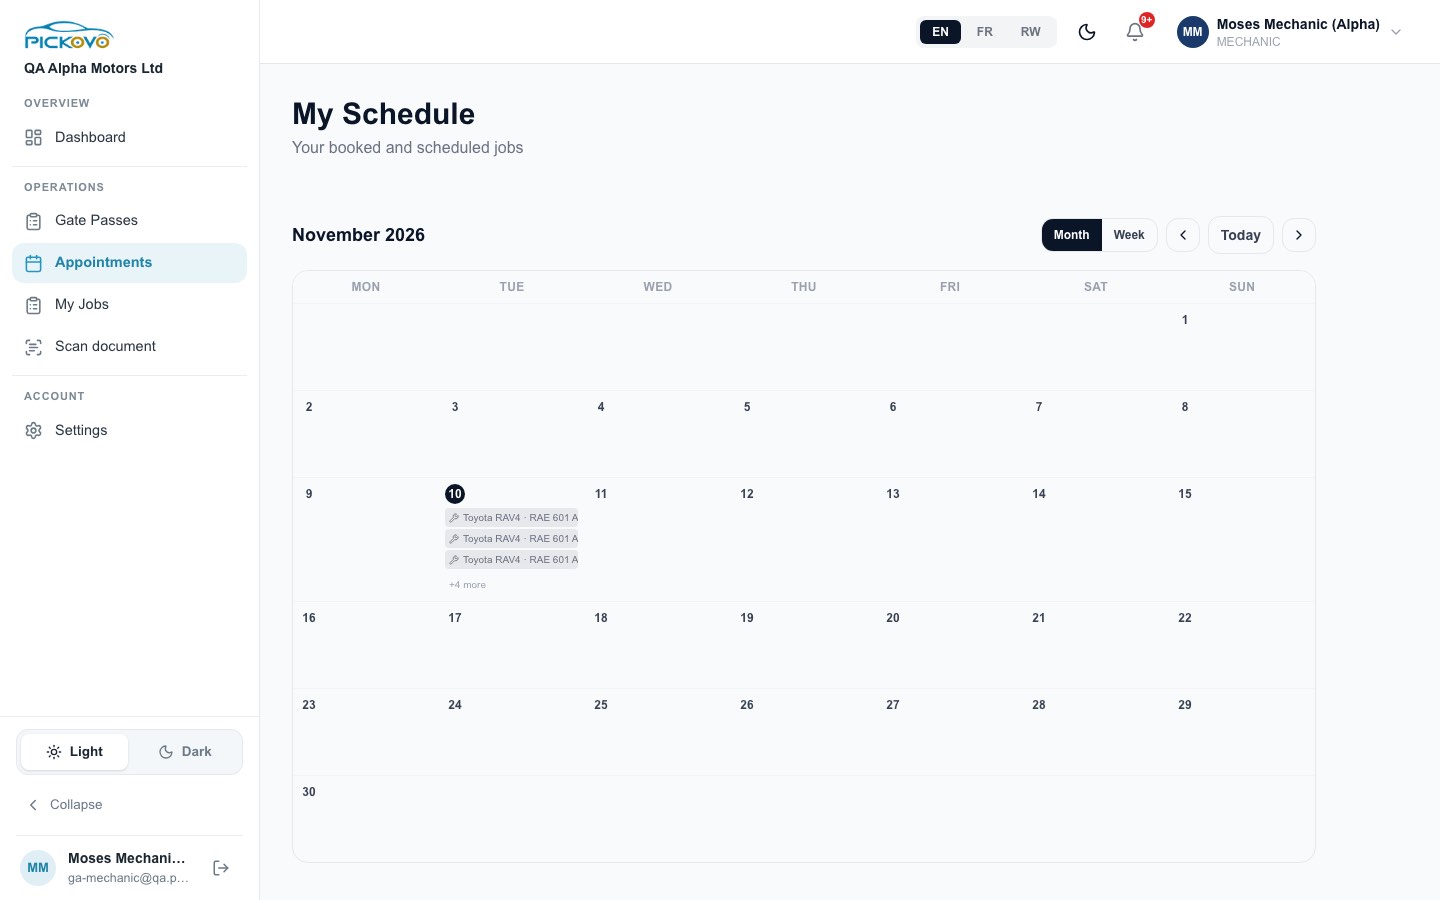
Figure 7: My Schedule in month view, with booked jobs on 10 November.
Restrictions
- You see only jobs assigned to you, from three months back to six months ahead. You do not see the garage's list of car-owner bookings.
- You cannot create appointments. New Appointment is not shown to mechanics.
- To work on a job, open it from My Jobs (see Troubleshooting).
C.7 Gate passes
Purpose: record a vehicle leaving the premises, for example after service or for a test drive. A gate pass needs an admin's approval before the vehicle goes.
Steps to create a gate pass
- Click Gate Passes in the sidebar.
- Click New Gate Pass.
- Optional: in Auto-fill from Job Card, search by job, customer or plate to fill in the details from a job. The most recently worked jobs are listed first.
- Fill in Customer Name and/or Vehicle Plate. At least one of them is required.
- Choose the Purpose: After Service, Test Drive, External Repair, Customer Pickup or Other. If you choose Other, describe it in Purpose Note.
- Check Date & Time. Fill in Authorized By (the supervisor or manager) and Received By (the driver or customer).
- Optional: add Items / Parts going out with the vehicle, and Notes.
- Click Create Gate Pass.
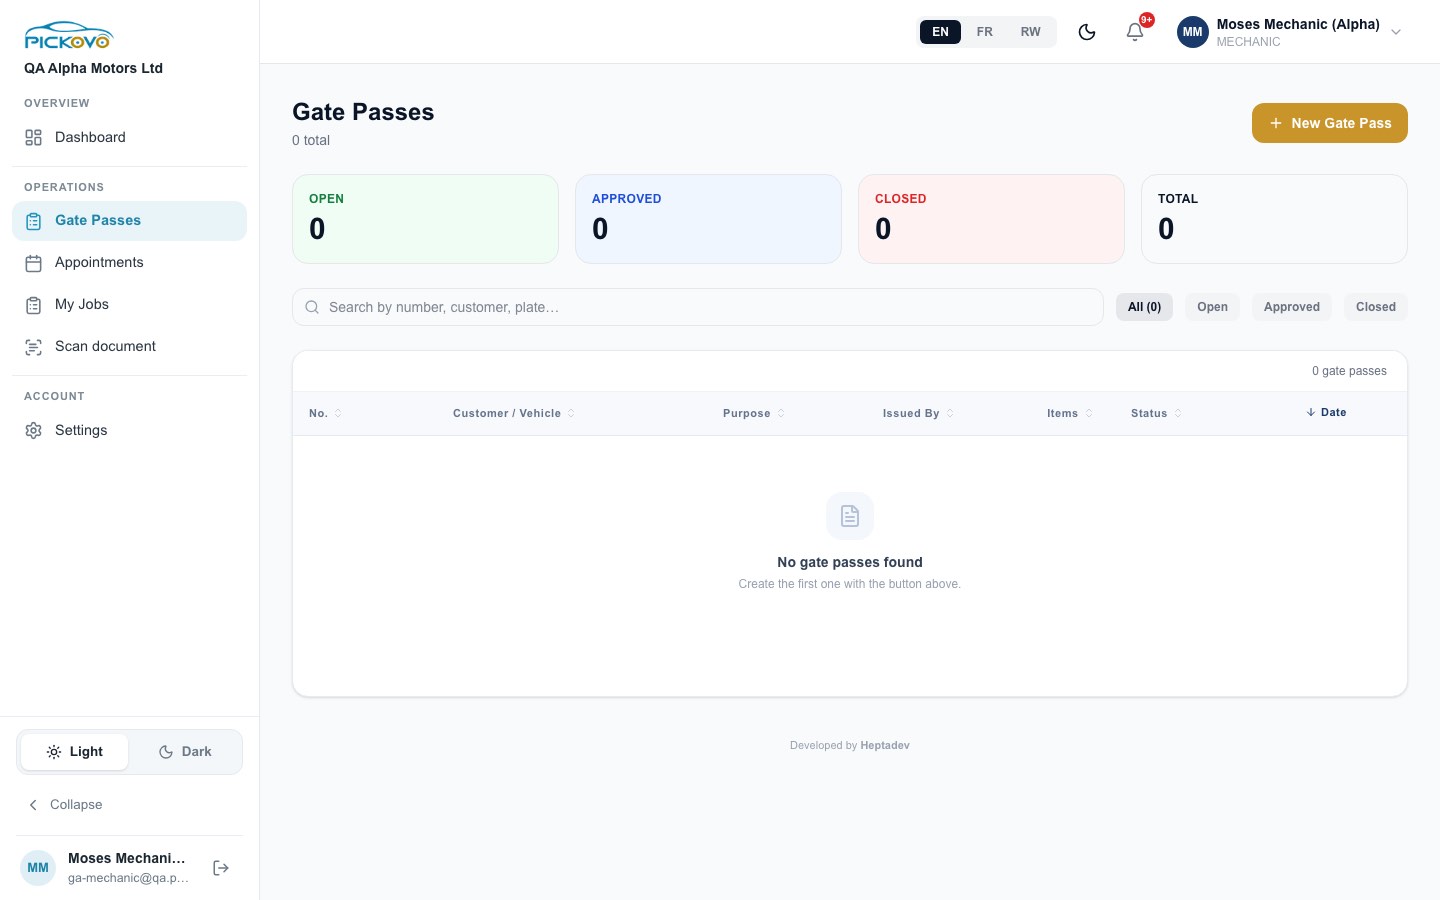
Figure 8: The Gate Passes page: Open, Approved, Closed and Total counters, the search box and status filters.
The list
- Search by number, customer or plate.
- Filter by All, Open, Approved or Closed.
- Click a column heading to sort by it.
- Open a pass to see it in full. From there you can Download PDF or Print it.
Expected outcome: the new pass is listed as Open. The garage admin approves it, and closes it after the vehicle has gone.
Restrictions: you can create and view gate passes. Only the garage admin can Approve or Close one.
C.8 Pages for car-owner app work (not in your menu)
Your default permission (bookings.view) also lets you open five garage pages used for the Pickovo car-owner app. They are not in your sidebar, but you may reach them from a link. Each one works only if Pickovo has switched that feature on for your garage. Every such feature is off until Pickovo enables it.
Reviews: see what car owners said about the garage after a finished job.
- The page shows the average rating, the count of each star rating, and an All / Not answered filter.
- You can read reviews but not reply. Replies are public and are written by the garage admin or receptionist.
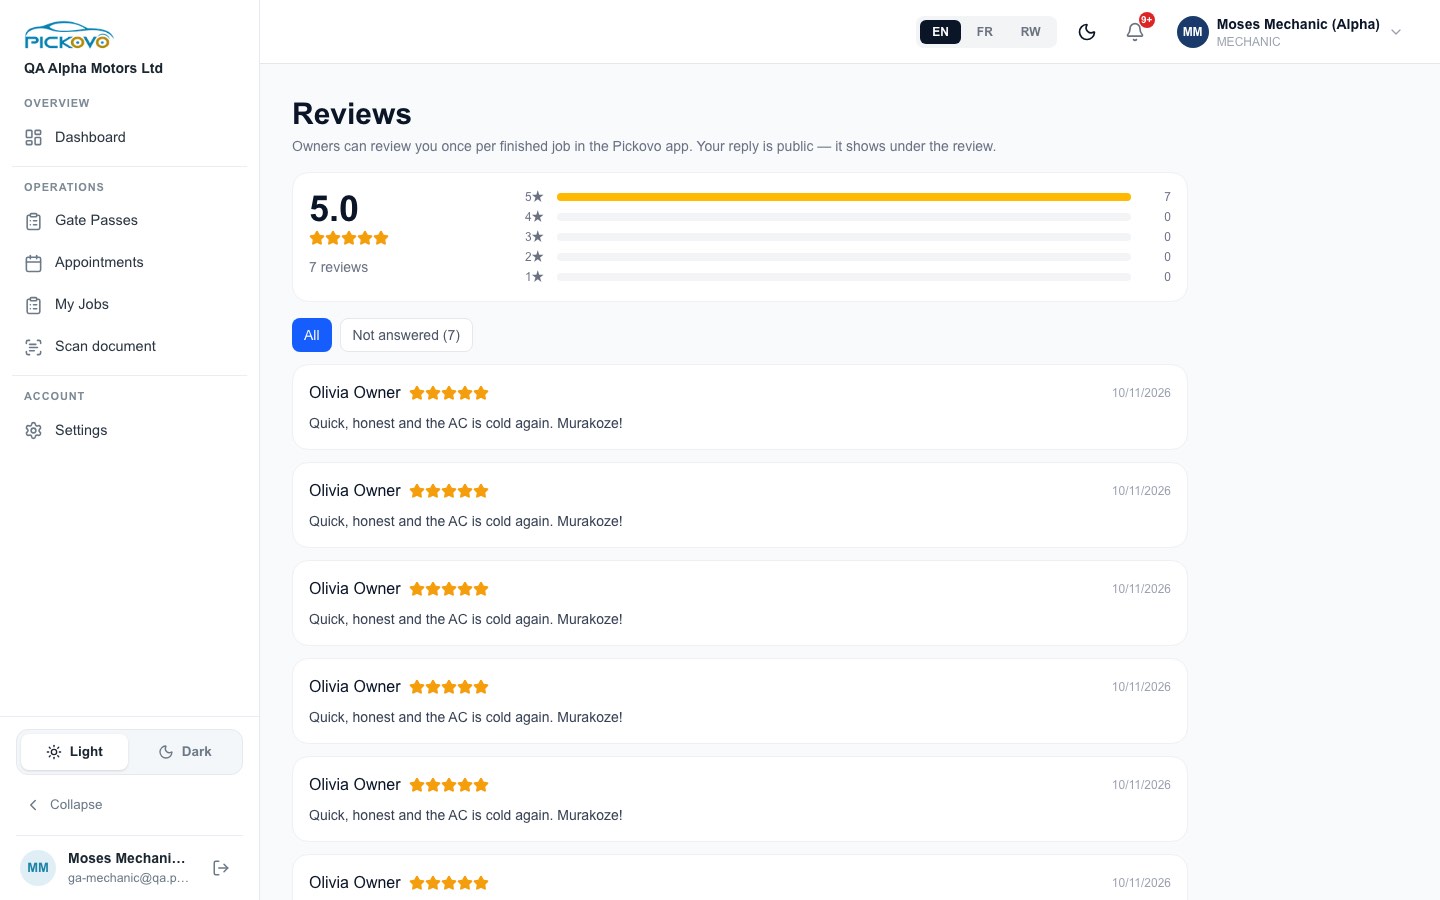
Figure 9: Reviews: average rating, star breakdown and owners' comments (read-only for mechanics).
Accident reports, Messages, Pickups and Roadside help: when a feature is off for your garage, the page says "This feature is not enabled for your garage. Pickovo turns it on per garage, contact Pickovo support if you would like it." In the test garage, all four were off.
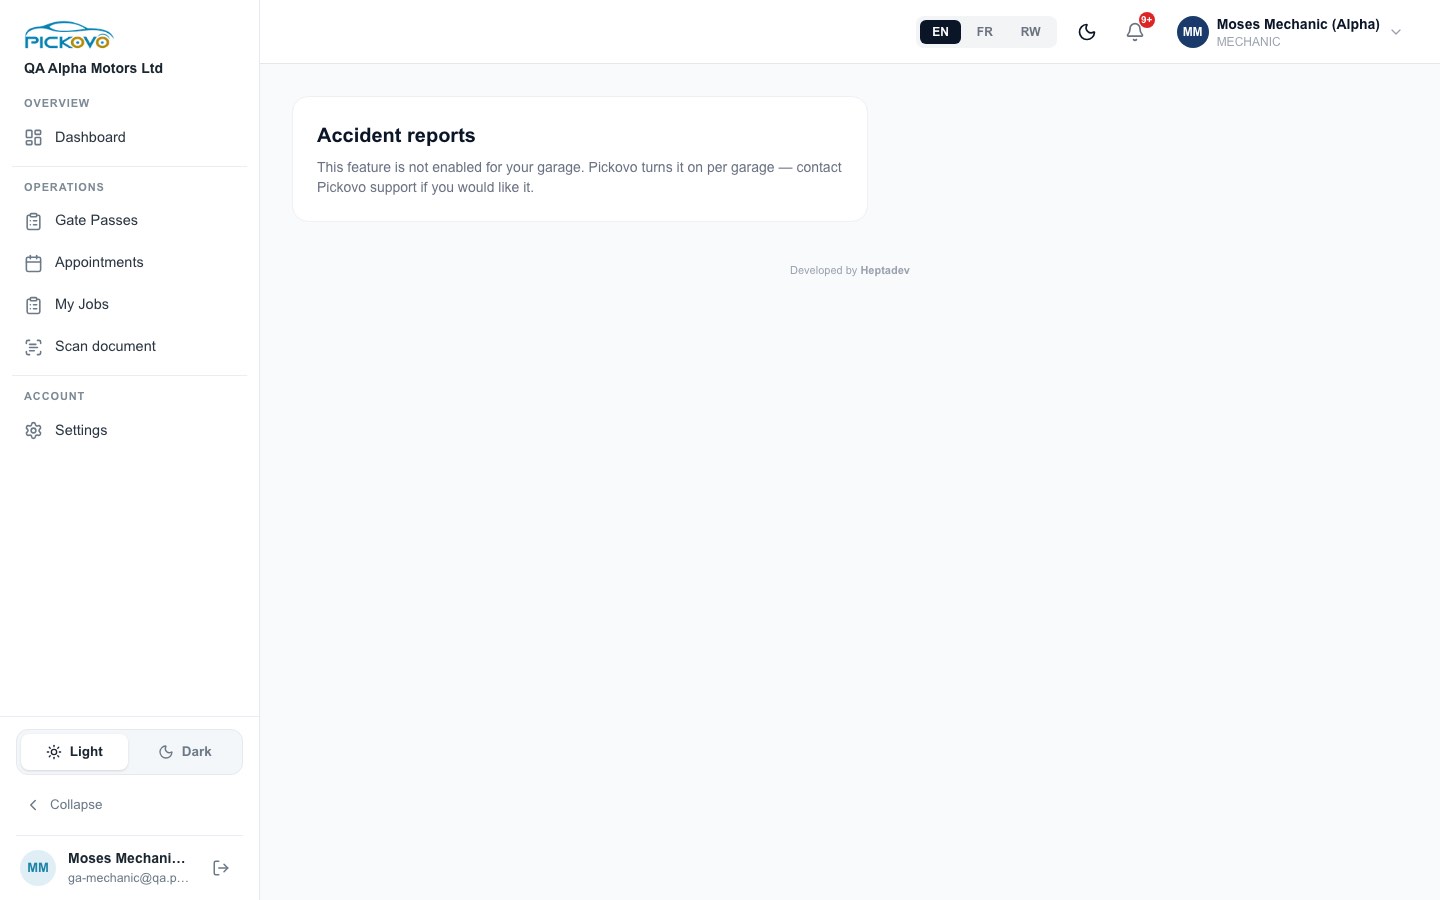
Figure 10: Accident reports: feature not enabled for this garage.
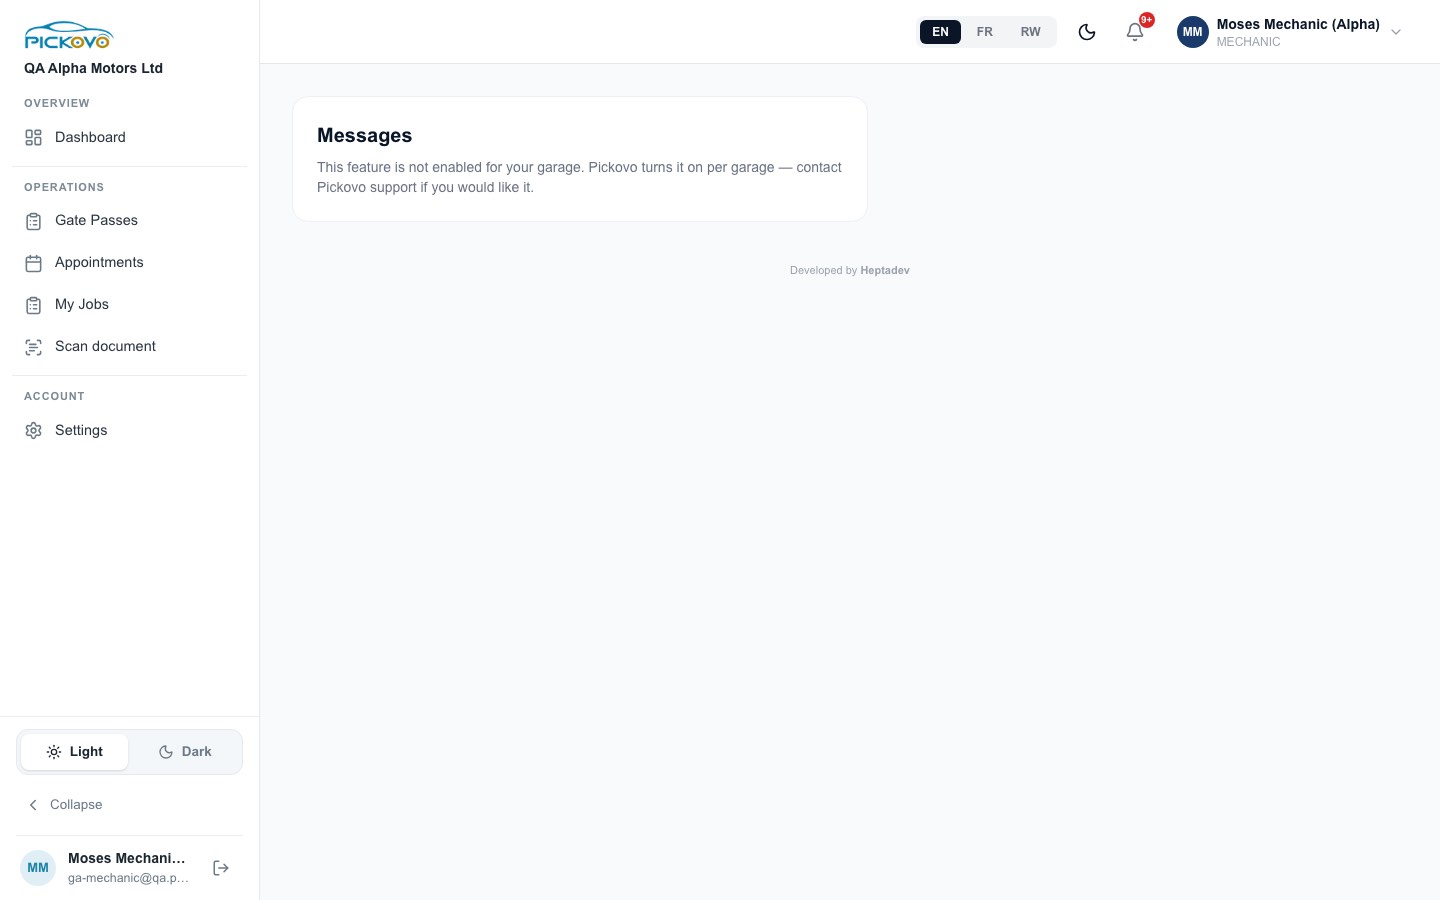
Figure 11: Messages: feature not enabled for this garage.
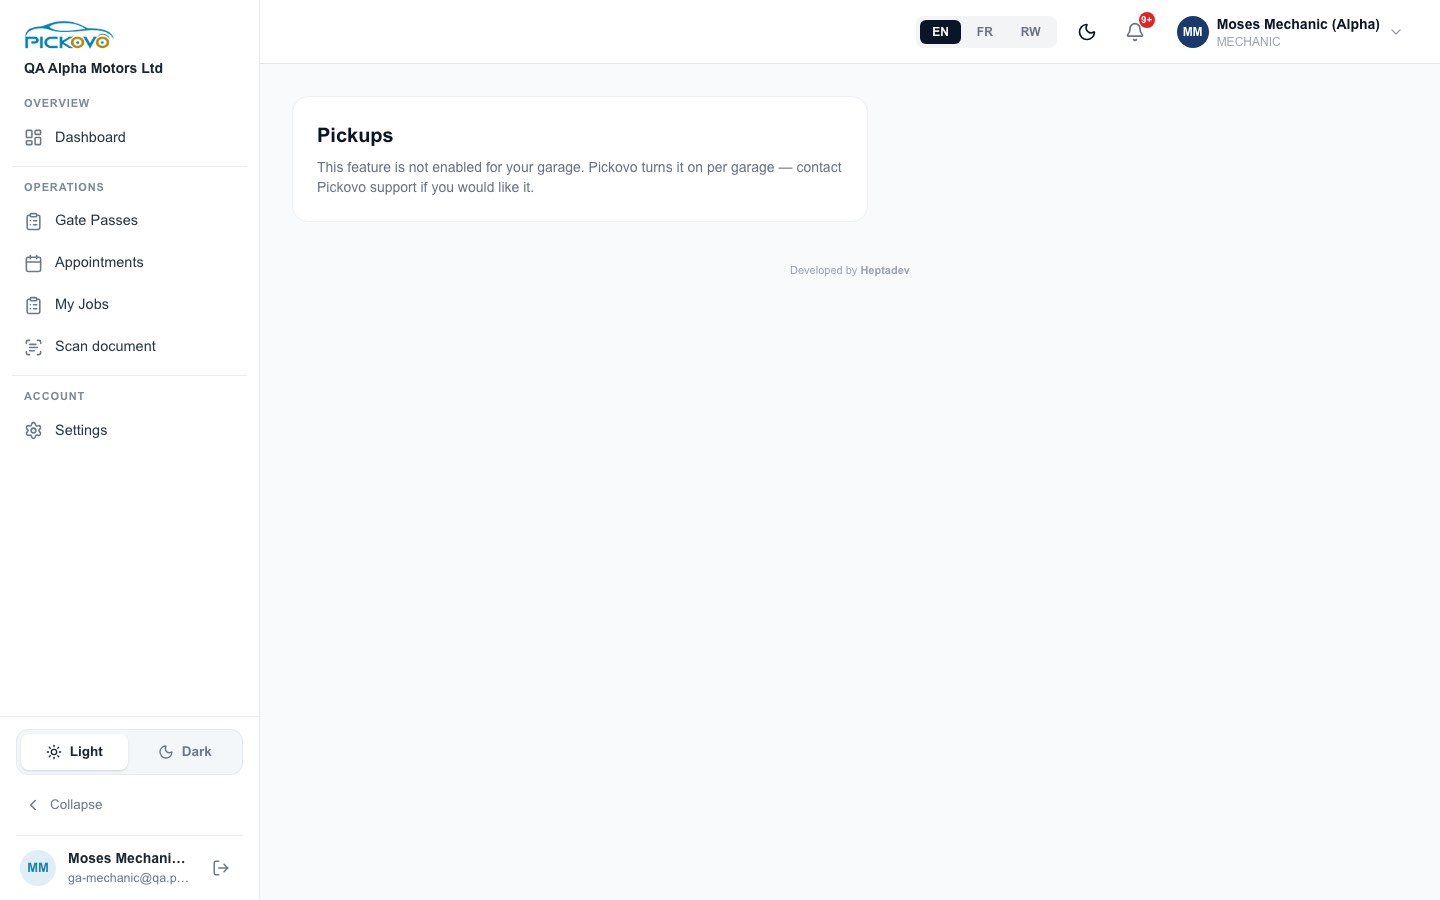
Figure 12: Pickups: feature not enabled for this garage.
Figure 13: Roadside help: feature not enabled for this garage.
If your garage needs one of these, ask your garage admin to contact Pickovo support.
C.9 Settings
Click Settings in the sidebar. The main page contains:
| Card | What it does |
|---|---|
| My Skills & Availability | Your supervisor uses this to decide who gets which job. Keep it current and press Save my skills |
| Personal Information | Full Name, Email, Phone Number |
| Change Password | Current Password, New Password (at least 6 characters), Confirm New Password |
| Delete account | Request deletion of your account |
There are also two more pages:
- Notification settings (
/settings/notifications): choose which job, diagnosis and quote notifications you receive. - Referral (
/settings/referral).
C.10 Scan document
Purpose: turn a paper document into editable text. For example, photograph a supplier's delivery note.
Steps
- Click Scan document.
- Take a picture or upload an image of the document.
- Review the text. Save it if you want to keep it, or download it as a PDF.
Privacy: Pickovo's AI service reads the pictures but does not store them. Only text you choose to save is kept.
D. What you can and cannot do
These are the default rights of a mechanic. A garage admin can give you extra permissions under Settings → Roles in the garage workspace. For example, they can let you see stock or create jobs. This guide describes the defaults. Your rights on your own jobs and the job-stage rules below are fixed and cannot be changed.
| Area | View | Create | Edit | Delete | Approve | Cannot access |
|---|---|---|---|---|---|---|
| Your own assigned jobs (lead or team member) | Yes | - | Yes status steps, findings, tasks, notes, inspection | - | , (cannot pass quality check, complete or close) | - |
| Other jobs / garage jobs board | - | - | - | - | - | Yes |
| Diagnosis (findings, photos) on your jobs | Yes | Yes | - | - | - | - |
| Part requests on your jobs | Yes | Yes | - | Yes withdraw your own while waiting | - | - |
| Stock / inventory | Yes read-only panel on Dashboard | - | - | - | - | Yes inventory pages |
| Gate passes | Yes | Yes | - | - | , (admin only) | - |
| Appointments (My Schedule) | Yes your jobs only | - | - | - | - | - |
| Reviews (if enabled) | Yes | - | - | - | - | - |
| Notifications | Yes | - | Yes mark read | - | - | - |
| Your profile, password, skills | Yes | - | Yes | - | - | - |
| Quotations, invoices, payments | - | - | - | - | - | Yes |
| Walk-ins, new jobs, new appointments, assigning mechanics | - | - | - | - | - | Yes |
| Reports, expenses, complaints, compliance, suppliers, purchase orders | - | - | - | - | - | Yes |
| Garage settings, staff and roles | - | - | - | - | - | Yes |
Job stages you can move a job between (fixed):
| From | To |
|---|---|
| Offered (pending) | Accepted |
| Accepted | Diagnosing, or straight to In progress |
| Diagnosing | Waiting for approval, or In progress |
| In progress | Quality check |
There is no stage a mechanic can move a job to from Quality check. In the QA tests, a mechanic's attempt to pass their own quality check was refused, and so was an attempt to decline a job.
E. Common workflows
E.1 A fleet vehicle repair (workflow W1)
Before you: a driver reports a fault (for example "Front brakes grinding – RAD 101 Q"). The fleet manager approves it and sends the job to your garage. The receptionist accepts it, and the head mechanic assigns it to you.
- You receive You are lead on a job (Figure 3). The job appears on your Dashboard under Next up.
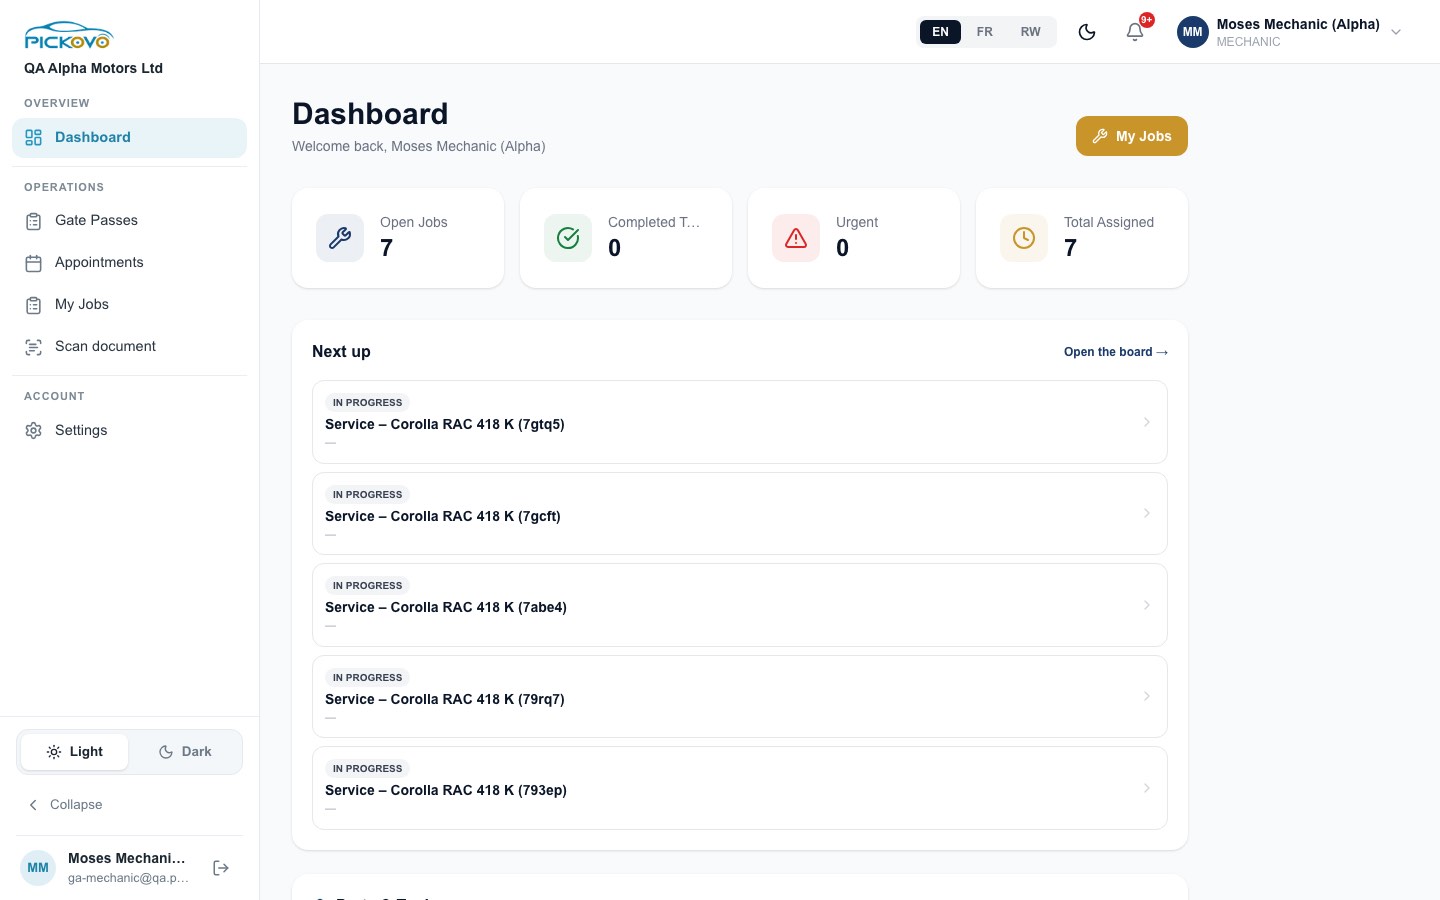
Figure 14: The Dashboard's Next up list after jobs were assigned during the workflow test.
- Open the job. Press Find the problem.
- Press Record what is wrong. Tap Brakes, set it to Serious, take photos, add a note (for example "Front pads worn to the backing plate"), then press Send findings. The job moves to Waiting for approval.
- Others act: the garage raises a quotation and sends it. The fleet manager approves it, and the job moves to Repairing now. You are notified ("Repair in progress").
- Under Parts, request the brake pads (Request parts → Send to stock). Wait for Parts ready.
- Fit the pads. Press Repair done, send for checking.
- After you: the head mechanic passes the quality check and the job becomes Ready for collection. The cashier invoices the fleet, records the payment, and the garage closes the job. Your job then shows This job is finished (Figure 6).
E.2 A walk-in job with a part request (workflow W2)
Before you: the front desk opens a walk-in job for a customer, assigns it to you and starts the repair.
- Open the job from My Jobs. The Vehicle card shows the customer's name. Use Call if you need to phone or text them (Figure 5).
- Under Parts, press Request parts. Search for the part (for example "Air filter"), enter How many (2) and press Send to stock. The request shows Waiting for stock.
- The stock manager acts: you receive Parts request seen, then Parts ready when they approve and issue it. Stock goes down only at that moment. The part now shows Issued.
- If you have to wait, press Stop work, I am waiting for something and choose Waiting for parts. Press Continue work when the part arrives.
- Finish the work. Press Repair done, send for checking. A supervisor checks it.
E.3 Releasing a vehicle with a gate pass
Before you: the job is finished, or the vehicle has to leave for a test drive or outside repair.
- Click Gate Passes → New Gate Pass.
- Use Auto-fill from Job Card to pick the job. Choose the Purpose and fill in Authorized By and Received By.
- Click Create Gate Pass. It is listed as Open.
- After you: the garage admin approves the pass, and closes it once the vehicle has gone. You can download or print the pass at any time.
F. Troubleshooting
| Problem | Likely cause and fix |
|---|---|
| A page sends you back to your Dashboard or to the sign-in page | The page is outside your permissions (for example the garage jobs board, inventory or invoices). Ask your garage admin if you need it. They can grant permissions under Settings → Roles |
| A job you know about shows "not found" | You are not its lead mechanic or on its team. Ask your supervisor to assign you |
| Clicking an entry in My Schedule takes you to your Dashboard instead of the job | Calendar entries link to the garage job page, which mechanics cannot open. Open the job from My Jobs instead |
| The big button is missing and a yellow message says "You cannot do this step" or "Your repair is being checked" | The job stage rules do not let a mechanic make the next move. A supervisor (or the customer, for price approval) acts next |
| "Cannot transition from … to …" | The job had already moved, or the move is not allowed for mechanics. Refresh the page and check the current stage |
| "This job is paused. Resume it before changing its status." | Press Continue work first |
| "This job has changed. Refresh to continue." | A change saved offline could not be applied because someone else moved the job. Press Refresh |
| "Tap at least one problem, or write one." | You pressed Send findings without choosing a problem |
| Photos will not upload, or findings will not send | These need internet. Your answers stay saved on the phone as a draft. Try again when connected |
| "This job is finished, parts cannot be requested for it" | The job is completed, closed or declined. Ask a supervisor |
| Your request shows Declined | Read the stock room's reason under the part and follow it, or send a new request |
| "Only admins can approve gate passes" | Approval and closing are the garage admin's job |
| "This feature is not enabled for your garage" | Pickovo has not switched that feature on for your garage. Your admin can ask Pickovo support |
| Sign-in is refused after several attempts | After 10 wrong passwords in 15 minutes, sign-in is paused for your account. Wait, or use Forgot password? |
| You are suddenly signed out or refused everywhere | Your account may have been deactivated or your role changed. This takes effect within seconds. Speak to your garage admin |
G. Security and best practices
- Keep your password to yourself. Never share your sign-in with another mechanic. The job history records who did each step, so shared accounts make the record wrong.
- Use a strong password and change it under Settings → Change Password if you think someone knows it. Two-factor sign-in codes are not offered on your own Settings page. Ask your garage admin if your garage requires them.
- Log out on shared devices. Use the log-out button next to your name at the bottom of the sidebar, especially on a workshop tablet or computer.
- Take honest photos. Findings and photos are shown to the people who approve the price. Photograph only the vehicle and the fault, not people or documents that are not needed.
- Don't ask for parts you don't need. Every issued part is charged to the job and recorded in the stock ledger.
- Use Stop work with a real reason. The reason helps the garage see where time is lost.
- Treat customer details as private. Customer names and phone numbers on walk-in jobs are for this job only.
- Report anything odd to your admin. This includes a job you should not see, or a notification about another garage.